


Exploring The Growth Rate Of Sulcata Tortoises: How Fast Do Sulcata Tortoises Grow
Sulcata tortoises grow rapidly during their early years, reaching impressive sizes in a relatively short period. From hatchlings to adults, these majestic creatures undergo remarkable growth spurts that fascinate both novice and experienced keepers. Understanding how fast do sulcata tortoises grow is crucial for providing them with proper care and a suitable environment. By closely monitoring their growth rates and implementing a balanced diet and ideal living conditions, you can ensure your sulcata tortoise thrives and flourishes in captivity. Let’s delve deeper into the fascinating world of sulcata tortoise growth rates and discover the secrets behind their impressive development.

How Fast Do Sulcata Tortoises Grow?
Introduction
Have you ever wondered how fast sulcata tortoises, also known as African spurred tortoises, grow? These fascinating creatures can live for decades and grow to be quite large. In this blog post, we will delve into the world of sulcata tortoises and explore just how fast they grow.
Understanding Sulcata Tortoises
Sulcata tortoises are some of the largest tortoise species in the world, native to the southern edge of the Sahara Desert in Africa. These reptiles are known for their impressive size and longevity, with some individuals living for over 70 years in captivity. Their distinctive appearance and gentle nature make them popular pets among reptile enthusiasts.
Size at Birth
When sulcata tortoises hatch from their eggs, they are tiny and vulnerable. A hatchling sulcata tortoise is usually around 1.5 to 2 inches long and weighs just a few ounces. Despite their small size, these baby tortoises have a lot of growing to do to reach their adult size.
Factors Influencing Growth Rate
Several factors can influence how fast a sulcata tortoise grows. The most critical factors include diet, temperature, humidity, and overall health. Providing a well-rounded diet rich in fiber, vitamins, and minerals is crucial for ensuring healthy growth. Additionally, maintaining the right temperature and humidity levels in their habitat is essential for supporting proper growth and development.
Growth Rate of Sulcata Tortoises
Sulcata tortoises are relatively fast growers compared to some other tortoise species. In their first few years of life, these tortoises can experience rapid growth rates, with some individuals doubling or even tripling in size within a year. However, as they reach adulthood, their growth rate slows down significantly.
Yearly Growth Patterns
During their first year of life, sulcata tortoises can grow anywhere from 2 to 4 inches in length, depending on their individual genetics and care. Subsequent years may see growth rates of around 1 to 2 inches per year. By the time a sulcata tortoise reaches adulthood at around 5-10 years old, their growth rate typically stabilizes, and they may only grow a few inches over the rest of their lifespan.
Factors Affecting Growth Speed
While sulcata tortoises are known for their relatively fast growth compared to other tortoise species, several factors can impact the speed at which they grow. These factors include diet, genetics, environmental conditions, and overall health. Providing a balanced diet and ensuring that their habitat meets their specific needs are crucial for promoting healthy growth.
Health and Growth
Ensuring that your sulcata tortoise is healthy is essential for supporting proper growth and development. Regular veterinary check-ups, a nutritious diet, and a suitable habitat are key components of maintaining a healthy tortoise. Any signs of illness or abnormal growth patterns should be addressed promptly to prevent any potential health issues.
Common Health Issues Affecting Growth
Some common health issues that can affect the growth of sulcata tortoises include metabolic bone disease, shell deformities, and respiratory infections. These conditions can hinder a tortoise’s growth and overall well-being if left untreated. Providing a balanced diet, proper lighting, and adequate space for exercise can help prevent these health issues.
Monitoring Growth Progress
To track the growth of your sulcata tortoise, it’s essential to keep detailed records of their size and weight over time. Regularly measuring your tortoise and comparing the measurements to growth charts for their age can help you monitor their progress. Any significant deviations from expected growth patterns should be discussed with a veterinarian.
In conclusion, sulcata tortoises are fascinating creatures that exhibit relatively fast growth rates compared to other tortoise species. Understanding how fast these tortoises grow and the factors that influence their growth is crucial for providing them with the care they need to thrive. By ensuring they have a balanced diet, suitable habitat, and proper veterinary care, you can help your sulcata tortoise reach its full growth potential and live a long, healthy life.
How FAST do Sulcatas Grow?!
Frequently Asked Questions
How quickly do sulcata tortoises grow in size?
Sulcata tortoises are known to grow rapidly in their early years, typically gaining around 1-2 inches in shell length per year for the first 5-10 years of their lives. However, their growth rate tends to slow down as they mature, and the rate can vary based on factors like diet, habitat conditions, and overall health.
What factors influence the growth rate of sulcata tortoises?
The growth rate of sulcata tortoises can be influenced by various factors such as diet, environmental conditions, genetics, and overall health. Providing a proper diet rich in calcium and ensuring they have access to proper lighting and space for exercise are essential for healthy growth.
At what age do sulcata tortoises reach their full size?
Sulcata tortoises can continue to grow throughout their lives, but they typically reach their full adult size at around 15-20 years of age. At this point, their growth rate significantly slows down, and they focus more on maintaining their size and overall health.
Final Thoughts
In conclusion, the growth rate of Sulcata tortoises can vary based on factors like diet, environment, and genetics. Generally, they grow rapidly in their first few years of life, with noticeable size increments each year. Providing proper care, such as a balanced diet and adequate space, can help optimize their growth rate. Understanding how fast do Sulcata tortoises grow can guide owners in ensuring their pets are healthy and thriving.
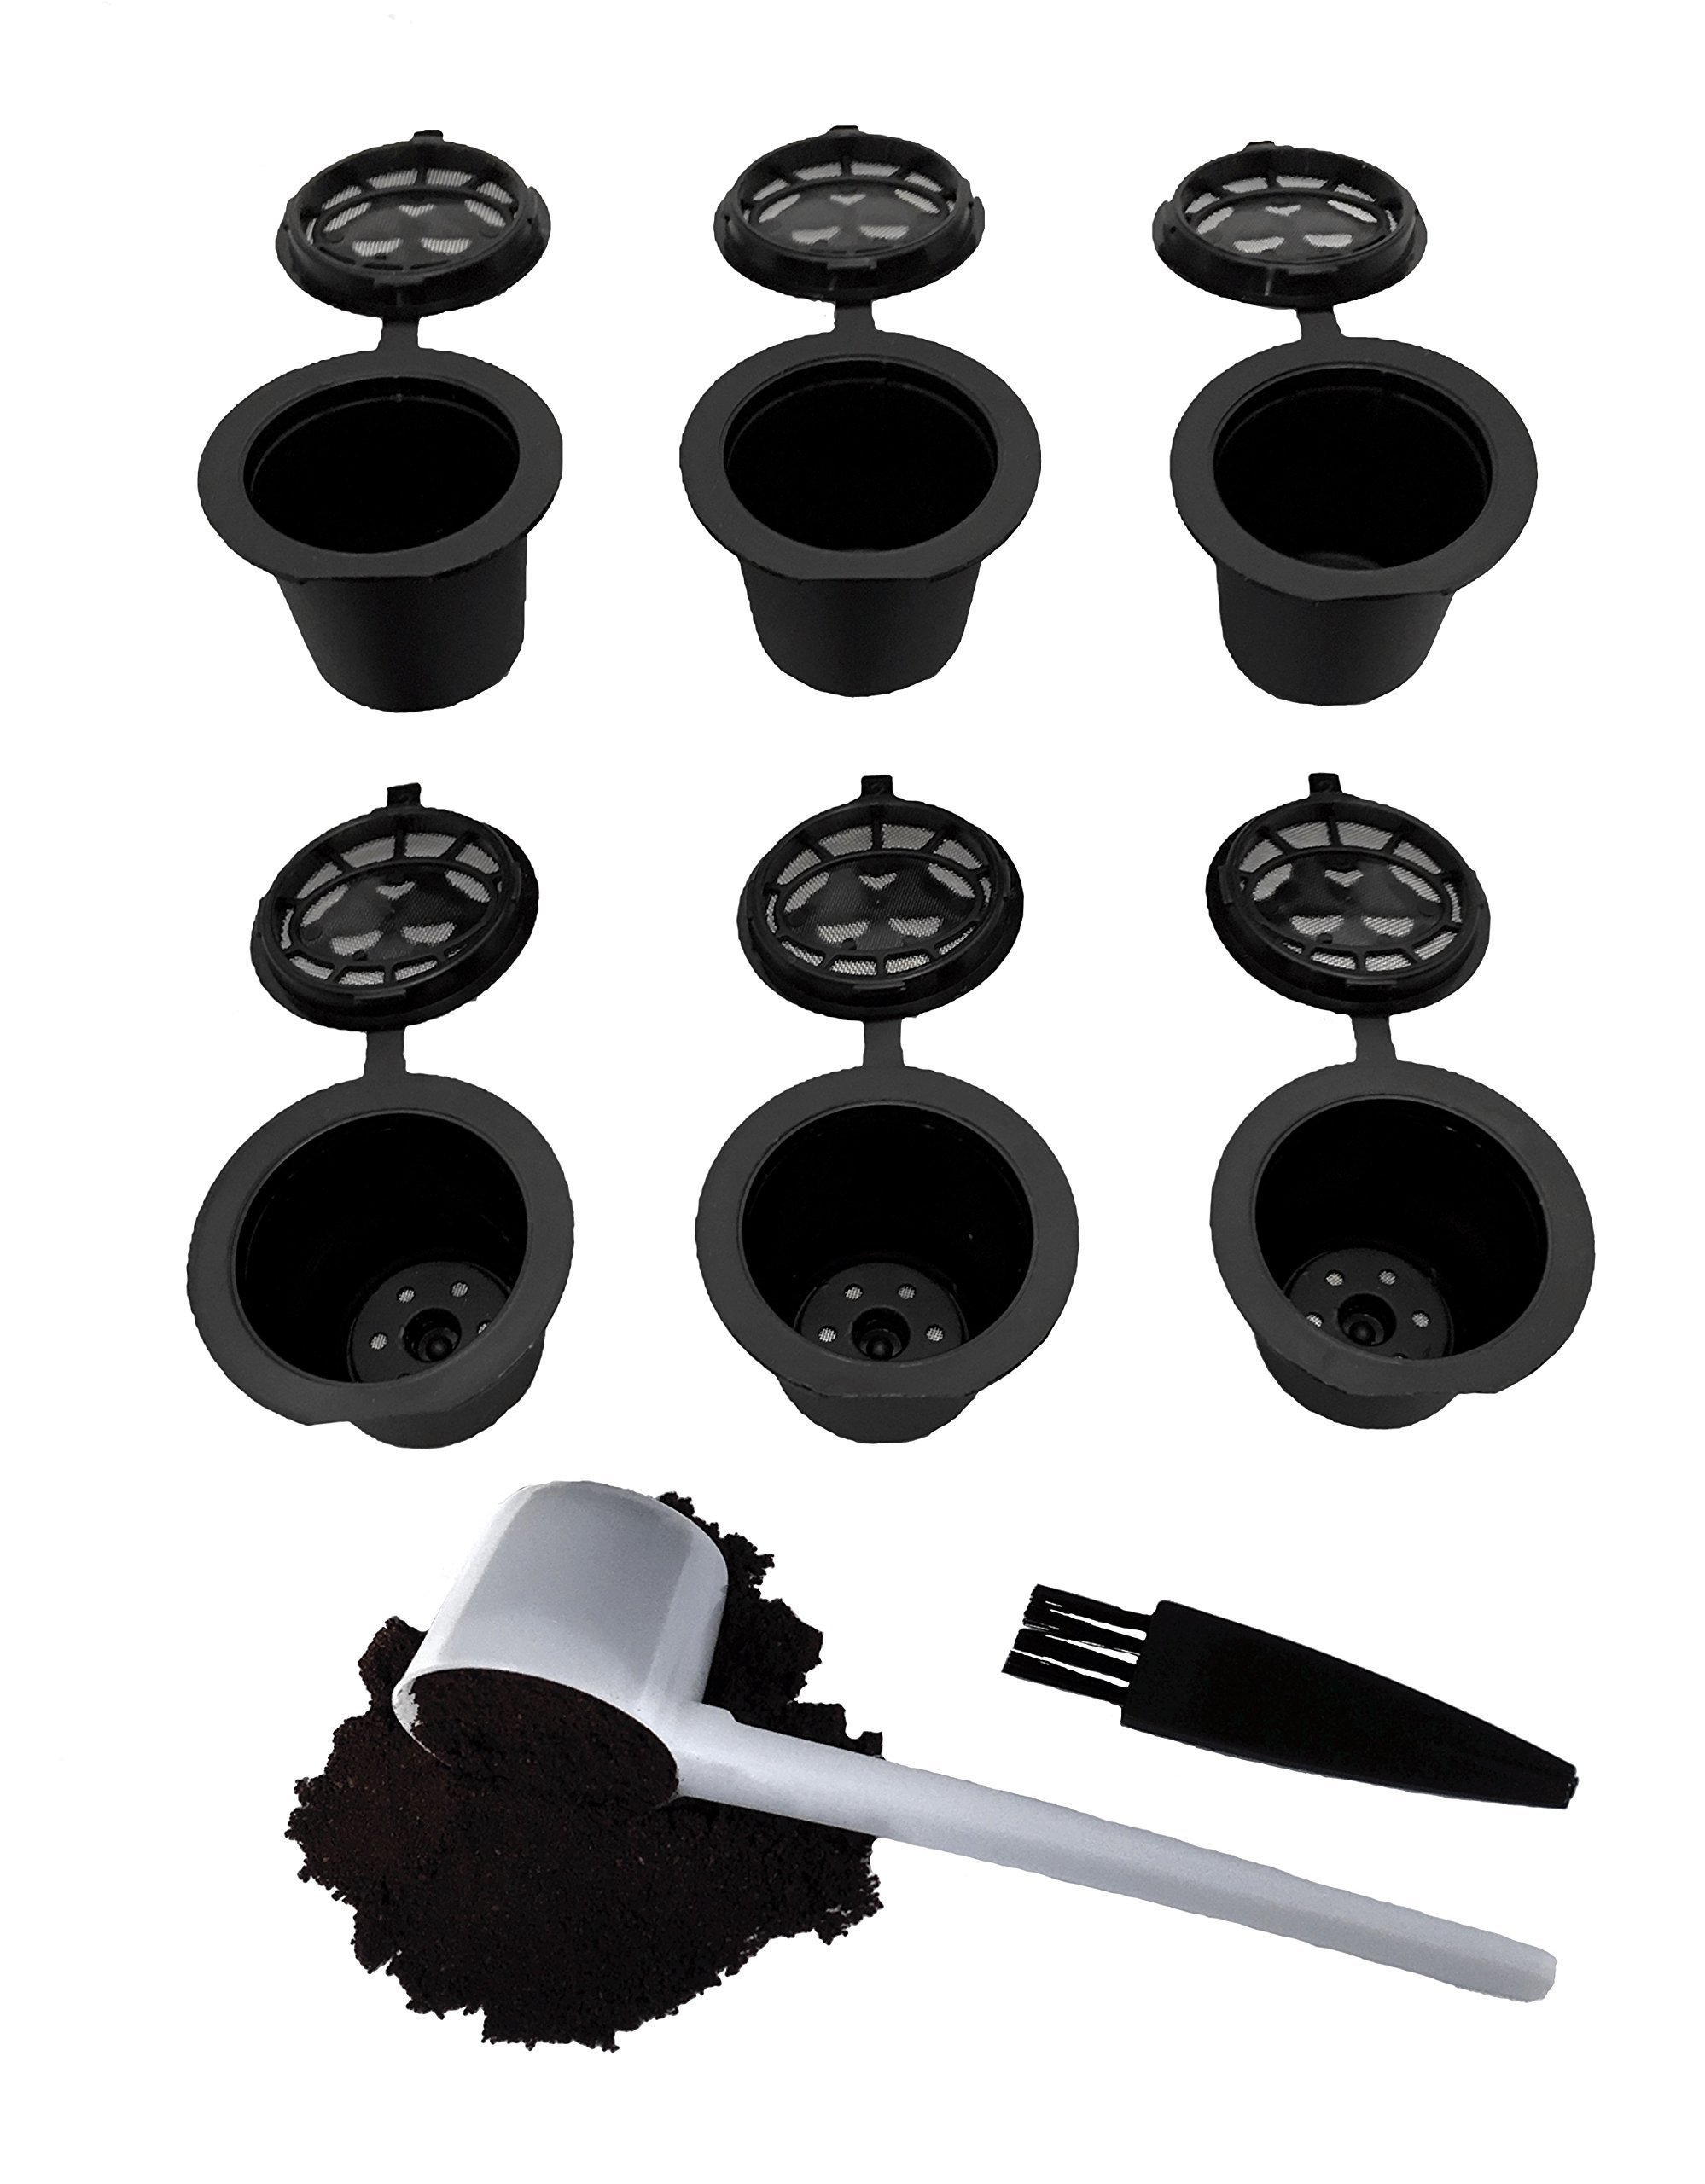
Simple Ways To Reuse Nespresso Pods: Creative Ideas & Tips
Wondering how to reuse Nespresso pods? It’s time to unlock the potential of these small coffee capsules beyond a single use. By implementing a few creative ideas, you can transform your Nespresso pods into functional and eco-friendly items. From planting herbs in Nespresso pods to creating jewelry or crafting home decor, the possibilities are endless. Embrace a sustainable lifestyle by giving new life to your Nespresso pods. Let’s dive into the world of innovative ways to reuse Nespresso pods!

How to Reuse Nespresso Pods: A Complete Guide
Do you love your daily cup of Nespresso coffee but feel guilty about the waste generated by those used pods? Well, the good news is that there are creative and practical ways to reuse Nespresso pods instead of just tossing them in the trash. Not only will you be reducing waste, but you’ll also be engaging in fun and eco-friendly activities. In this article, we will explore various ways to reuse Nespresso pods effectively. Let’s dive in!
The Basics of Nespresso Pods
Before we delve into ways to reuse Nespresso pods, let’s understand a bit about these little capsules. Nespresso pods are small, single-serve coffee capsules made of aluminum or plastic. They are designed to be used once and then discarded. However, with a little creativity, you can give these pods a second life.
1. Create Seed Starters
One fantastic way to reuse Nespresso pods is by turning them into seed starters for your garden. Start by cleaning and drying the used pods thoroughly. Fill them with potting soil and plant seeds according to the instructions on the seed packet. Place the pods in a tray near a sunny window, water them regularly, and watch your seeds sprout and grow. Once the seedlings are ready, you can transplant them into your garden or larger pots.
Tips:
- Make drainage holes in the bottom of the pod to prevent waterlogging.
- Label each pod with the type of seed you planted to keep track of your plants.
2. DIY Miniature Planters
Get your creative juices flowing by transforming Nespresso pods into adorable miniature planters. After cleaning the pods, paint them in vibrant colors or decorate them with stickers or washi tape. Fill the pods with small succulents or cacti, creating a charming display for your desk or windowsill. These mini planters also make great gifts for friends and family.
Pro Tip:
For extra stability, glue the painted pods onto a small tray or plate.
3. Arts and Crafts Projects
Nespresso pods can be a valuable resource for arts and crafts projects, especially for kids. From creating jewelry to building sculptures, the possibilities are endless. Paint the pods, string them together to make necklaces or keychains, or glue them together to construct 3D objects. Encourage your children’s creativity and imagination with this fun and eco-friendly activity.
Ideas:
- Use glitter and sequins to add sparkle to your pod creations.
- Experiment with different painting techniques like sponge painting or marbling.
4. Organizational Tools
Give your home or office a touch of organization by repurposing Nespresso pods as storage containers. Use them to hold small items like paper clips, beads, spices, or even jewelry. Arrange the pods in a decorative tray or box for a practical and stylish storage solution. You can also label the pods for easy identification of their contents.
Organization Ideas:
- Create a magnetic board with pods attached for a unique way to display notes and reminders.
- Stack pods together to make a desktop pen holder or makeup brush organizer.
5. Candle Making
Transform Nespresso pods into charming tea light candles for a cozy and sustainable lighting option. Clean the pods thoroughly and fill them with melted candle wax. Insert a wick in the center of the pod and allow the wax to set. Once the candles have hardened, light them up to create a warm and inviting atmosphere in your home. You can even add scents or colors to customize your candles.
Candle Tips:
- Experiment with different wax blends like soy or beeswax for unique candle textures.
- Add essential oils to the wax for delightful fragrances that elevate your mood.
As you can see, there are numerous creative and practical ways to reuse Nespresso pods instead of discarding them after a single use. From gardening to arts and crafts, there are endless possibilities to give these pods a second life. By incorporating these ideas into your daily life, you’ll not only reduce waste but also add a touch of creativity to your routine. So, the next time you enjoy your Nespresso coffee, remember that your used pods can be transformed into something truly remarkable.
Start exploring the world of Nespresso pod recycling today and unleash your inner creativity while making a positive impact on the environment. Happy reusing!
How to refill and reuse your Nespresso pods. #nespressopods
Frequently Asked Questions
Can Nespresso pods be reused after a single use?
Yes, Nespresso pods can be reused creatively to reduce waste. There are several ways to repurpose them instead of throwing them away after one use.
What are some creative ways to reuse Nespresso pods?
Some creative ways to reuse Nespresso pods include refilling them with your own coffee grounds, using them as seed starters, creating art or crafts, or turning them into small containers for organizing small items.
How can I refill Nespresso pods for reuse?
To refill Nespresso pods, you can carefully remove the used coffee grounds, clean the pod thoroughly, and refill it with your favorite coffee grounds using a refillable pod kit that is compatible with your Nespresso machine.
Are there any specific tips to keep in mind when reusing Nespresso pods?
When reusing Nespresso pods, make sure to clean them properly to avoid any residue affecting the taste of your coffee. Also, ensure that the pods are completely dry before refilling them to prevent mold growth.
Final Thoughts
In conclusion, reusing Nespresso pods is a sustainable and creative way to reduce waste. By following simple methods like cleaning and refilling the pods, or turning them into DIY crafts, you can give these pods a new life. Don’t forget to explore various ways to upcycle Nespresso pods, such as using them for planting seedlings or creating jewelry. Embrace the opportunity to be environmentally conscious and resourceful by learning how to reuse Nespresso pods.
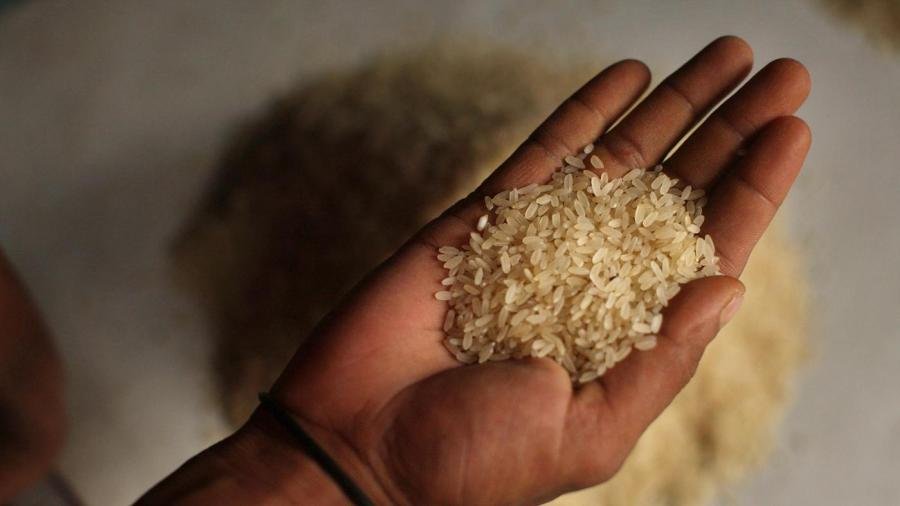
Exploring: How Much Does A Grain Of Rice Weigh
A single grain of rice weighs around 0.02 to 0.04 grams, depending on the type and size. While it may seem insignificant, the weight of a grain of rice holds a fascinating story of history, culture, and science. From ancient agricultural practices to modern-day precision measurements, the humble grain of rice embodies both simplicity and complexity. Join us on a journey to uncover the secrets behind the weight of a grain of rice and its remarkable significance. Let’s delve into the world of this tiny yet impactful staple.

How Much Does a Grain of Rice Weigh?
Have you ever wondered about the weight of something as small as a grain of rice? It may seem like a tiny, insignificant piece of food, but the weight of a single grain of rice can actually vary depending on certain factors. Let’s dive into the world of rice grains and explore how much they can weigh!
The Basics of Rice Grains
Rice is a staple food for many people around the world. It comes in different varieties, shapes, and sizes. When we talk about the weight of a grain of rice, we are typically referring to a single piece of rice from a particular type of rice plant. Rice grains are incredibly small, with each grain being just a fraction of a gram in weight.
Factors Affecting the Weight of a Grain of Rice
Several factors can influence the weight of a grain of rice. One of the primary factors is the variety of rice. Different types of rice plants produce grains of varying sizes and weights. For example, long-grain rice may weigh differently from short-grain rice.
Another factor that can affect the weight of a grain of rice is its moisture content. Rice grains absorb moisture from their surroundings, which can make them slightly heavier. The level of moisture in the rice grain can impact its weight, albeit only by a small amount.
Size and Shape of Rice Grains
The size and shape of rice grains also play a role in determining their weight. Long-grain rice, as the name suggests, is longer and generally lighter in weight compared to short-grain or medium-grain rice varieties. The shape of the rice grain can affect how much it weighs and how it cooks.
Processing and Polishing
During the processing of rice, the grains may undergo polishing to remove the outer layers, such as the bran and germ. This polishing can impact the weight of the rice grains. Polished rice grains tend to be lighter than unpolished grains due to the removal of certain components.
Exploring the Weight of a Grain of Rice
So, how much does a grain of rice actually weigh? On average, a single grain of rice weighs about 0.02 grams. That’s incredibly light! To put it into perspective, you would need hundreds of grains of rice to make up just one gram in weight.
Despite their small size and weight, rice grains are packed with energy and nutrients. They are a rich source of carbohydrates, which provide our bodies with the fuel needed for daily activities. Rice is a versatile food that can be prepared in numerous ways and enjoyed in various dishes.
Fun Facts About Rice Grains
Here are some interesting facts about rice grains that you may not have known:
Rice is a Staple Food
Rice is a staple food for more than half of the world’s population. It is a primary source of nutrition for billions of people across the globe.
Rice Varieties
There are thousands of varieties of rice grown worldwide, each with its own unique characteristics, flavors, and uses. From basmati to jasmine rice, the diversity of rice is truly remarkable.
Rice Cultivation
Rice cultivation has a long history that dates back thousands of years. It is believed to have originated in Asia and has since spread to different parts of the world.
Rice in Different Cuisines
Rice is a versatile ingredient used in various cuisines, from Asian stir-fries to Mediterranean pilafs. It can be steamed, fried, boiled, or even ground into flour for various culinary creations.
Next time you enjoy a bowl of rice or spot a single grain on your plate, remember the small but mighty nature of these tiny grains. Despite their light weight, rice grains play a significant role in feeding billions of people worldwide. The weight of a grain of rice may seem inconsequential, but its impact on our diets and cultures is truly immense.
So, the next time someone asks you, “How much does a grain of rice weigh?” you can share your newfound knowledge about these tiny yet essential grains!
How Many Grains of Rice Can I Lift?
Frequently Asked Questions
1. How does the weight of a grain of rice compare to other small objects?
A grain of rice typically weighs around 0.02-0.04 grams, which is very light compared to other small objects. For reference, a paperclip weighs about 1 gram, a dime weighs approximately 2.3 grams, and a penny weighs around 2.5 grams.
2. Can the weight of a grain of rice vary depending on the type of rice?
Yes, the weight of a grain of rice can vary slightly depending on the type of rice. Different varieties of rice can have grains that weigh between 0.02 to 0.04 grams, with some types being slightly heavier or lighter than others.
3. How many grains of rice make up a pound?
There are approximately 29,000 to 30,000 grains of rice in a pound, depending on the size and weight of each individual grain. This means that each grain of rice contributes a very small fraction of the total weight when considering a pound of rice.
Final Thoughts
A grain of rice weighs around 0.02 grams. This tiny weight may seem insignificant, but collectively, grains of rice play a crucial role in feeding millions worldwide. Understanding how much a grain of rice weighs highlights the importance of this staple food item. Next time you enjoy a serving of rice, remember the weight of that single grain and appreciate its impact on global food supply chains.

How Long Does Veggie Broth Last In The Fridge: Essential Guide
Veggie broth can last in the fridge for about 4-5 days. Proper storage is the key to maintaining its freshness and flavor. Whether you make your own veggie broth at home or buy it from the store, knowing how long it can stay in the fridge is essential for food safety. In this blog article, we will delve into the factors that affect the shelf life of veggie broth and provide tips on how to extend its freshness. So, how long does veggie broth last in the fridge? Let’s find out.

How Long Does Veggie Broth Last in the Fridge?
Have you ever wondered how long your beloved veggie broth can stay fresh in the fridge? It’s a common question, especially for those who love to make homemade soups or use broth as a base for various dishes. Let’s dive into the world of veggie broth storage and discover the secrets to extending its shelf life!
Understanding Veggie Broth Shelf Life
First things first, let’s talk about what veggie broth is and why it’s essential to store it properly. Veggie broth is a flavorful liquid made by simmering vegetables, herbs, and spices in water. It serves as a versatile ingredient in vegetarian and vegan cooking, adding depth and richness to dishes.
When stored in the fridge, veggie broth can typically last for about 4 to 5 days. However, several factors can influence its shelf life, such as the ingredients used, the preparation method, and how it’s stored.
Factors Affecting Veggie Broth Shelf Life
1. Ingredients
The quality and freshness of the ingredients used to make veggie broth play a significant role in determining how long it will last. Using fresh vegetables and herbs will result in a broth with a longer shelf life compared to using older or wilted produce.
2. Preparation Method
The way veggie broth is prepared can also impact its shelf life. Properly simmering the ingredients for an adequate amount of time helps extract flavors while ensuring that the broth is safe to consume. Additionally, straining the broth thoroughly can remove any solids that may spoil more quickly.
3. Storage Conditions
Storing veggie broth in the fridge is crucial for maintaining its freshness. Make sure to transfer the broth into airtight containers or jars before refrigerating it. This helps prevent contamination and odors from other foods in the fridge from affecting the broth.
Extending the Shelf Life of Veggie Broth
If you want to make your veggie broth last longer than a few days, there are a few strategies you can employ:
1. Freezing
One of the best ways to extend the shelf life of veggie broth is by freezing it. Pour the broth into ice cube trays or freezer-safe containers, then store them in the freezer. Frozen veggie broth can last for 3 to 4 months without losing its flavor.
2. Boiling Before Use
If you’ve had veggie broth sitting in the fridge for a few days and are unsure if it’s still good, try boiling it before use. Bringing the broth to a boil will kill any bacteria that may have started to grow, making it safe to consume.
3. Proper Labeling
When storing veggie broth in the fridge or freezer, always label the containers with the date when you made the broth. This way, you can keep track of how long it has been stored and avoid any confusion about its freshness.
Signs That Veggie Broth Has Gone Bad
Despite your best efforts, veggie broth can still go bad if not stored or handled properly. Here are some signs to look out for to determine if your broth has spoiled:
1. Foul Odor
If your veggie broth has a sour, rancid, or off-putting smell, it’s a sure sign that it has gone bad and should be discarded.
2. Mold Growth
Visible mold or unusual discoloration on the surface of the broth indicates that it’s no longer safe to consume.
3. Strange Texture
If the veggie broth has developed a slimy or viscous texture, it’s best to err on the side of caution and throw it away.
In conclusion, veggie broth can last for about 4 to 5 days in the fridge when stored properly. By considering factors like ingredients, preparation method, and storage conditions, you can ensure that your veggie broth stays fresh and flavorful. To extend its shelf life, freezing, boiling before use, and proper labeling are effective strategies. Remember to always check for signs of spoilage before consuming veggie broth to avoid any potential health risks. Enjoy your homemade soups and dishes with confidence, knowing that your veggie broth is in its prime condition!
How To Make Veggie Stock From Kitchen Scraps
Frequently Asked Questions
How long can veggie broth last in the fridge?
Veggie broth can typically last in the fridge for about 4 to 5 days. It is important to store it in an airtight container to maintain its freshness.
What factors can affect the shelf life of veggie broth in the fridge?
The shelf life of veggie broth in the fridge can be influenced by factors like how it was stored, the freshness of the ingredients used, and if it has been reheated multiple times.
Can you freeze veggie broth to extend its shelf life?
Yes, you can freeze veggie broth to prolong its shelf life. Simply pour the broth into a freezer-safe container, leaving some room for expansion, and it can last for up to 3 to 4 months in the freezer.
Final Thoughts
Veggie broth typically lasts for 4-5 days in the fridge. To ensure its freshness, store it in a sealed container. Properly refrigerated veggie broth can maintain its quality for up to a week. Remember to check for any signs of spoilage before using it. So, how long does veggie broth last in the fridge? Around 4-5 days is the recommended timeframe.

Expert Tips: How To Reset Pokewalker Like A Pro
To reset Pokewalker, simply follow these steps. First, press and hold Down, X, and L buttons simultaneously. Next, select “Yes” to clear all data. Finally, press and hold Up, X, and R buttons. Voila! Your Pokewalker is now reset and ready for a new adventure. Get ready to embark on a fresh journey with your trusty Pokemon companion.

How to Reset Pokewalker: Your Ultimate Guide
Welcome, fellow Pokemon trainers! Are you looking to start fresh with your Pokewalker device and need to know how to reset it? Look no further because in this comprehensive guide, we’ll walk you through everything you need to know about resetting your Pokewalker.
What is a Pokewalker?
Before we dive into the resetting process, let’s first understand what a Pokewalker is. The Pokewalker is a nifty little gadget that allows you to transfer your Pokemon from certain Pokemon games, such as HeartGold and SoulSilver, onto a small device that you can carry with you wherever you go. It lets you earn Watts, find items, and even catch wild Pokemon by walking around in the real world!
Reasons to Reset Your Pokewalker
There could be various reasons why you might want to reset your Pokewalker. Perhaps you want to start a new adventure with a different set of Pokemon, or maybe your current Pokewalker is malfunctioning, and a reset could fix the issue. Whatever your reason may be, resetting your Pokewalker is a simple process that we’ll guide you through step by step.
Steps to Reset Your Pokewalker
Step 1: Access the Pokewalker Menu
The first step is to turn on your Pokewalker device and navigate to the main menu. From the main menu, locate the option that allows you to connect to your game, typically found under the “Connect” or “Settings” section.
Step 2: Initiate the Reset Process
Once you’ve accessed the menu, look for the option that says “Reset” or “Erase.” Select this option to begin the reset process. Your device will prompt you to confirm that you want to reset the Pokewalker. Confirm the action, and your Pokewalker will be reset to its default settings.
Step 3: Reconnect to Your Game
After the reset is complete, you can now reconnect your Pokewalker to your Pokemon game. Follow the on-screen instructions provided by the game to establish the connection between your game and the Pokewalker. Once connected, you’re ready to start a new adventure with your freshly reset Pokewalker!
Troubleshooting Tips
If you encounter any issues during the reset process, here are a few troubleshooting tips to help you out:
Tip 1: Ensure Proper Battery Level
Make sure your Pokewalker has sufficient battery power before attempting to reset it. Low battery levels can sometimes cause glitches during the reset process. If needed, replace the batteries with fresh ones.
Tip 2: Check for Connectivity Issues
If your Pokewalker is having trouble connecting to your game, ensure that the infrared port on both the Pokewalker and the game cartridge are clean and free of any obstructions. Sometimes dust or dirt can interfere with the connection.
Tip 3: Consult the User Manual
If you’re still facing difficulties with resetting your Pokewalker, refer to the user manual that came with the device. The manual may provide additional troubleshooting steps specific to your Pokewalker model.
In Conclusion
Resetting your Pokewalker can breathe new life into your Pokemon adventures and open up a world of possibilities. Whether you’re starting fresh or troubleshooting an issue, following the steps outlined in this guide will help you reset your Pokewalker with ease. Now, grab your Pokewalker, lace up your shoes, and embark on your next Pokemon journey!
Remember, the world of Pokemon is vast and full of surprises, so don’t be afraid to explore, discover, and most importantly, have fun!
How to reset your Pokewalker data
Frequently Asked Questions
How can I reset my Pokewalker device?
To reset your Pokewalker, follow these steps: First, ensure that the device is turned off. Next, press and hold the Up, Select, and R buttons simultaneously. While holding these buttons, turn on the Pokewalker by pressing the On button. A confirmation message will appear, prompting you to reset the device. Select “Yes” to proceed with the reset. Your Pokewalker will now be reset to its factory settings.
What happens when I perform a reset on my Pokewalker?
Resetting your Pokewalker will erase all data stored on the device, including steps taken and Pokemon obtained. It will essentially bring the Pokewalker back to its original state as if it were brand new. Make sure to back up any important data before initiating the reset process.
Do I need any special tools to reset my Pokewalker?
No, you do not need any special tools to reset your Pokewalker. The reset can be easily performed using the device’s existing buttons. Simply follow the steps provided in the first question to reset your Pokewalker without the need for any additional tools.
Will I lose any unique features or functionalities by resetting my Pokewalker?
Resetting your Pokewalker will only erase data stored on the device and restore it to its factory settings. You will not lose any unique features or functionalities that come with the Pokewalker itself. After the reset, you can continue using the device as you normally would, starting fresh with your Pokemon journey.
Final Thoughts
To reset Pokewalker, go to the main menu, select the ‘connect to Pokewalker’ option, press and hold all buttons simultaneously for a few seconds until the screen goes black. Release the buttons and press any button to complete the reset. Remember, to reset Pokewalker, follow these simple steps and enjoy a fresh start.

How Long Does Post Surgery Anxiety Last: Expert Insights
Post-surgery anxiety can linger for weeks to months, impacting recovery. Its duration varies, influenced by individual factors and support systems. Recognizing the signs and seeking help are crucial steps in managing how long does post surgery anxiety last. Familiarize yourself with coping strategies to navigate through this challenging period. Understanding the timeline and seeking support can make a significant difference in overcoming post-surgery anxiety.

How Long Does Post Surgery Anxiety Last?
Welcome to our comprehensive guide on understanding post-surgery anxiety and how long it typically lasts. Going through surgery can be a stressful experience, and feeling anxious afterward is a common occurrence for many people. In this article, we will delve into the various aspects of post-surgery anxiety, its potential duration, and ways to cope with it effectively.
What is Post-Surgery Anxiety?
Post-surgery anxiety, also known as postoperative anxiety, refers to the feelings of fear, worry, and nervousness that some individuals experience after undergoing a surgical procedure. It can manifest in various ways, such as restlessness, irritability, difficulty concentrating, or even panic attacks. The intensity of post-surgery anxiety can vary from person to person, depending on factors like the type of surgery, individual coping mechanisms, and overall mental health.
Factors Influencing Post-Surgery Anxiety Duration
Several factors can influence how long post-surgery anxiety lasts for an individual. Understanding these factors can help manage and alleviate anxiety more effectively. Some common factors include:
Type of Surgery
The complexity and invasiveness of the surgery can impact the level of anxiety experienced postoperatively. More extensive procedures may lead to prolonged anxiety due to the physical and emotional toll they take on the body.
Previous Mental Health History
Individuals with a history of anxiety disorders, depression, or other mental health conditions may be more prone to experiencing prolonged post-surgery anxiety. It is essential for healthcare providers to be aware of a patient’s mental health history to provide appropriate support.
Postoperative Complications
Complications during the recovery period can exacerbate anxiety levels. Uncertainty about the outcome of the surgery or unexpected issues that arise postoperatively can contribute to prolonged anxiety symptoms.
Support System
The presence of a strong support system, including family, friends, and healthcare professionals, can significantly impact how long post-surgery anxiety lasts. Having a supportive network can help individuals cope with their emotions and feel more reassured throughout the recovery process.
Duration of Post-Surgery Anxiety
The duration of post-surgery anxiety can vary widely among individuals. For some people, feelings of anxiety may subside relatively quickly after the surgery, while others may experience prolonged anxiety that persists for weeks or even months. In most cases, post-surgery anxiety tends to diminish gradually as the individual recovers physically and emotionally.
Coping Strategies for Post-Surgery Anxiety
Managing post-surgery anxiety is crucial for promoting a smooth recovery process and overall well-being. Here are some effective coping strategies to help deal with postoperative anxiety:
Stay Connected
Keeping in touch with friends, family, and healthcare providers can provide emotional support and reassurance during the recovery period. Sharing your feelings and concerns with others can help alleviate anxiety.
Practice Relaxation Techniques
Engaging in relaxation techniques such as deep breathing, meditation, or gentle yoga can help calm your mind and body, reducing feelings of anxiety and stress.
Stay Active
Physical activity, as permitted by your healthcare provider, can help release endorphins and improve your mood. Even gentle activities like short walks can be beneficial for managing anxiety.
Seek Professional Help
If your anxiety persists or becomes overwhelming, don’t hesitate to seek help from a mental health professional. Therapy, counseling, or medication may be recommended to address persistent anxiety symptoms.
In conclusion, post-surgery anxiety is a common experience for many individuals undergoing surgical procedures. While the duration of post-surgery anxiety can vary, it typically diminishes over time as the individual progresses through the recovery process. By understanding the factors influencing post-surgery anxiety, implementing effective coping strategies, and seeking appropriate support when needed, individuals can navigate through postoperative anxiety more effectively. Remember, it’s essential to prioritize your mental well-being during the recovery period to promote a smooth and successful healing process.
Thank you for reading our guide on how long post-surgery anxiety lasts. Remember that you are not alone in your feelings, and reaching out for help is a sign of strength. Stay positive, stay connected, and take care of yourself as you journey towards recovery!
How Long Does Post Surgery Anxiety Last? – Stress Free Mindset
Frequently Asked Questions
How long can post-surgery anxiety persist after an operation?
Post-surgery anxiety duration varies for each individual and can last for a few days to several weeks. Factors like the type of surgery, personal coping mechanisms, and pre-existing anxiety levels can influence the duration of post-surgery anxiety.
What are common signs that indicate post-surgery anxiety is lingering longer than expected?
If feelings of anxiety persist, escalate in intensity, interfere with daily activities, or cause excessive worry beyond the normal healing period, it may be a sign that post-surgery anxiety is lasting longer than expected.
Can seeking help from a healthcare professional help in managing prolonged post-surgery anxiety?
Yes, consulting a healthcare provider, such as a therapist or psychologist, can be beneficial in managing prolonged post-surgery anxiety. They can provide support, offer coping strategies, and, if necessary, recommend appropriate treatment options.
Are there self-care techniques that can aid in reducing post-surgery anxiety that lingers longer than anticipated?
Engaging in relaxation techniques such as deep breathing exercises, mindfulness meditation, staying physically active within recommended limits by your healthcare provider, maintaining a healthy diet, and spending time on activities you enjoy can help in managing post-surgery anxiety that persists.
Final Thoughts
In conclusion, post-surgery anxiety can vary in duration, lasting anywhere from a few days to several weeks. It is important for individuals to seek support and communicate their feelings during this time. Understanding that post-surgery anxiety is a common experience can help in managing its effects. Remember, how long post-surgery anxiety lasts differs for each person, but with proper care and support, it can be effectively managed.

Secure Hotel Door: How To Lock Door With Hanger
Need to secure your hotel room door without a proper lock? Simply use a hanger! Grab the hanger from the closet and follow these quick steps to keep yourself safe and sound. No need to stress about safety—this handy trick will give you peace of mind during your hotel stay. Let’s dive into how to lock hotel door with hanger and ensure a worry-free night’s sleep.

Unlocking the Secret: How to Lock Your Hotel Door with a Hanger
Welcome, travelers! Have you ever stayed in a hotel room and felt a little uneasy about the security of your door? Maybe the lock is a bit flimsy or you simply want some added peace of mind during your stay. Well, fear not! In this guide, we’ll explore a clever and effective trick that can help you secure your hotel door using just a humble hanger. Let’s dive in and learn how to lock your hotel door with a hanger!
The Importance of Safety and Security
Feeling safe and secure is crucial when you’re away from the comfort of your own home. While most hotels have reliable security measures in place, it never hurts to take some extra precautions to ensure your peace of mind. By using a hanger to lock your hotel door, you can add an additional layer of security to your room.
Gather Your Materials
Before we get started, you’ll need to gather a few simple materials to help you lock your hotel door with a hanger. Here’s what you’ll need:
- A sturdy wire hanger
- A pair of pliers (optional, but helpful)
Step-by-Step Guide: How to Lock Your Hotel Door with a Hanger
Step 1: Prepare Your Hanger
Start by unraveling the wire hanger and straightening it out as much as possible. If you have a pair of pliers handy, you can use them to help you bend the hanger into the desired shape more easily.
Step 2: Create the Locking Mechanism
Next, you’ll want to create a simple locking mechanism using the hanger. Bend one end of the hanger into a small hook shape that will be used to secure the door handle. The other end of the hanger will be used to anchor the hook in place.
Step 3: Insert the Hanger
Once you’ve created the locking mechanism, slide the hooked end of the hanger over the top of the door handle. Make sure the hook is securely fastened around the handle to prevent it from slipping off.
Step 4: Secure the Hanger
Now, take the other end of the hanger and anchor it securely between the door handle and the door frame. This will help to keep the hook in place and prevent the door from being easily opened from the outside.
Additional Tips for Enhanced Security
While locking your hotel door with a hanger can provide an extra level of security, there are a few additional tips you can follow to further enhance the safety of your room:
- Always double-check that your door is securely locked before leaving your room.
- Keep your valuables secure in a hotel safe or locked suitcase.
- Avoid sharing your room number with strangers or displaying it in public areas.
And there you have it – a simple yet effective way to lock your hotel door using just a hanger. By following the steps outlined in this guide and taking some additional security precautions, you can enjoy a more peaceful and secure stay during your travels. Remember, it’s always better to be safe than sorry when it comes to your personal safety and security. Happy travels!
Thank you for reading our guide on how to lock your hotel door with a hanger. We hope you found it helpful and informative. Safe travels!
Hotel security #hotel #hotels #security #securitybreach #travel #travelvlog
Frequently Asked Questions
How can I secure a hotel door using a hanger?
To lock a hotel door using a hanger, you can fashion a makeshift lock by bending the hanger into a straight line. Slide one end of the hanger into the door’s latch opening to prevent it from fully closing, acting as a barrier against anyone trying to enter the room.
Is it safe to use a hanger as a lock for a hotel door?
While using a hanger as a lock for a hotel door can provide a temporary additional security measure, it is essential to understand that it is not as secure as a traditional lock. It could deter potential intruders, but it may not fully prevent unauthorized access.
Can I use this method to lock the hotel door from the inside?
Yes, you can use a hanger to secure a hotel door from the inside by placing it in the latch opening to prevent the door from fully closing. This method is useful when you want to add an extra layer of security while you are inside the room.
Final Thoughts
To conclude, a simple hanger can be used to secure a hotel room door from the inside. By sliding the hanger through the door latch, a makeshift lock can be created quickly and efficiently. Remember to always prioritize safety and security, especially when traveling. In emergency situations, knowing how to lock the hotel door with a hanger can provide an additional layer of protection.

Discover The Cost Of Gel X Nails: How Much Is Gel X Nails
Gel X nails offer a durable and trendy manicure option. So, how much is Gel X nails? The cost can vary depending on the salon, location, and additional services. It’s essential to consider the quality and expertise in the pricing. In this article, we will delve into the factors that influence the cost of Gel X nails and provide tips on finding the best value for your money. Let’s get started!

How Much is Gel X Nails: A Complete Guide to Pricing and Benefits
Introduction
Have you ever wondered how much it costs to get Gel X nails? In this comprehensive guide, we will delve into the world of Gel X nails, exploring their prices, benefits, and everything else you need to know before your next nail appointment.
What Are Gel X Nails?
Gel X nails are a type of nail enhancement that combines the flexibility of gel with the strength of acrylic. They are applied using pre-made gel tips that are secured to the natural nail and then shaped and polished to perfection. Gel X nails are popular for their durability and long-lasting wear.
Understanding the Cost
The cost of Gel X nails can vary depending on several factors, including the salon location, the experience of the nail technician, and any additional services you may opt for. On average, Gel X nails can range from $50 to $150 per set. Keep in mind that prices may also differ based on the complexity of the design or the length of the nails.
Factors Influencing Pricing
Some salons may charge extra for nail art, intricate designs, or additional services such as cuticle care or nail shaping. It’s essential to inquire about the total cost upfront to avoid any surprises when it comes time to pay.
The Benefits of Gel X Nails
One of the primary advantages of Gel X nails is their durability. Unlike traditional manicures, Gel X nails can last up to three weeks without chipping or peeling. They are also more flexible than acrylic nails, making them less prone to breakage.
Long-Lasting Wear
Gel X nails are perfect for individuals with busy lifestyles who don’t have time for frequent touch-ups. Whether you’re typing away on a keyboard or washing dishes, Gel X nails can withstand daily wear and tear.
Natural Look and Feel
Another benefit of Gel X nails is their natural look and feel. The gel tips are lightweight and mimic the appearance of natural nails, giving you a flawless finish without the bulkiness often associated with acrylics.
Tips for Maintaining Gel X Nails
To extend the life of your Gel X nails, it’s essential to follow a few maintenance tips. Avoid using your nails as tools, always wear gloves when doing household chores, and moisturize your cuticles regularly to keep your nails looking their best.
Proper Nail Care
Investing in a good cuticle oil and nail strengthener can help keep your Gel X nails healthy and strong. Regularly trimming and shaping your nails will also prevent any snagging or lifting, ultimately prolonging the lifespan of your manicure.
In conclusion, the cost of Gel X nails can vary depending on several factors, but the benefits of this nail enhancement make it a worthwhile investment. Whether you’re looking for long-lasting wear, a natural look, or durability, Gel X nails have you covered. So, the next time you’re due for a manicure, consider treating yourself to a set of Gel X nails for a flawless and lasting finish.
What to Know About Gel X Nails 101 – Pros & Cons
Frequently Asked Questions
What factors determine the cost of Gel X nails?
The cost of Gel X nails can vary depending on several factors such as the complexity of the design, the experience of the nail technician, the location of the salon, and any additional services included in the appointment.
Can I get a price estimate for Gel X nails without visiting the salon?
It’s challenging to provide an accurate price estimate for Gel X nails without a consultation at the salon. Prices can differ based on individual preferences and specific requirements, so it’s best to schedule a consultation for an accurate quote.
Do Gel X nails cost more than traditional acrylic nails?
Gel X nails generally tend to be more expensive than traditional acrylic nails. This is because Gel X nails are considered a premium service that offers a more durable and natural-looking result compared to traditional acrylics.
Final Thoughts
In conclusion, Gel X nails offer a convenient and long-lasting solution for beautiful manicures. The cost of Gel X nails may vary depending on the salon or technician you choose. When considering how much Gel X nails cost, it’s essential to factor in the quality of products and expertise of the nail technician. Ultimately, the investment in Gel X nails is worth it for those seeking a durable and flawless nail enhancement option.

Discover How Many Babies Do Shrimp Have: A Complete Guide
Shrimp can have anywhere from 1,000 to 30,000 babies at a time, making them quite prolific reproducers. These tiny crustaceans may seem unassuming, but their reproductive capabilities are nothing short of fascinating. Have you ever wondered how many babies do shrimp have, and how they manage to care for such large broods? Let’s dive into the intriguing world of shrimp reproduction and uncover the secrets behind their impressive offspring numbers. Get ready to be amazed by the wonders of nature unfolding within the depths of the ocean.

How Many Babies Do Shrimp Have?
Shrimp are fascinating creatures that live in oceans, rivers, and lakes all around the world. One of the most interesting things about shrimp is their reproduction process. Have you ever wondered how many babies a shrimp can have? Let’s dive into the wonderful world of shrimp reproduction and find out!
The Life of a Shrimp
Before we talk about how many babies shrimp can have, let’s first understand a bit about the life cycle of a shrimp. Shrimp start their lives as tiny eggs, which are usually laid by the mother shrimp. These eggs hatch into larvae, which then grow into juvenile shrimp. As they continue to grow, they become adult shrimp ready to reproduce and continue the cycle.
Shrimp Reproduction
Now, let’s focus on the exciting part – shrimp reproduction! Female shrimp can lay hundreds to thousands of eggs at a time, depending on the species. Once these eggs are fertilized by male shrimp, they are carried under the female’s abdomen until they hatch. This process is called “brooding.”
Brooding Process
During the brooding process, the female shrimp carefully tends to her eggs, ensuring they get enough oxygen and nutrients to develop properly. This can take anywhere from a few weeks to a few months, depending on the shrimp species and environmental conditions.
Once the eggs hatch, tiny larvae emerge, ready to embark on their own journey in the vast waters. It’s truly amazing to think about how many baby shrimp come into this world through this process!
Factors Affecting Shrimp Reproduction
Several factors can influence how many babies a shrimp can have. Environmental conditions such as water temperature, salinity, and food availability play a crucial role in the reproductive success of shrimp. Healthy adult shrimp are more likely to produce a larger number of offspring compared to stressed or malnourished shrimp.
Species Variation
Additionally, different shrimp species have varying reproductive capacities. Some species are known to produce more offspring than others. For example, certain species of freshwater shrimp may have smaller broods compared to marine shrimp species.
Life Expectancy
Another factor to consider is the life expectancy of shrimp. Some shrimp species have shorter lifespans, which may result in fewer opportunities for reproduction compared to species that live longer.
Importance of Shrimp Reproduction
Shrimp play a vital role in aquatic ecosystems as they serve as a food source for many other aquatic animals. Their reproductive success is crucial for maintaining healthy populations and ecological balance. By producing a large number of offspring, shrimp contribute to the diversity and abundance of marine life.
Human Impact
However, human activities such as overfishing, habitat destruction, and pollution can have a detrimental impact on shrimp populations. It’s essential for us to understand and appreciate the delicate balance of nature to ensure the sustainability of shrimp and other marine species.
In conclusion, the number of babies a shrimp can have varies depending on various factors such as species, environmental conditions, and individual health. From hundreds to thousands, each baby shrimp is a precious addition to the aquatic world, playing a vital role in the ecosystem. By learning more about shrimp reproduction, we can develop a deeper appreciation for these fascinating creatures and their importance in the marine environment.
Next time you enjoy a delicious shrimp dish, take a moment to think about the incredible journey these tiny creatures go through to bring joy to our taste buds!
Examples of the 4 Stages of Shrimp Pregnancy & Growth: (HD 2022 Version) Cherry Shrimp Life Cycle.
Frequently Asked Questions
How many babies do shrimp typically have at one time?
Shrimp usually give birth to a large number of babies at once, with the exact quantity varying depending on the species. Commonly, a single female shrimp can release anywhere from 50 to over 1,000 baby shrimp called larvae during a single reproductive cycle.
What is the process of shrimp reproduction like?
Female shrimp carry their eggs externally until they hatch, after which the larvae are released into the water. Shrimp reproduce through a process called spawning, where females fertilize their eggs with sperm from males. The larvae go through several stages of development before reaching adulthood.
How often do shrimp reproduce and have babies?
Shrimp typically reproduce multiple times throughout their lifetime, with some species reproducing every few weeks under optimal conditions. The frequency of reproduction can vary based on factors such as environmental conditions, food availability, and maturity of the shrimp.
Final Thoughts
Shrimp can have anywhere from 1,000 to 2,000 babies in a single brood. The number of babies a shrimp can have varies depending on species and environmental conditions. It is fascinating to learn about how many babies shrimp can have, showcasing their remarkable reproductive abilities. Researchers continue to study and learn more about the reproduction and life cycle of these intriguing crustaceans.

Ultimate Guide: How To Adjust A Propane Regulator
Adjusting a propane regulator is a crucial step in ensuring your gas appliances work efficiently. To adjust a propane regulator properly, you need to understand the process and follow the right steps. Proper adjustment ensures proper gas flow and pressure, which are essential for safe and effective operation. In this guide, we will walk you through the steps on how to adjust a propane regulator correctly to keep your appliances running smoothly. Let’s dive in and learn the necessary skills to maintain your propane system.

How to Adjust a Propane Regulator: A Comprehensive Guide
Welcome to our guide on adjusting a propane regulator! Propane regulators are crucial components of your gas system, ensuring a safe and steady flow of propane to your appliances. Whether you’re a seasoned DIY enthusiast or a novice homeowner looking to learn more about propane systems, this step-by-step guide will walk you through the process of adjusting a propane regulator with ease.
Understanding the Basics of a Propane Regulator
Before we delve into the adjustment process, let’s first understand what a propane regulator does. A propane regulator is a device that controls the flow of propane from your tank to your appliances. It reduces the high pressure of the propane in the tank to a safe and consistent pressure for use in your home.
Regulators have a pressure rating measured in BTUs (British Thermal Units) per hour, indicating the maximum flow rate they can handle. It’s essential to ensure that your regulator is correctly adjusted to prevent issues such as fluctuating flame sizes or inefficient appliance operation.
Gathering the Necessary Tools
Before you start adjusting your propane regulator, make sure you have the following tools on hand:
- Adjustable wrench
- Manometer (for measuring gas pressure)
- Protective gloves
- Safety goggles
Checking for Gas Leaks
Before proceeding with any adjustments, it’s crucial to check for gas leaks in your system. To do this, mix a solution of soapy water and apply it to the regulator connections and the gas line fittings. Turn on the gas, and if you see bubbles forming, it indicates a leak. In this case, turn off the gas immediately and tighten the connections or seek professional help.
Adjusting the Pressure
Now, let’s move on to the actual adjustment process. Follow these steps to adjust the pressure of your propane regulator:
Step 1: Locate the Regulator
The propane regulator is usually located near the propane tank or at the beginning of the gas line. It looks like a cylindrical device with an inlet and outlet connection.
Step 2: Turn Off the Gas
Before making any adjustments, ensure that the gas supply to the regulator is turned off. This can usually be done by closing the valve on the propane tank.
Step 3: Loosen the Locking Nut
Using an adjustable wrench, loosen the locking nut on the regulator. This nut secures the adjustment screw in place.
Step 4: Adjust the Pressure
With the locking nut loosened, use a screwdriver to turn the adjustment screw clockwise to increase the pressure or counterclockwise to decrease the pressure. Use the manometer to check the pressure and make precise adjustments.
Step 5: Secure the Locking Nut
Once you’ve achieved the desired pressure setting, tighten the locking nut to secure the adjustment screw in place. Ensure it is snug but not overtightened.
Testing the Regulator
After adjusting the pressure, it’s essential to test the regulator to ensure it’s functioning correctly. Turn on the gas and check the flame on your appliances. The flame should be steady and blue. If you notice any issues, double-check the pressure setting and make adjustments as necessary.
Maintaining Your Propane System
Regular maintenance of your propane system is key to ensuring its efficiency and safety. In addition to adjusting the regulator, it’s essential to check for leaks, replace worn-out components, and schedule professional inspections periodically.
Adjusting a propane regulator may seem daunting at first, but with the right tools and knowledge, you can confidently maintain your gas system at home. By following the steps outlined in this guide and staying vigilant about safety precautions, you’ll be able to ensure a smooth and reliable flow of propane to your appliances. Remember, if you’re ever unsure about making adjustments to your propane system, don’t hesitate to seek help from a qualified professional.
Thank you for reading our comprehensive guide on how to adjust a propane regulator. We hope you found it informative and empowering. Stay safe and enjoy the benefits of a well-maintained propane system in your home!
How To Reset Your Propane Regulator
Frequently Asked Questions
What tools are needed to adjust a propane regulator?
To adjust a propane regulator, you will typically need an adjustable wrench, a screwdriver, soapy water solution for leak testing, and protective gloves or goggles for safety.
How can I tell if my propane regulator needs adjustment?
If you notice inconsistent flame patterns, yellow or flickering flames, or difficulties maintaining a steady heat output on your propane appliance, it might indicate that the regulator needs adjustment.
Can I adjust the pressure output of a propane regulator myself?
Yes, you can adjust the pressure output of a propane regulator yourself by carefully following the manufacturer’s instructions and using the appropriate tools. However, if you are unsure, it’s best to seek professional help to avoid any potential risks.
What is the recommended procedure for adjusting a propane regulator?
First, turn off the propane supply and disconnect the regulator. Use the appropriate tools to adjust the pressure setting according to the manufacturer’s guidelines. Reconnect the regulator, check for leaks using soapy water, and test the propane appliance to ensure proper functioning.
Final Thoughts
To adjust a propane regulator, follow these steps: first, carefully locate the adjustment screw. Next, use a screwdriver to turn the screw clockwise to increase pressure or counterclockwise to decrease. Ensure to test the pressure with a gauge after each adjustment to ensure it’s within the desired range. By following these simple steps, you can safely and effectively adjust a propane regulator to suit your needs. Adjusting a propane regulator is a straightforward process that can be done with just a few simple tools and a little know-how.