


How Many Cups In A Liter: A Simple Guide
There are roughly 4.2 cups in a liter. Understanding this conversion can be quite handy, whether you are following a recipe or need to accurately measure liquid ingredients. Many home cooks and bakers often find themselves in a situation where they need to switch between cups and liters. Knowing how to do this conversion easily can save you time and ensure your dishes turn out just right. Join us as we delve deeper into the simple yet crucial question: How much cups in a liter? Let’s explore this measurement conversion and its practical applications together.

How Much Cups in a Liter: Exploring the Conversion
Have you ever found yourself in the kitchen, following a recipe that calls for a specific amount of liters, but you only have measuring cups on hand? Understanding how much cups are in a liter can be a lifesaver when cooking or baking. In this article, we’ll dive deep into the conversion of liters to cups, providing you with all the information you need to nail your recipes every time!
The Basics: Understanding Liters and Cups
Before we delve into the conversion, let’s make sure we’re all on the same page about what liters and cups are. A liter is a unit of measurement in the metric system used to measure volume. On the other hand, a cup is a unit of measurement commonly used in cooking and baking to measure both liquid and dry ingredients.
When it comes to conversions, it’s essential to know that 1 liter is equivalent to approximately 4.2 cups. This means that if a recipe calls for 1 liter of a liquid ingredient, you can use around 4.2 cups to measure it out.
Converting Liters to Cups
Now that we have a basic understanding of liters and cups, let’s explore how we can convert between the two. Converting liters to cups involves a simple multiplication. As mentioned earlier, 1 liter is equal to about 4.2 cups. To convert a certain number of liters to cups, you can use the following formula:
Number of Cups = Number of Liters x 4.2
For example, if you have 2 liters of milk and you want to know how many cups that is, you would multiply 2 by 4.2:
2 liters x 4.2 = 8.4 cups
So, 2 liters of milk is approximately equal to 8.4 cups.
Practical Application: Cooking and Baking
Understanding the conversion from liters to cups can be incredibly useful in the kitchen. Whether you’re making a big batch of soup, mixing up a refreshing beverage, or baking a delicious cake, knowing how much cups are in a liter can help you follow recipes accurately.
Let’s look at a common scenario: you’re preparing a fruit punch that calls for 3 liters of various juices. To measure out the liquids accurately, you can use the conversion we discussed earlier. By multiplying 3 liters by 4.2, you’ll find that you need approximately 12.6 cups of juice to make the perfect batch of fruit punch.
Quick Tips for Converting Liters to Cups
Converting liters to cups doesn’t have to be complicated. Here are some quick tips to help you make conversions with ease:
1. Know the Conversion Factor:
Remember that 1 liter is roughly equal to 4.2 cups. Having this conversion factor in mind can simplify your calculations.
2. Use a Measuring Cup:
When converting liters to cups, make sure to use a reliable measuring cup to ensure accuracy in your cooking and baking.
3. Double-Check Your Math:
It’s always a good idea to double-check your calculations when converting measurements. A small mistake could alter the outcome of your dish.
Understanding how much cups are in a liter is a valuable skill for anyone who loves spending time in the kitchen. By mastering this conversion, you can confidently tackle a wide range of recipes and create delicious dishes with precision. Whether you’re a novice cook or a seasoned baker, knowing how to convert liters to cups will undoubtedly enhance your culinary adventures. So next time you come across a recipe that calls for liters, remember the simple conversion to cups and cook up a storm!
Happy cooking!
How many cups in a liter?
Frequently Asked Questions
How many cups are in a liter?
There are approximately 4.2 cups in a liter. This conversion may vary slightly depending on the standard cup size being used.
Can I convert liters to cups accurately for cooking and baking?
Yes, you can convert liters to cups for cooking and baking purposes. Understanding the conversion factor of 1 liter to about 4.2 cups will help you accurately measure ingredients.
Why is it important to know how many cups are in a liter?
Knowing how many cups are in a liter is crucial for following recipes accurately, especially when dealing with international or metric measurements. It helps maintain consistency in the quantities of ingredients used.
Final Thoughts
In conclusion, knowing how much cups are in a liter is essential for accurate measurements in the kitchen. With 4.22 cups in a liter, you can easily convert recipes and portion sizes. Understanding this conversion simplifies cooking and baking, ensuring precise results. Next time you’re in the kitchen, keep in mind the ratio of cups to liters for seamless meal preparation.
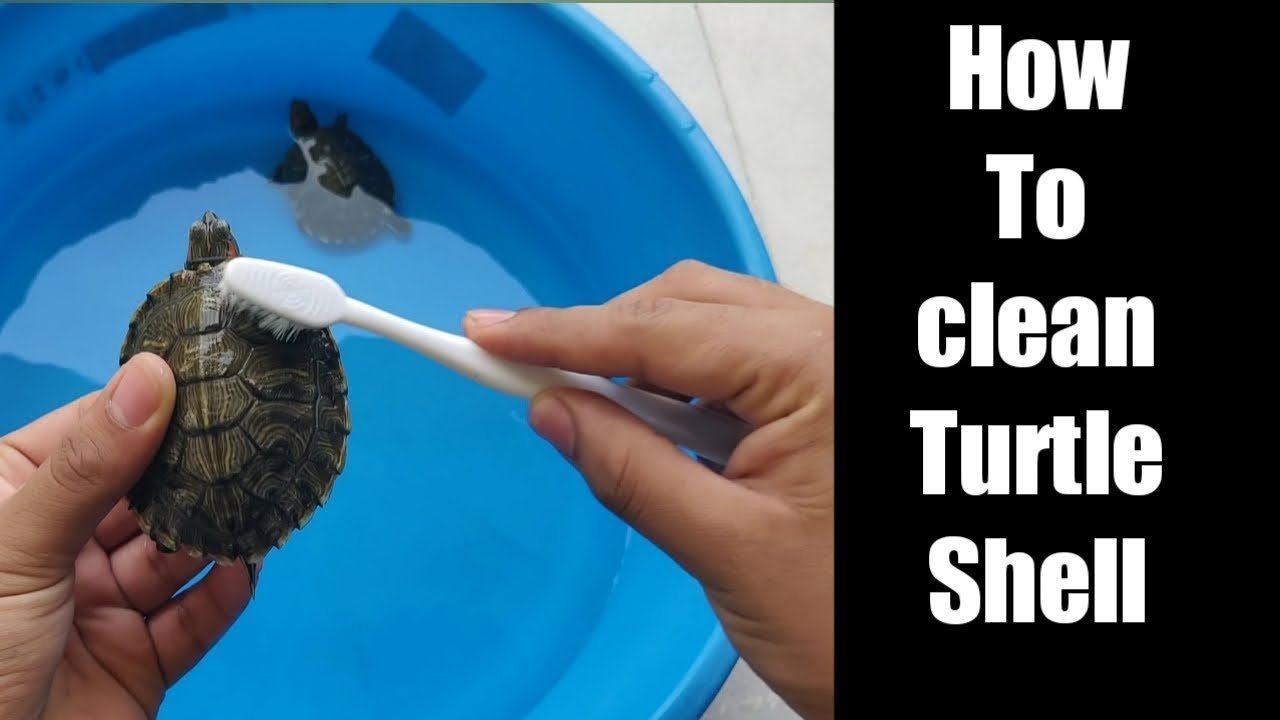
Simple Tips For Cleaning Turtle Shell: How To Clean Turtle Shell
To clean a turtle shell effectively, start by gently scrubbing it with a soft brush and mild soap. Rinse thoroughly with lukewarm water to remove any residue. Next, use a soft cloth to dry the shell completely to prevent any mold or mildew growth. Regular cleaning and maintenance can help maintain the beauty and health of your turtle’s shell for years to come. Now, let’s dive deeper into the step-by-step process of how to clean turtle shell to keep your shelled friend happy and healthy.

How to Clean a Turtle Shell
Introduction
Welcome to our comprehensive guide on how to clean a turtle shell! If you have a pet turtle or have found a turtle shell in the wild, it’s essential to know how to properly clean and preserve it. A turtle shell is a unique and fascinating part of these incredible creatures, and by learning the right techniques, you can ensure it remains in good condition for display or study.
Materials Needed
Before we dive into the cleaning process, let’s gather the necessary materials:
- Soft-bristled brush
- Mild dish soap
- Clean water
- Soft cloths
- Cotton swabs
- Optional: white vinegar
Step 1: Assess the Condition of the Turtle Shell
Before starting the cleaning process, carefully examine the turtle shell. Look for any cracks, loose scutes (the individual sections of the shell), or signs of damage. If the shell is severely damaged, it’s best to consult a professional rather than attempting to clean it yourself.
Step 2: Gently Remove Debris
Begin by using a soft-bristled brush to gently remove any dirt, dust, or debris from the turtle shell. Be very gentle to avoid causing any further damage to the shell. Brush in the direction of the scutes, following the natural pattern of the shell.
Step 3: Prepare the Cleaning Solution
Fill a bowl with clean water and add a small amount of mild dish soap. You can also add a teaspoon of white vinegar to help disinfect the shell if desired. Mix the solution gently to create a soapy mixture.
Step 4: Clean the Turtle Shell
Dip a soft cloth into the cleaning solution and wring out any excess liquid. Gently wipe the turtle shell with the damp cloth, focusing on one section at a time. Avoid getting the shell too wet, as excessive moisture can be harmful.
For hard-to-reach areas or intricate patterns on the shell, use a cotton swab dipped in the cleaning solution to carefully clean those areas.
Step 5: Rinse and Dry the Shell
Once you have cleaned the entire shell, rinse off any soap residue with clean water. Pat the shell dry with a soft cloth or allow it to air dry naturally. Avoid using heat to dry the shell, as this can damage the delicate keratin structure.
Step 6: Optional Preservation
If you wish to preserve the turtle shell for display, you can lightly apply a thin layer of mineral oil or turtle shell polish to enhance its natural shine and protect it from environmental damage. Remember to use these products sparingly and avoid any areas with visible damage.
Congratulations! You have successfully learned how to clean a turtle shell. By following these simple steps and using gentle techniques, you can maintain the beauty and integrity of the shell. Whether you’re a turtle enthusiast or a curious explorer, taking care of a turtle shell is a rewarding experience that allows you to appreciate the wonders of nature up close.
How to Easily Clean a Red Eared Slider's Turtle Shell | Tips
Frequently Asked Questions
How can I safely clean a turtle shell at home?
To clean a turtle shell at home, start by gently scrubbing it with a soft-bristled brush and lukewarm water. Avoid using harsh chemicals or rough scrubbing tools that can damage the shell. For stubborn dirt or algae, you can make a mild solution of water and vinegar to help loosen and remove the build-up. After cleaning, rinse the shell thoroughly with clean water and pat it dry with a soft cloth.
What should I do if my turtle’s shell has a foul odor?
If your turtle’s shell has a foul odor, it may be a sign of bacterial or fungal growth. In this case, it’s best to consult a veterinarian for proper diagnosis and treatment. Avoid attempting to mask the odor with perfumes or other products, as it’s essential to address the underlying cause to ensure your turtle’s health and well-being.
Is it necessary to sanitize the turtle shell after cleaning?
Sanitizing the turtle shell after cleaning is a good practice to prevent the growth of harmful bacteria. You can use a diluted solution of chlorine bleach or specialized reptile-safe disinfectants to sanitize the shell. Make sure to rinse the shell thoroughly after sanitizing to remove any residual cleaning agents that can be harmful to your turtle.
Final Thoughts
In conclusion, cleaning a turtle shell is essential for its overall health and well-being. To properly clean a turtle shell, start by gently scrubbing with a soft brush and warm, soapy water. Pay close attention to any algae or debris that may have accumulated. Rinse thoroughly to ensure all soap residue is removed. Remember, regular cleaning is crucial to maintain a healthy and happy turtle.

Simple Ways To Fix Wobbly Desk On Carpet
To fix a wobbly desk on carpet, start by firmly placing shims under the legs for stability. Ensure the shims are adjusted evenly to prevent wobbling. Alternatively, consider adding furniture pads or rubber grippers under the legs. These simple solutions can help create a solid foundation for your desk on carpet. Now, let’s delve deeper into the steps for a sturdy and steady workspace.

How to Fix a Wobbly Desk on Carpet
Are you tired of your desk wobbling every time you try to work or study? A wobbly desk can be frustrating and distracting, making it difficult to focus on your tasks. But fear not, as there are simple solutions to stabilize your desk on carpet without the need for professional help. In this comprehensive guide, we will explore various methods and tips on how to fix a wobbly desk on carpet, helping you create a stable and comfortable workspace.
Identifying the Cause of the Wobble
Before we dive into the solutions, it’s essential to determine the root cause of the wobble. A wobbly desk on carpet can be caused by uneven legs, an unstable base, or an uneven floor surface. By identifying the specific reason for the instability, you can choose the most suitable fix for your desk.
Adjusting the Desk Legs
One common reason for a wobbly desk is uneven legs. To address this issue, start by adjusting the height of each leg to ensure they are all in contact with the floor. Use a level to check the alignment of the legs and make necessary adjustments by turning the leg levelers clockwise or counterclockwise. This simple step can often eliminate the wobble caused by uneven legs.
Adding Shims or Spacers
If adjusting the legs doesn’t solve the wobble, you can try adding shims or spacers under the uneven legs. Cut pieces of cardboard, wood, or rubber pads to the desired thickness and place them under the shorter legs. This will help stabilize the desk and provide a level surface for your work area.
Using Furniture Pads or Floor Protectors
Another effective solution for fixing a wobbly desk on carpet is to use furniture pads or floor protectors. These adhesive pads can be attached to the bottom of the desk legs to create a cushioned barrier between the desk and the carpet. Not only will this help stabilize the desk, but it will also prevent damage to the carpet fibers.
Securing the Desk Base
If the wobble is originating from the desk base rather than the legs, you can secure the base to the floor for added stability. Use L-brackets or angle braces to attach the desk base to the wall or floor. This will prevent any side-to-side movement and keep the desk firmly in place on the carpet.
Reinforcing with Cross Bracing
For desks with a larger surface area or heavier weight, adding cross bracing underneath can help distribute the load and prevent wobbling. Install additional support beams or braces between the legs of the desk to reinforce the structure and minimize any sway or movement. This method is particularly effective for desks used for heavy-duty tasks.
Leveling the Carpet Surface
In some cases, the carpet itself may be uneven, causing the desk to wobble. To address this issue, consider leveling the carpet surface under the desk. You can use carpet padding or shims to create a more stable foundation for the desk legs. This simple adjustment can make a significant difference in the desk’s stability on carpet.
Regular Maintenance and Checks
Once you have fixed the wobble in your desk, it’s essential to perform regular maintenance checks to ensure it remains stable over time. Periodically inspect the desk legs, base, and overall structure for any signs of wear or loosening. By staying proactive and addressing any issues promptly, you can enjoy a sturdy and wobble-free workspace.
Dealing with a wobbly desk on carpet doesn’t have to be a daunting task. By following the simple yet effective solutions outlined in this guide, you can stabilize your desk and create a more comfortable work environment. Whether it’s adjusting the legs, adding shims, or securing the base, there are various methods to fix a wobbly desk without the need for professional assistance.
Remember, a stable desk not only enhances your productivity but also promotes better posture and overall well-being. So, roll up your sleeves, try out these tips, and say goodbye to that annoying wobble for good!
Happy stabilizing!
Top 3 Causes of Standing Desk Wobble and How You Can Avoid It
Frequently Asked Questions
How can I stabilize a wobbly desk on carpet?
To fix a wobbly desk on carpet, you can try using furniture pads or coasters underneath the desk legs. These pads can provide a stable surface for the desk to rest on, preventing it from wobbling. You can also consider using adjustable leveling feet that can be installed on the desk legs to ensure proper balance.
What other methods can I use to stop my desk from wobbling on carpet?
An alternative fix for a wobbly desk on carpet is to place shims or wedges under the uneven legs. By adjusting the height of the shims, you can level the desk and eliminate the wobbling. Additionally, tightening any loose screws or bolts in the desk frame can also help stabilize it on carpeted surfaces.
Are there any DIY solutions for stabilizing a wobbly desk on carpet?
Yes, you can try using a small piece of plywood or a thick book placed under the desk legs to create a level base. Another DIY solution is to attach self-adhesive rubber or felt pads to the bottom of the desk legs to improve grip on the carpet and reduce wobbling. These simple fixes can effectively stabilize your desk on a carpeted floor.
Final Thoughts
To fix a wobbly desk on carpet, start by adjusting the desk legs for stability. If needed, add shims or felt pads under the legs to level the desk. Alternatively, try using a rug gripper or double-sided tape to secure the desk in place on the carpet. By following these simple steps, you can easily resolve the issue of a wobbly desk on carpet, ensuring a sturdy and reliable workspace.

Decoding How Long Is Attorney Review In Nj
Attorney review in NJ typically lasts for 3 to 5 business days. It’s a crucial phase in the home buying process that allows for legal scrutiny of the contract. Understanding how long attorney review in NJ can take is essential for both buyers and sellers alike. During this time, attorneys review the terms of the contract, making sure their clients’ interests are protected. Delays in this stage can impact the overall timeline of the real estate transaction significantly.

How Long is Attorney Review in NJ: A Comprehensive Guide
Understanding Attorney Review in NJ
Attorney review in New Jersey is a crucial step in the process of buying or selling a home. It is a period during which the buyer and seller have the opportunity to consult with their attorneys and address any legal concerns before finalizing the real estate transaction. But how long does this review process typically take in the Garden State? Let’s delve into the details.
The Standard Timeframe for Attorney Review
In New Jersey, the standard timeframe for attorney review is typically three business days. During this period, the buyer’s and seller’s attorneys can review the contract, suggest modifications, and negotiate any necessary changes. It is essential for both parties to act promptly during this time to ensure a smooth and timely real estate transaction.
Factors Affecting the Length of Attorney Review
Several factors can influence how long attorney review takes in NJ. One significant factor is the responsiveness of the attorneys involved. If the attorneys promptly communicate and work efficiently, the review process can be completed within the standard three-day timeframe. However, delays in communication or decision-making can prolong the attorney review period.
Another factor that can impact the length of attorney review is the complexity of the real estate transaction. If there are complicated legal issues or unique contract terms that need to be addressed, the review process may take longer than the standard three days. It is crucial for both parties to be proactive in addressing any legal concerns to expedite the attorney review process.
Tips for a Smooth Attorney Review Process
To ensure a smooth attorney review process in NJ, follow these tips:
1. Choose Experienced Attorneys
Selecting attorneys with experience in real estate transactions can help streamline the attorney review process. Experienced attorneys are familiar with common issues that may arise during attorney review and can provide valuable guidance to their clients.
2. Communicate Effectively
Open and clear communication between all parties involved is key to a successful attorney review process. Make sure to promptly respond to your attorney’s requests and keep all parties informed of any developments or concerns.
3. Review the Contract Thoroughly
Carefully review the contract with your attorney and discuss any terms or conditions that may need clarification or modification. Addressing potential issues early on can help prevent delays during the attorney review period.
4. Act Promptly
Be proactive in addressing any legal concerns and making decisions during the attorney review period. Delays in communication or decision-making can prolong the review process and potentially jeopardize the real estate transaction.
In conclusion, attorney review in NJ typically lasts for three business days, but several factors can influence its length. By working with experienced attorneys, communicating effectively, and addressing legal concerns promptly, you can help ensure a smooth and timely attorney review process. Remember, attorney review is a crucial step in the real estate transaction process, so it is essential to approach it with diligence and attention to detail.
Explaining the Attorney Review Period in New Jersey
Frequently Asked Questions
How long does the attorney review typically take in New Jersey real estate transactions?
Attorney review in New Jersey usually lasts for 3 to 5 business days from the time all parties receive the contract signed by both the buyer and the seller. During this period, the attorneys can review the contract, suggest modifications, and negotiate terms, if necessary.
What happens if the attorney review period in New Jersey exceeds the standard time frame?
If the attorney review period in New Jersey surpasses the agreed-upon timeframe, it can lead to delays in finalizing the real estate transaction. Both parties should aim to adhere to the timeline to prevent any complications or extensions.
Can the attorney review period in New Jersey be shortened if needed?
Yes, the attorney review period in New Jersey can be expedited if both parties agree to it. However, it is crucial to ensure that all parties, including the attorneys, have ample time to review the contract thoroughly to avoid any potential legal issues down the line.
Final Thoughts
In conclusion, the attorney review process in New Jersey typically lasts for 3-5 business days. During this time, both the buyer’s and seller’s attorneys review and negotiate the terms of the contract. It is a crucial step in the real estate transaction that allows for legal protection and ensures all parties are in agreement. Understanding how long attorney review in NJ lasts will help you navigate the home buying process with confidence.

How Much Is Valet Parking At Burbank Airport: Essential Guide
Valet parking at Burbank Airport typically ranges from $23 to $30 per day. Convenience and peace of mind are just a few reasons travelers opt for this service. However, with numerous options available, finding the best valet parking deal is crucial. Let’s explore the cost, benefits, and tips for securing affordable valet parking at Burbank Airport.

How Much is Valet Parking at Burbank Airport?
Are you planning a trip and looking for a convenient parking option at Burbank Airport? Valet parking can be a stress-free and time-saving choice for travelers who want a seamless airport experience. In this detailed guide, we will explore everything you need to know about valet parking at Burbank Airport, including pricing, benefits, and how to make the most of this service.
The Convenience of Valet Parking
Imagine arriving at the airport and having a professional valet service take care of parking your car for you. With valet parking, you can skip the hassle of finding a parking spot, walking long distances with heavy luggage, and worrying about the security of your vehicle. Valet parking offers a convenient drop-off and pick-up service right at the airport terminal, making your travel experience more smooth and enjoyable.
Pricing Options for Valet Parking
The cost of valet parking at Burbank Airport can vary depending on several factors, such as the duration of your trip and any additional services you may require. Typically, the pricing for valet parking is calculated on a daily basis.
For short-term trips, the daily rate for valet parking at Burbank Airport ranges from $25 to $35. This rate may increase slightly during peak travel seasons or holidays. If you plan to leave your car parked for an extended period, such as a week or more, many valet parking services offer discounted weekly rates, which can save you money compared to the daily rate.
Benefits of Valet Parking
Apart from the convenience of drop-off and pick-up right at the terminal, valet parking offers additional benefits that make it a popular choice for many travelers. One of the primary advantages is the enhanced security features provided by valet parking services. When you opt for valet parking, your car is stored in a secure parking facility with 24/7 surveillance, giving you peace of mind while you are away.
Furthermore, valet parking often includes complimentary services such as assistance with luggage, shuttle service to and from the terminal, and sometimes even car wash and detailing options. These additional services can add value to your parking experience and leave you feeling well taken care of.
Booking Valet Parking in Advance
To ensure you have a spot reserved for valet parking at Burbank Airport, it is recommended to book in advance, especially during busy travel seasons. Many valet parking services allow you to make reservations online or over the phone, making the process quick and easy. By booking ahead of time, you can secure your parking spot, guarantee the availability of valet service, and sometimes even enjoy early booking discounts.
Tips for Making the Most of Valet Parking
To make the most of your valet parking experience at Burbank Airport, consider the following tips:
- Arrive at the airport with enough time to drop off your car and go through security without feeling rushed.
- Have all necessary travel documents easily accessible to avoid delays during drop-off or pick-up.
- Clearly communicate any specific instructions or preferences to the valet attendant to ensure a smooth experience.
- Take note of any contact information provided by the valet service in case you need to reach them during your trip.
- Upon your return, confirm the pick-up location and timing with the valet service to minimize wait times.
In Conclusion
Valet parking at Burbank Airport offers travelers a convenient and efficient parking option that can enhance the overall travel experience. While the pricing may vary based on the duration of your trip and additional services, the benefits of valet parking, including convenience, security, and added amenities, make it a popular choice for many passengers. By booking valet parking in advance and following some simple tips, you can make the most of this service and start your journey with peace of mind knowing your vehicle is in good hands.
Valet Parking Burbank
Frequently Asked Questions
What are the valet parking rates at Burbank Airport?
The valet parking rates at Burbank Airport vary depending on the duration of parking. Typically, the daily rate ranges from $25 to $45.
Can I make a reservation for valet parking at Burbank Airport?
Yes, you can make a reservation for valet parking at Burbank Airport. It is recommended to book in advance to secure your spot, especially during peak travel times.
Is valet parking at Burbank Airport a convenient option for travelers?
Yes, valet parking at Burbank Airport is a convenient option for travelers looking for a hassle-free parking experience. Your car will be parked and retrieved for you, allowing for a seamless transition to and from the airport terminal.
Final Thoughts
Valet parking at Burbank Airport costs around $25-$30 per day. This convenient service allows travelers to drop off their vehicle and have it parked for them. When considering the option of valet parking at Burbank Airport, the additional cost should be factored into your travel budget. Valet parking at Burbank Airport offers a stress-free experience for travelers looking for convenience and efficiency. Remember to inquire about the current rates for how much valet parking is at Burbank Airport before your trip.

Best Practices: How Often To Give Tylenol And Motrin
Wondering how often to give Tylenol and Motrin to your little one? Finding the right balance between these two common over-the-counter medications can be crucial when dealing with children’s fevers or pain. Both Tylenol and Motrin can be effective in reducing fever and alleviating discomfort, but it’s essential to know the correct dosages and timing for each. Let’s explore the best practices for administering these medications to ensure your child’s well-being and comfort.

How Often to Give Tylenol and Motrin: A Parent’s Guide
Welcome, parents! If you’ve ever found yourself wondering about the best way to manage your child’s fever or pain, you’re in the right place. In this comprehensive guide, we’ll explore the importance of knowing how often to give Tylenol and Motrin to your little ones. Let’s dive in!
The Basics: Tylenol vs. Motrin
Before we delve into the dosing schedules, let’s differentiate between Tylenol (acetaminophen) and Motrin (ibuprofen). These are common over-the-counter medications used to reduce fever and relieve minor aches and pains. While both are effective in managing symptoms, it’s essential to understand when to use each one.
When to Use Tylenol:
Tylenol is typically recommended for reducing fever or relieving pain in children. It is gentle on the stomach and is suitable for kids who may have stomach sensitivity to other medications. Tylenol is also a go-to option for infants under six months old.
When to Use Motrin:
Motrin, on the other hand, is an NSAID (nonsteroidal anti-inflammatory drug) that can help reduce inflammation in addition to fever and pain. It’s ideal for older children and those with conditions like swelling or muscle pain. However, Motrin should not be given to infants under six months without a doctor’s approval.
Understanding Dosage Guidelines
When it comes to administering Tylenol or Motrin to your child, following the correct dosage guidelines is crucial. Giving too little may not provide adequate relief, while giving too much can be harmful. Always consult with your child’s pediatrician before starting any new medication regimen.
Dosing by Weight
Many medications are dosed based on a child’s weight rather than age. This ensures that the dosage is tailored to your child’s specific needs. Always use an updated weight and age chart to determine the correct dosage for your little one.
Timing Between Doses
One common question parents have is how often to give Tylenol and Motrin without overlapping doses. It’s crucial to space out the administration of these medications to avoid accidental overdosing. Typically, you should wait at least four hours between doses of Tylenol and six hours between doses of Motrin.
Creating a Dosage Schedule
Establishing a consistent dosing schedule can help you stay organized and ensure your child receives the right amount of medication at the right times. Here’s a simple guide to help you create a dosage schedule for Tylenol and Motrin:
Step 1: Consult Your Pediatrician
Before starting any new medication regimen, consult with your child’s pediatrician. They can provide personalized recommendations based on your child’s health history and current condition.
Step 2: Record Symptoms and Temperatures
Keep a log of your child’s symptoms and temperatures to track their progress. This information can help your pediatrician make informed decisions about dosage adjustments if necessary.
Step 3: Set Reminder Alarms
With busy schedules, it’s easy to forget when it’s time for the next dose. Set reminder alarms on your phone or use a medication tracking app to stay on top of the dosing schedule.
Step 4: Monitor Side Effects
While Tylenol and Motrin are generally safe when used as directed, it’s essential to watch for any potential side effects. Contact your pediatrician immediately if you notice any adverse reactions in your child.
As a parent, knowing how often to give Tylenol and Motrin to your child can be a game-changer in managing their fever and discomfort. By understanding the differences between the two medications, following proper dosing guidelines, and creating a dosage schedule, you can ensure your child receives the care they need.
Remember, your child’s health is a top priority, so never hesitate to reach out to your pediatrician with any questions or concerns. With the right knowledge and proactive approach, you can help your little one feel better in no time. Stay informed, stay vigilant, and most importantly, stay ready to handle whatever comes your way!
Where to Turn for Pain Relief or Inflammation (Aleve, Motrin, Advil, Tylenol) Dr. Mandell
Frequently Asked Questions
How should I alternate giving Tylenol and Motrin to my child?
When managing a child’s fever or pain with Tylenol (acetaminophen) and Motrin (ibuprofen), it’s important to follow the dosing instructions provided by your healthcare provider. Typically, you can alternate between the two medications every 3-4 hours, making sure not to exceed the maximum daily dose for each. Always double-check the correct dosage based on your child’s weight and age to avoid any potential complications.
What is the recommended frequency for administering Tylenol and Motrin to a child?
The frequency of giving Tylenol and Motrin to a child depends on the specific dosing instructions provided by your child’s healthcare provider. Generally, these medications can be given every 6-8 hours, but it’s crucial to consult with a healthcare professional to determine the appropriate timing for your child’s specific condition and age. Never exceed the recommended dosage or frequency without proper guidance.
Can I give Tylenol and Motrin simultaneously to my child?
It is not recommended to give Tylenol and Motrin simultaneously to a child unless advised by a healthcare provider. These medications work differently and have the potential to interact adversely when administered together. Alternating between Tylenol and Motrin at appropriate intervals is a safer and more effective approach to managing your child’s fever or pain.
Final Thoughts
It is important to administer Tylenol and Motrin as directed by the healthcare provider. Typically, Tylenol can be given every 4-6 hours and Motrin every 6-8 hours. Ensuring the correct dosage and frequency of these medications is crucial for effective pain or fever management. Always consult a healthcare professional for specific guidance on how often to give Tylenol and Motrin to avoid any potential risks or complications.

Efficient Guide: How To Load Motorcycle In Truck
To load a motorcycle in a truck safely and efficiently, follow these practical steps. Start by ensuring the truck bed is clear of any debris or obstacles. Next, use a sturdy loading ramp to guide the motorcycle into the truck. Once the motorcycle is in place, secure it properly with tie-down straps. Remember, knowing how to load a motorcycle in a truck is not just about convenience but also crucial for ensuring both the bike and the truck are kept safe during transportation.

How to Load a Motorcycle in a Truck
Transporting your motorcycle in a truck can be a convenient and efficient way to get your bike to a workshop, race track, or simply to take it along on a road trip. However, loading a motorcycle into a truck requires careful planning and execution to ensure the safety of your bike and those around you. In this comprehensive guide, we will walk you through the step-by-step process of loading a motorcycle in a truck like a pro!
Step 1: Prepare Your Truck and Loading Equipment
Before you begin loading your motorcycle, make sure your truck is parked on a level surface and that the loading ramp is securely attached to the truck bed. Check the tie-down straps and ensure they are in good condition and capable of securing your motorcycle during transit. It’s also a good idea to have a friend or family member assist you in loading the bike for added safety.
Step 2: Position the Truck and Ramp
Position your truck in a way that allows for a smooth and straight entry for your motorcycle onto the loading ramp. Make sure there are no obstacles or obstructions that could hinder the loading process. Extend the loading ramp fully and secure it in place to provide a stable platform for your bike.
Step 3: Prepare Your Motorcycle
Prior to loading your motorcycle, ensure that the bike is in neutral gear and that the handlebars are straight. If your bike has a center stand, engage it to provide additional stability during the loading process. Double-check the tire pressure and ensure that the brakes are functioning properly.
Step 4: Push or Ride the Motorcycle onto the Ramp
Depending on the weight of your motorcycle and your comfort level, you can either push the bike up the ramp or ride it up slowly and steadily. If you choose to ride the bike, make sure to maintain a steady speed and keep the bike centered on the ramp to prevent tipping.
Step 5: Secure the Motorcycle in the Truck
Once your motorcycle is in the truck bed, use high-quality tie-down straps to secure the bike in multiple locations. Attach the straps to solid anchor points on the truck bed to prevent the bike from shifting during transit. Make sure the straps are tight and secure, but not overly tight to avoid damaging the bike’s suspension.
Step 6: Check and Double-Check
Before hitting the road, double-check that all straps are securely fastened and that the motorcycle is stable in the truck bed. Test the bike by gently rocking it side-to-side to ensure it is properly secured. It’s also a good idea to check the tie-down straps periodically during your journey to ensure they remain tight and secure.
Additional Tips for Loading a Motorcycle in a Truck
Here are some additional tips to make the loading process smoother and safer:
Use a Loading Assistant:
Having a friend or family member assist you during the loading process can make it easier and safer, especially if you encounter any difficulties.
Practice Makes Perfect:
If you are new to loading a motorcycle in a truck, practice in a safe and controlled environment before attempting it on your own. This will help you gain confidence and ensure a smooth loading process.
Invest in Quality Tie-Down Straps:
High-quality tie-down straps are essential for securing your motorcycle during transit. Make sure to invest in straps that are designed for motorcycles and can withstand the weight and vibrations during travel.
Check Local Regulations:
Before transporting your motorcycle in a truck, make sure to check local regulations and requirements for securing the bike. Some areas may have specific guidelines for transporting motorcycles, so it’s important to comply with these regulations to avoid any issues.
By following these step-by-step instructions and tips, you can safely and effectively load your motorcycle in a truck and transport it to your desired destination with ease. Remember to always prioritize safety and take your time to ensure that your bike is securely fastened for a smooth journey!
Happy riding and safe travels!
How To Load a Motorcycle Into a Truck at RevZilla.com
Frequently Asked Questions
How can I safely load a motorcycle into a truck?
To safely load a motorcycle into a truck, start by ensuring the truck’s loading ramp is securely in place and at a suitable angle for the bike. Next, carefully push or ride the motorcycle up the ramp while applying the brakes gently. Use tie-down straps to secure the motorcycle in an upright position, making sure to fasten them to sturdy anchor points in the truck bed. Double-check all connections before driving off to ensure the motorcycle is stable during transportation.
What are the key steps to follow when loading a motorcycle into a truck alone?
If you are loading a motorcycle into a truck alone, consider using a ramp designed for motorcycle loading to make it easier. Before loading, ensure the truck is parked on a flat surface and the ramp is secure. You may need to use a combination of pushing and engine power to get the motorcycle up the ramp safely. Take your time, use caution, and consider employing a spotter to assist you if possible.
Are there any specific safety precautions to keep in mind while loading a motorcycle into a truck?
When loading a motorcycle into a truck, prioritize safety by wearing appropriate gear, such as gloves and sturdy footwear, to protect yourself during the process. It’s crucial to ensure the loading ramp is stable and secure before attempting to load the motorcycle. Always keep the motorcycle under control and avoid sudden movements that could lead to accidents or damage. Regularly inspect the tie-down straps and connections to confirm they are secure throughout the journey.
Final Thoughts
To load a motorcycle in a truck, follow these steps: secure the truck ramp, align the motorcycle with the ramp, and then carefully push or ride the motorcycle onto the truck bed. Use tie-down straps to secure the motorcycle in place and ensure it is stable during transport. Remember to double-check all connections before hitting the road. Loading a motorcycle in a truck requires attention to detail and careful execution to ensure a safe and successful transport.

Step-By-Step Guide: How To Write A Check For $400
Writing a check for $400 is a simple yet essential task that many people may encounter. To do so, start by writing the current date on the top right corner. Next, write the recipient’s name on the “Pay to the order of” line and then the amount in both words and numbers to avoid any confusion. Ensure to sign the check at the bottom right corner. Mastering the art of writing a check for $400 ensures smooth financial transactions and organization in your personal finances. Let’s dive into the details!

How to Write a Check for $400
Introduction
Writing a check may seem like an outdated concept in today’s digital world, but it is still a valuable skill to have. Whether you are paying bills, making a donation, or simply transferring money, knowing how to write a check properly is essential. In this guide, we will walk you through the step-by-step process of writing a check for the specific amount of $400.
Why Write a Check for $400?
Before diving into the details of how to write a check for $400, it’s important to understand the significance of this specific amount. $400 can represent different things to different people. It could be the amount needed to cover a monthly utility bill, pay for a special gift, or contribute to a savings goal. Regardless of the reason, having the ability to write a check for $400 gives you the freedom and flexibility to manage your finances effectively.
Step 1: Fill in the Date Line
The first step in writing a check for $400 is to fill in the date line. This is usually located at the top right-hand corner of the check. Writing the date ensures that the check is valid and can be processed by the bank. Be sure to use the correct format, such as “MM/DD/YYYY.”
Step 2: Write the Payee’s Name
Next, you will need to write the name of the person or organization you are paying $400 to on the “Pay to the Order of” line. Make sure to write the name clearly and accurately to avoid any confusion when the check is deposited.
Step 3: Fill in the Amount in Numbers
In this step, you will write the amount of $400 in numbers on the appropriate line next to the dollar sign. Be sure to place the decimal point where it belongs, even if there are no cents involved in this particular transaction.
Step 4: Write the Amount in Words
After writing the amount in numbers, the next step is to write it out in words on the line underneath the payee’s name. Remember to start with “Four Hundred” followed by the word “dollars.” This step is crucial to prevent any alterations to the numerical amount.
Step 5: Memo Line (Optional)
The memo line is an optional field on the check where you can include a brief description of the purpose of the payment. For example, you could write “Birthday gift” or “Payment for services.” While this step is not mandatory, it can help both you and the payee keep track of the transaction.
Step 6: Sign the Check
The final step in writing a check for $400 is to sign it at the bottom right-hand corner. Your signature serves as a form of authorization and confirms that you have authorized the payment. Without your signature, the check will not be valid.
Security Tips for Writing Checks
1. Keep Your Checks Secure
It’s crucial to keep your checks in a safe and secure location to prevent unauthorized use. Avoid leaving blank checks lying around or sharing your checkbook with others.
2. Double-Check Your Entries
Before finalizing the check, double-check all the details you have written, including the date, payee’s name, and the amount in both numbers and words. Any errors can lead to complications when processing the check.
3. Record Your Transactions
Keeping a record of all your check transactions can help you monitor your finances and track your spending. Make a note of the payee, amount, and purpose of each check you write.
4. Use Secure Payment Methods
Consider using secure payment methods, such as electronic transfers or online bill pay, for recurring payments. This can help reduce the risk of check fraud and ensure timely transactions.
In conclusion, knowing how to write a check for $400 is a valuable skill that can come in handy in various financial situations. By following the steps outlined in this guide and implementing the security tips provided, you can write checks confidently and securely. Remember, practice makes perfect, so feel free to write out a few practice checks to get comfortable with the process. Writing a check may be a traditional method of payment, but it remains a useful tool in managing your finances effectively.
How To Write A Check
Frequently Asked Questions
How do I write a check for $400?
To write a check for $400, start by writing the current date on the top right corner of the check. Next, write “Four Hundred” in the payment amount section. Make sure to include the dollar sign ($) to indicate the currency. Then, write “400.00” in the box provided. Finally, sign the check at the bottom right corner and add any necessary memos in the memo line.
Can I write a check for $400 without cents?
Yes, you can write a check for $400 without including any cents. In the payment amount section, simply write “Four Hundred.” However, make sure to accurately fill out the box provided for the numeric amount by writing “400.00” to avoid any confusion or errors.
What should I do if I make a mistake when writing a $400 check?
If you make a mistake when writing a check for $400, do not attempt to correct it by scribbling or using correction fluid. Instead, void the check and start over with a new one to ensure clarity and accuracy. Remember to securely destroy the voided check to prevent misuse.
Final Thoughts
When writing a check for $400, start by clearly writing the recipient’s name and the amount in both numbers and words. Include the purpose of the payment on the memo line if necessary. Be sure to sign the check at the bottom to authorize the transaction. To write a check for $400 correctly, follow these simple steps for a seamless payment process. Remember, accuracy is key when writing a check for $400.
How Long Does A Fill In Take: The Complete Guide
How long does a fill in take? A typical fill in session can last anywhere from 20 to 45 minutes, but the exact duration depends on various factors. From the type of service you’re getting to the intricacy of the design, each aspect plays a role in determining the time frame. To demystify the process and offer insights into what you can expect, let’s delve into the factors that influence how long does a fill in take and how you can make the most of your appointment.

How Long Does a Fill In Take: Your Ultimate Guide
Welcome, young quiz enthusiasts! Have you ever wondered how long it takes to complete a fill-in puzzle? Fill-ins, also known as fill-in-the-blank puzzles, are a fun and challenging way to test your vocabulary and logic skills. In this guide, we will explore the ins and outs of fill-ins and give you some tips on how to solve them quickly and efficiently. So, grab your pencil and let’s dive in!
Understanding Fill-In Puzzles
Before we get into how long it takes to complete a fill-in puzzle, let’s first understand what these puzzles are all about. Fill-in puzzles consist of a grid with empty squares that you need to fill in with words or phrases based on the provided clues. The goal is to fill in all the squares correctly to reveal a hidden quote or message.
Fill-ins are a great way to improve your vocabulary, spelling, and critical thinking skills. They come in various difficulty levels, from easy to challenging, so there’s always a puzzle that suits your skill level. Now, let’s move on to the main question: how long does it take to solve a fill-in puzzle?
Factors Affecting the Time to Complete a Fill In
The time it takes to complete a fill-in puzzle can vary depending on several factors. Here are some key elements that can influence how long it takes to solve a fill in:
1. Puzzle Difficulty
The difficulty level of the fill-in puzzle plays a significant role in determining how long it will take to complete. Easy puzzles with simple clues and common words can be solved quickly, while challenging puzzles with complex clues and obscure words may take more time.
2. Your Vocabulary and Spelling Skills
Your vocabulary and spelling skills also impact how long it takes to solve a fill-in puzzle. The more words you know and the better you are at spelling them correctly, the faster you’ll be able to fill in the grid.
3. Focus and Concentration
Another factor that affects the time to complete a fill-in puzzle is your focus and concentration. If you can stay focused and avoid distractions while working on the puzzle, you’ll be able to solve it more quickly.
Tips for Solving Fill-In Puzzles Quickly
Now that you know the factors that can influence how long it takes to complete a fill-in puzzle, here are some tips to help you solve them quickly and efficiently:
1. Start with the Easy Words
Scan the clues and fill in the easy words first. This will give you a head start and help you build momentum as you work on the more challenging parts of the puzzle.
2. Use Crossword Puzzle Techniques
If you’re familiar with crossword puzzles, you can apply some of the same techniques to fill-ins. Look for hints in the clues, such as tense or context, to help you fill in the correct words.
3. Check Your Answers Twice
Once you’ve completed the puzzle, go back and double-check all your answers. This will help you catch any mistakes or typos you might have made along the way.
In conclusion, the time it takes to complete a fill-in puzzle can vary depending on the puzzle’s difficulty, your skills, and your level of focus. By following the tips outlined in this guide, you can improve your speed and accuracy when solving fill-in puzzles. So, next time you tackle a fill-in puzzle, remember to stay focused, start with the easy words, and double-check your answers. Happy puzzling!
There you have it, young wordsmiths! The ultimate guide on how long it takes to complete a fill-in puzzle. We hope you’ve found this information helpful and that it inspires you to tackle more fill-ins in the future. Keep sharpening those brain cells and happy puzzling!
Steps the dentist takes to fill YOUR cavity. #cavity #dentist #filling
Frequently Asked Questions
How long does a fill-in procedure typically take?
The duration of a fill-in procedure can vary depending on the extent of work needed and the individual’s specific needs. On average, a fill-in appointment usually takes around 30 to 60 minutes to complete.
Can the time needed for a fill-in be affected by the condition of my nails?
Yes, the condition of your nails can influence the duration of the fill-in procedure. If your nails require more extensive filing, shaping, or repairs, it may take longer to complete the fill-in process.
Are there factors that could speed up or prolong the time required for a fill-in?
Several factors can impact the time needed for a fill-in. Key factors include the skill level of the nail technician, the complexity of the design or style chosen, any additional nail services requested, and the overall health and condition of your natural nails.
Is it advisable to schedule additional time for a fill-in appointment to accommodate any unexpected delays?
It’s generally a good idea to allocate some extra time for your fill-in appointment, especially if you are getting intricate designs or if your nails require significant repairs. By allowing for flexibility in your schedule, you can ensure that the technician has ample time to provide quality service without feeling rushed.
Final Thoughts
In conclusion, a fill-in appointment typically takes around 30 minutes. The time may vary depending on the complexity of the filling and the dentist’s schedule. Patients can expect the process to be quick and efficient, ensuring minimal disruption to their day. Ultimately, understanding how long does a fill-in take can help individuals better plan their dental visits.

Secure Your Wallet: How To Attach Airtag Effortlessly
Attaching your AirTag to your wallet is a quick and simple process. Start by securing the AirTag inside your wallet. Next, connect the AirTag to the loop or holder using a keyring or adhesive. Now, your wallet is trackable and easily locatable in case it gets misplaced. Enhance the security of your belongings effortlessly by following these easy steps on how to attach AirTag to wallet.

How to Attach AirTag to Wallet
Have you ever found yourself frantically searching for your wallet, only to realize it’s been misplaced? With Apple’s innovative AirTag technology, you can now easily track and locate your wallet with just a few simple steps. In this guide, we will walk you through how to attach an AirTag to your wallet securely, ensuring you never lose track of it again.
What is an AirTag?
Before we dive into the process of attaching an AirTag to your wallet, let’s first understand what an AirTag is. An AirTag is a small, lightweight tracking device designed by Apple to help you find and keep track of your belongings using the Find My app on your iPhone or iPad.
Why Attach an AirTag to Your Wallet?
Attaching an AirTag to your wallet provides an added layer of security and convenience. By connecting your AirTag to your wallet, you can easily locate it if it goes missing. Whether your wallet slips between couch cushions or gets left behind at a restaurant, the AirTag will help you pinpoint its exact location.
Steps to Attach AirTag to Your Wallet
Step 1: Prepare Your AirTag
The first step in attaching an AirTag to your wallet is to prepare the AirTag itself. Make sure your AirTag is powered on by removing the plastic tab that covers the battery. You will hear a sound indicating that the AirTag is active and ready to be paired with your device.
Step 2: Open the Find My App
Next, open the Find My app on your iPhone or iPad. This app is where you will be able to pair your AirTag with your device and customize its settings.
Step 3: Add New Item
Within the Find My app, tap on the “Add New Item” option. Select “AirTag” from the list of available devices. Follow the on-screen instructions to pair your AirTag with your device.
Step 4: Attach AirTag to Your Wallet
Once your AirTag is successfully paired with your device, it’s time to attach it to your wallet. There are a few different methods you can use to secure the AirTag to your wallet:
Method 1: Inserting AirTag into Wallet Pocket
If your wallet has a dedicated pocket or compartment, you can simply slide the AirTag into this pocket. Make sure the AirTag is positioned securely and won’t easily fall out.
Method 2: Using an AirTag Holder
Alternatively, you can purchase an AirTag holder specifically designed for wallets. These holders come in various styles and designs, allowing you to attach the AirTag to your wallet in a secure and stylish way.
Method 3: Using a Keyring
Another option is to attach the AirTag to your wallet using a keyring. Simply loop the keyring through the opening on the AirTag and then attach it to a secure area on your wallet.
Tips for Securely Attaching AirTag to Your Wallet
When attaching your AirTag to your wallet, consider the following tips to ensure it is securely attached:
- Choose a secure attachment method that works best for your wallet.
- Avoid blocking any essential compartments or slots in your wallet.
- Regularly check the attachment to ensure the AirTag is still securely in place.
Attaching an AirTag to your wallet is a simple yet effective way to prevent the stress and inconvenience of losing such an essential item. By following the steps outlined in this guide and utilizing the tips provided, you can enjoy the peace of mind that comes with knowing your wallet is always within reach.
Take advantage of Apple’s innovative AirTag technology and keep track of your wallet with ease. With just a few simple steps, you can attach an AirTag to your wallet and never have to worry about misplacing it again.
Now that you have the knowledge and tools to attach an AirTag to your wallet, go ahead and give it a try. You’ll thank yourself the next time you misplace your wallet but can easily locate it with the help of your trusty AirTag.
Remember, a securely attached AirTag means a peace of mind knowing your wallet is always by your side.
How to set up and use your AirTag | Apple Support
Frequently Asked Questions
How do I attach an AirTag to my wallet?
To attach an AirTag to your wallet, simply place the AirTag inside your wallet or secure it to the outside using a key ring or adhesive backing. Make sure the AirTag is securely attached to your wallet to prevent it from getting lost.
Can I use a key ring to attach the AirTag to my wallet?
Yes, you can use a key ring to securely attach the AirTag to your wallet. Simply loop the key ring through the small opening on the AirTag and then attach it to a secure area on your wallet. This method ensures that the AirTag stays in place and is easily accessible.
Is it recommended to use adhesive backing to attach the AirTag to my wallet?
Using adhesive backing to attach the AirTag to your wallet is another option. You can stick the AirTag securely to the outside of your wallet using the adhesive backing. Ensure the surface is clean and dry before applying the adhesive for a strong attachment.
Final Thoughts
Attaching your AirTag to your wallet is a simple and effective way to keep track of your valuables. Simply slide the AirTag into your wallet’s designated slot or use a key ring holder for quick access. This ensures you can easily locate your wallet using the Find My app. Securely attaching your AirTag to your wallet provides peace of mind and added security. Remember, how to attach AirTag to wallet is an essential step in safeguarding your belongings.