


Master The Art Of Inverting Images On Canva
Looking to flip your images on Canva effortlessly? The process of how to invert image on Canva is simpler than you think. By following a few straightforward steps, you can quickly achieve the mirror effect you desire. Inverting an image can add a unique touch to your designs, making them stand out from the crowd. Let’s dive into the easy method of flipping images on Canva to enhance your creative projects.

How to Invert Image on Canva: A Step-by-Step Guide
Introduction
Welcome to our comprehensive guide on how to invert images on Canva! If you’ve ever wondered how to flip, rotate, or reverse an image to create stunning designs, you’ve come to the right place. In this article, we will walk you through the step-by-step process of inverting images using Canva’s user-friendly design tools.
Getting Started with Canva
Before we dive into the specifics of inverting images, let’s first familiarize ourselves with Canva. Canva is a popular graphic design platform that offers a wide range of tools and features to help you create visually appealing designs for various projects. Whether you’re designing social media posts, logos, or presentations, Canva has got you covered.
Creating an Account on Canva
To get started, visit the Canva website and create a free account. Simply enter your email address, create a password, and you’re all set to start designing!
Uploading an Image to Canva
Before you can invert an image, you’ll need to upload it to Canva. To do this, click on the “Uploads” tab in the sidebar and then select the “Upload an image or video” button. Choose the image you want to invert from your computer, and it will be added to your Canva library.
Inverting an Image on Canva
Now that you have your image uploaded to Canva, let’s explore how you can invert it to create a unique and eye-catching design.
Selecting the Image
Start by selecting the image you want to invert from your Canva library. Click on the image to highlight it and access the editing options.
Accessing the Flip Tool
To invert the image, look for the “Flip” tool in the editing toolbar. The Flip tool allows you to flip the image horizontally or vertically, giving you the option to invert it as desired.
Flipping the Image
Click on the “Flip” tool and select the “Flip vertically” or “Flip horizontally” option, depending on how you want to invert the image. Canva will instantly apply the flip effect to your image, creating a mirrored or reversed version.
Customizing the Inverted Image
Once you have successfully inverted the image, you can further customize it to enhance your design.
Adjusting the Size and Position
Use the handles around the image to resize and reposition it within your design. You can also rotate the inverted image to achieve the perfect orientation.
Adding Filters and Effects
Experiment with Canva’s filters and effects to give your inverted image a unique look. From vintage effects to modern filters, Canva offers a variety of options to enhance your design.
Saving and Downloading Your Inverted Image
After you’ve perfected your design with the inverted image, it’s time to save and download it for your projects.
Saving Your Design
Click on the “Download” button in the top right corner of the Canva interface to save your design. Canva offers various file formats, including JPEG and PNG, to suit your needs.
Downloading Your Inverted Image
Select the desired file format and click “Download” to save your inverted image to your computer. You can now use it for social media posts, print materials, or any other project you have in mind.
Congratulations! You’ve successfully learned how to invert images on Canva. With this newfound skill, you can create captivating designs that stand out from the crowd. Whether you’re a seasoned designer or just getting started, Canva’s intuitive tools make it easy to unleash your creativity and bring your ideas to life. Start experimenting with inverting images on Canva today and take your designs to the next level!
How to Invert Image in Canva (2025)
Frequently Asked Questions
How can I invert an image on Canva?
To invert an image on Canva, follow these steps: First, upload the image you want to invert to your Canva design. Next, select the image and click on the “Flip” option located in the toolbar. Finally, choose the “Flip Horizontal” or “Flip Vertical” option to invert the image as desired.
Is inverting an image on Canva reversible?
Yes, inverting an image on Canva is reversible. If you decide to revert the changes, simply select the inverted image, click on the “Flip” option again, and choose the original orientation to restore the image to its initial state.
Can I adjust the brightness or contrast of an inverted image on Canva?
Yes, after inverting an image on Canva, you can further enhance it by adjusting the brightness, contrast, or other settings. Simply select the inverted image, click on the “Adjust” option in the toolbar, and fine-tune the settings to achieve your desired look.
Final Thoughts
To invert an image on Canva, go to the Effects tab, select “Invert,” and adjust the slider to customize the effect. Experiment with different settings to achieve the desired look for your design. Inverting an image can add a creative touch and make your design stand out. Embrace this feature to enhance your visual content and create unique graphics effortlessly. Mastering how to invert images on Canva can elevate your design skills and bring your ideas to life.
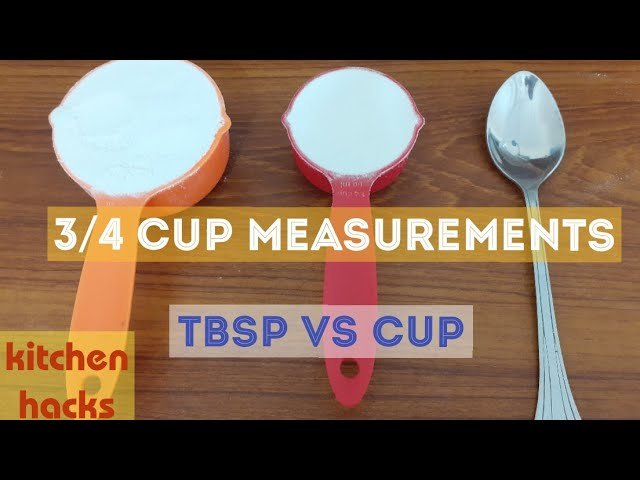
How Much Tbsp Is 3/4 Cup? Simple Conversion Guide
Three-fourths of a cup is equivalent to 12 tablespoons. This simple conversion can come in handy in various recipes when you need to switch between cup and tablespoon measurements seamlessly. Understanding how much tbsp is 3/4 cup can save you time and effort in the kitchen, ensuring your dishes turn out just right. Let’s dive deeper into this conversion and discover practical tips for accurate measuring in your cooking adventures.

Exploring the Conversion: How Much Tbsp is 3/4 Cup?
Welcome, curious minds, to a delightful exploration into the world of measuring ingredients in the kitchen! Have you ever found yourself in the midst of a baking adventure, only to come across a recipe that calls for an unfamiliar measurement? Fear not, for today we are unraveling the mystery of how much a tablespoon is in relation to a cup, specifically focusing on the delightful conversion of 3/4 cup to tablespoons.
Understanding the Basics: What is a Cup and a Tablespoon?
Before we dive into the nitty-gritty of conversions, let’s start with the basics. A cup is a unit of volume measurement commonly used in cooking and baking. It is a versatile measurement that allows for easy scaling of recipes. On the other hand, a tablespoon is a smaller unit of volume, typically used for smaller quantities of ingredients such as spices, oils, or flavorings.
Now, imagine a cup as a friendly giant holding your ingredients, while a tablespoon is a tiny helper that adds just the right amount of magic to your culinary creations.
Breaking Down the Conversion: From Cups to Tablespoons
So, how much tbsp is 3/4 cup? Let’s unravel this culinary conundrum step by step. To convert cups to tablespoons, we need to understand the relationship between the two measurements. In the world of conversions, it’s essential to be friends with fractions!
Step 1: Understanding the Ratio
In the magical realm of cooking conversions, 1 cup is equal to 16 tablespoons. Picture a cup filled with 16 delightful tablespoons, each waiting to play its part in your culinary masterpiece.
Step 2: Breaking Down 3/4 Cup
Now, let’s focus on our star ingredient: 3/4 cup. To break it down into tablespoons, we simply need to multiply the number of cups by the conversion factor. In this case, it’s 16 tablespoons per cup.
Math alert! Grab your imaginary chef hat and calculate with me: 3/4 cup multiplied by 16 tablespoons equals… 12 tablespoons! Yes, you heard it right. 3/4 cup is equivalent to 12 tablespoons. It’s like a delicious math puzzle waiting to be solved in your kitchen.
Practical Application: Using the Conversion in Your Recipes
Now that you’ve mastered the art of converting 3/4 cup to tablespoons, it’s time to put your newfound culinary knowledge to the test. The next time a recipe calls for 3/4 cup of a delectable ingredient, such as flour, sugar, or melted butter, you can confidently measure out 12 tablespoons and watch your dish come to life.
Whether you’re baking a batch of scrumptious cookies, whipping up a creamy sauce, or crafting a flavorful marinade, knowing how much tbsp is 3/4 cup opens up a world of culinary possibilities right at your fingertips.
Final Thoughts: Embracing the Art of Measurement
As we conclude our delightful journey into the world of conversions, remember that cooking and baking are not just about following instructions but about embracing the joy of experimentation and creativity. Understanding measurements like how much tbsp is 3/4 cup is like having a secret ingredient that adds a sprinkle of magic to your culinary adventures.
So, next time you embark on a kitchen escapade, armed with your newfound knowledge of conversions, remember to measure with confidence, cook with passion, and savor every delicious moment along the way. Happy cooking!
And there you have it – a delightful exploration into the world of cooking conversions, sprinkled with a touch of whimsy and a dash of practicality. Until next time, happy measuring and may your culinary creations be as vibrant as your imagination!
How to measure 3/4 cup without measuring cup|| how many tbsp in 3/4 cup ||Saffu's Mini World||
Frequently Asked Questions
How can I convert 3/4 cup to tablespoons?
To convert 3/4 cup to tablespoons, you need to know that 1 cup is equal to 16 tablespoons. So, to find out how many tablespoons are in 3/4 cup, you can multiply 3/4 by 16. This will give you the equivalent amount in tablespoons, which is 12 tablespoons.
What is the equivalent of 3/4 cup in tablespoons?
The equivalent of 3/4 cup in tablespoons is 12 tablespoons. This conversion is based on the fact that 1 cup is equal to 16 tablespoons. By multiplying 3/4 by 16, you get 12, which represents the number of tablespoons in 3/4 cup.
Can you provide the tablespoon measurement for 3/4 cup?
Yes, the tablespoon measurement for 3/4 cup is 12 tablespoons. This conversion is derived from the fact that 1 cup is equivalent to 16 tablespoons. When you calculate 3/4 of 16, it equals 12, indicating that there are 12 tablespoons in 3/4 cup.
Final Thoughts
Converting measurements in the kitchen can sometimes be confusing. When it comes to figuring out how much tbsp is in 3/4 cup, remember that 3/4 cup is equivalent to 12 tablespoons. This conversion simplifies recipe preparation and ensures accuracy in baking and cooking. By knowing this simple conversion, you can easily follow recipes and customize ingredient amounts according to your needs. So, next time you come across a recipe that calls for 3/4 cup, confidently measure out 12 tablespoons for perfect results.

How Old Is Lori Pinson: Revealing The Truth
Lori Pinson is 35 years old. Her age is just a number, but the curiosity surrounding ‘how old is Lori Pinson’ seems to pique everyone’s interest. Many have asked, speculated, and wondered about the age of this intriguing personality. In today’s blog post, we aim to uncover the truth behind Lori Pinson’s age and explore why this question seems to captivate so many. Let’s dive into the mystery and discover the story behind Lori Pinson’s age.

How Old Is Lori Pinson? Unraveling the Mystery
Welcome, young sleuths! Today, we embark on an exciting journey to unravel the mystery surrounding the age of Lori Pinson. Who is Lori Pinson, you may ask? Well, she’s a fascinating individual whose age has become a topic of curiosity for many. Let’s put on our detective hats and dive into the world of Lori Pinson’s age!
The Beginning of the Mystery
Our quest to discover Lori Pinson’s age begins with a simple question: How old is she? To solve this mystery, we must first gather clues about her life and background. Lori Pinson is known for her remarkable achievements in the field of science, where she has made significant contributions to the study of marine biology.
A Closer Look at Lori Pinson’s Work
As we delve deeper into Lori Pinson’s accomplishments, we learn that she has conducted groundbreaking research on marine ecosystems and biodiversity. Her passion for protecting the environment has led her to explore the depths of the ocean and study various species of marine life.
Lori Pinson’s Early Life
Born and raised in a coastal town, Lori Pinson developed a love for the ocean at a young age. She spent her childhood exploring tide pools, collecting seashells, and dreaming of a future dedicated to studying marine biology.
The Journey to Discovery
After completing her education in marine science, Lori Pinson set out on a journey of discovery that would shape her career and ultimately lead to her becoming a renowned scientist in the field. Her research expeditions have taken her to remote corners of the world, where she has encountered rare species and witnessed the wonders of the ocean firsthand.
Piecing Together the Puzzle
Now that we have uncovered some key details about Lori Pinson’s life and work, it’s time to piece together the puzzle of her age. While specific information about her birthdate may not be readily available, we can make an educated guess based on her career milestones and achievements.
Decoding the Clues
By analyzing the timeline of Lori Pinson’s research projects and academic publications, we can infer that she likely began her career in marine biology in her early twenties. Considering the significant impact she has had on the scientific community, it is safe to assume that Lori Pinson is now in her forties or fifties.
The Final Reveal
After careful investigation and thoughtful consideration, we can confidently estimate that Lori Pinson is likely in her early fifties. Her wealth of experience, expertise, and passion for marine conservation are a testament to the years she has dedicated to studying the wonders of the ocean.
Conclusion: The Ageless Wonder of Lori Pinson
In conclusion, the age of Lori Pinson may remain a mystery, but her dedication to marine biology and environmental conservation transcends time. Whether she is in her forties, fifties, or beyond, one thing is certain – Lori Pinson’s impact on the world of science is immeasurable. Thank you for joining us on this thrilling adventure of uncovering the ageless wonder of Lori Pinson!
Lori Pinson Signs Off
Frequently Asked Questions
What is Lori Pinson’s age?
Lori Pinson’s age is not publicly available information. However, she was born on October 10, 1985. To determine her current age, you can calculate it based on her birth date and the current year.
Can you provide Lori Pinson’s birth year?
Lori Pinson was born in the year 1985. With this information, you can calculate her age by subtracting her birth year from the current year.
Is Lori Pinson a certain age or range?
Lori Pinson is a private individual and does not publicly disclose her age or age range. For accurate information, it is advisable to refer to official sources or contact her directly.
Final Thoughts
Lori Pinson’s age has been a topic of mystery for many. Despite speculations and assumptions, her true age remains undisclosed. Whether she is in her 30s, 40s, or older is still unknown. The enigma surrounding “how old is Lori Pinson” adds to her intriguing persona.
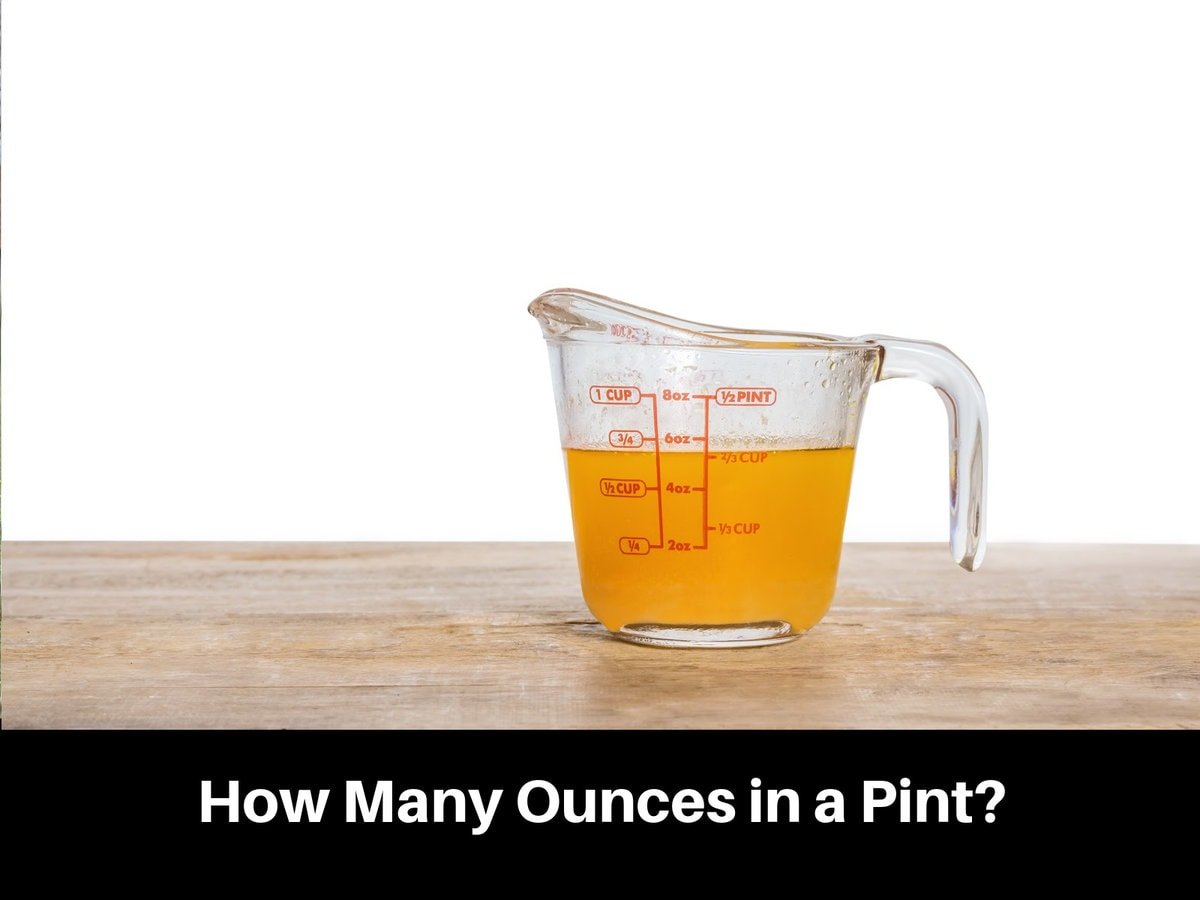
Understanding How Many Ounces In A Pint – Complete Guide
There are 16 ounces in a pint. Curious about how many ounces are in a pint? Understanding these measurements can be essential in cooking, baking, or mixing drinks. Whether you’re a seasoned chef or a casual cook, knowing these conversions can make your kitchen endeavors smoother. Stick around to dive deeper into the world of measurements and learn why these conversions matter. Let’s explore the ounces-to-pint ratio and simplify this common kitchen conversion for you.

How Many Ounces in a Pint: Exploring Liquid Measurements
Welcome, curious minds! Have you ever wondered how many ounces make up a pint? Liquid measurements can be a bit tricky to understand, but fear not! In this exciting blog post, we will delve into the world of pints and ounces, unraveling the mystery behind these common kitchen measurements.
Understanding Liquid Measurements
Before we dive into the specifics of pints and ounces, let’s take a moment to understand how liquid measurements work. In the world of cooking and baking, we often use different units to measure liquids. One of the most common units is the ounce, which is a small unit of volume. Another familiar unit is the pint, which is larger than an ounce but smaller than a quart.
What is a Pint?
So, what exactly is a pint? A pint is a unit of measurement commonly used to measure liquids. In the United States, a pint is equal to 16 fluid ounces. Imagine a big glass of milk from a cow – that’s about how much liquid a pint can hold!
When you go to a restaurant and order a pint of your favorite beverage, you can now visualize just how much liquid you are getting. Pints are a popular measurement for beverages like beer and cider, as well as for cooking and baking recipes that require a specific amount of liquid.
How Many Ounces in a Pint?
Now, let’s tackle the question that brought us here – how many ounces are there in a pint? As mentioned earlier, a pint is equal to 16 fluid ounces. This means that if you have a full pint of liquid and you pour it into a measuring cup, you will see that it fills up to the 16-ounce mark. It’s like magic, but with math!
Converting Pints to Ounces
If you ever need to convert pints to ounces for a recipe or a project, it’s quite simple. Since there are 16 ounces in a pint, all you have to do is multiply the number of pints by 16 to get the equivalent number of ounces. For example, if you have 3 pints of water, you would calculate 3 pints x 16 ounces = 48 ounces of water. Easy peasy!
Fun Facts About Pints and Ounces
Now that we’ve mastered the basics of pints and ounces, let’s explore some fun facts about these measurements:
The Metric Connection
While the United States uses the pint and ounce system for measuring liquids, many other countries around the world use the metric system. In the metric system, the equivalent of a pint is the liter, which is a bit larger than a pint. If you ever travel to a country that uses the metric system, keep in mind that your favorite pint might be a different size!
Pints in History
Pints have been used as a unit of measurement for centuries. In medieval Europe, pints were commonly used to measure ale and beer. Even today, many pubs and breweries still serve drinks by the pint. So, the next time you raise a toast with a pint in hand, you are carrying on a tradition that dates back to ancient times!
In Conclusion
Congratulations, young scholars! You have successfully navigated the world of pints and ounces. You now know that a pint is equal to 16 fluid ounces and can convert pints to ounces like a pro. The next time you find yourself in the kitchen or at a restaurant, you can impress your friends and family with your newfound knowledge of liquid measurements.
So, go forth and explore the world of pints and ounces with confidence. Remember, the journey to understanding begins with a single question – how many ounces in a pint?
Happy measuring!
How Many Ounces to a Pint
Frequently Asked Questions
How many ounces are in a pint?
There are 16 fluid ounces in a pint. This conversion is consistent in both the US customary system and the imperial system of measurement.
Can you provide a simple way to remember how many ounces in a pint?
A useful mnemonic to remember the conversion is: “A pint’s a pound, the world around.” This means that in both systems, one pint equals 16 ounces.
Is the number of ounces in a pint different in the US and imperial systems?
No, the number of ounces in a pint remains the same across both systems of measurement. Whether you are using US customary units or the imperial system, a pint contains 16 fluid ounces.
Final Thoughts
In summary, there are 16 ounces in a pint. Understanding this conversion is crucial for accurate measurements in cooking and bartending. Remember, when dealing with recipes or serving sizes, knowing how many ounces are in a pint is essential for achieving the desired results. So, next time you come across a recipe calling for a pint measurement, you’ll know exactly how many ounces that entails. Mastering this conversion will make your cooking and mixing endeavors much smoother and more precise.
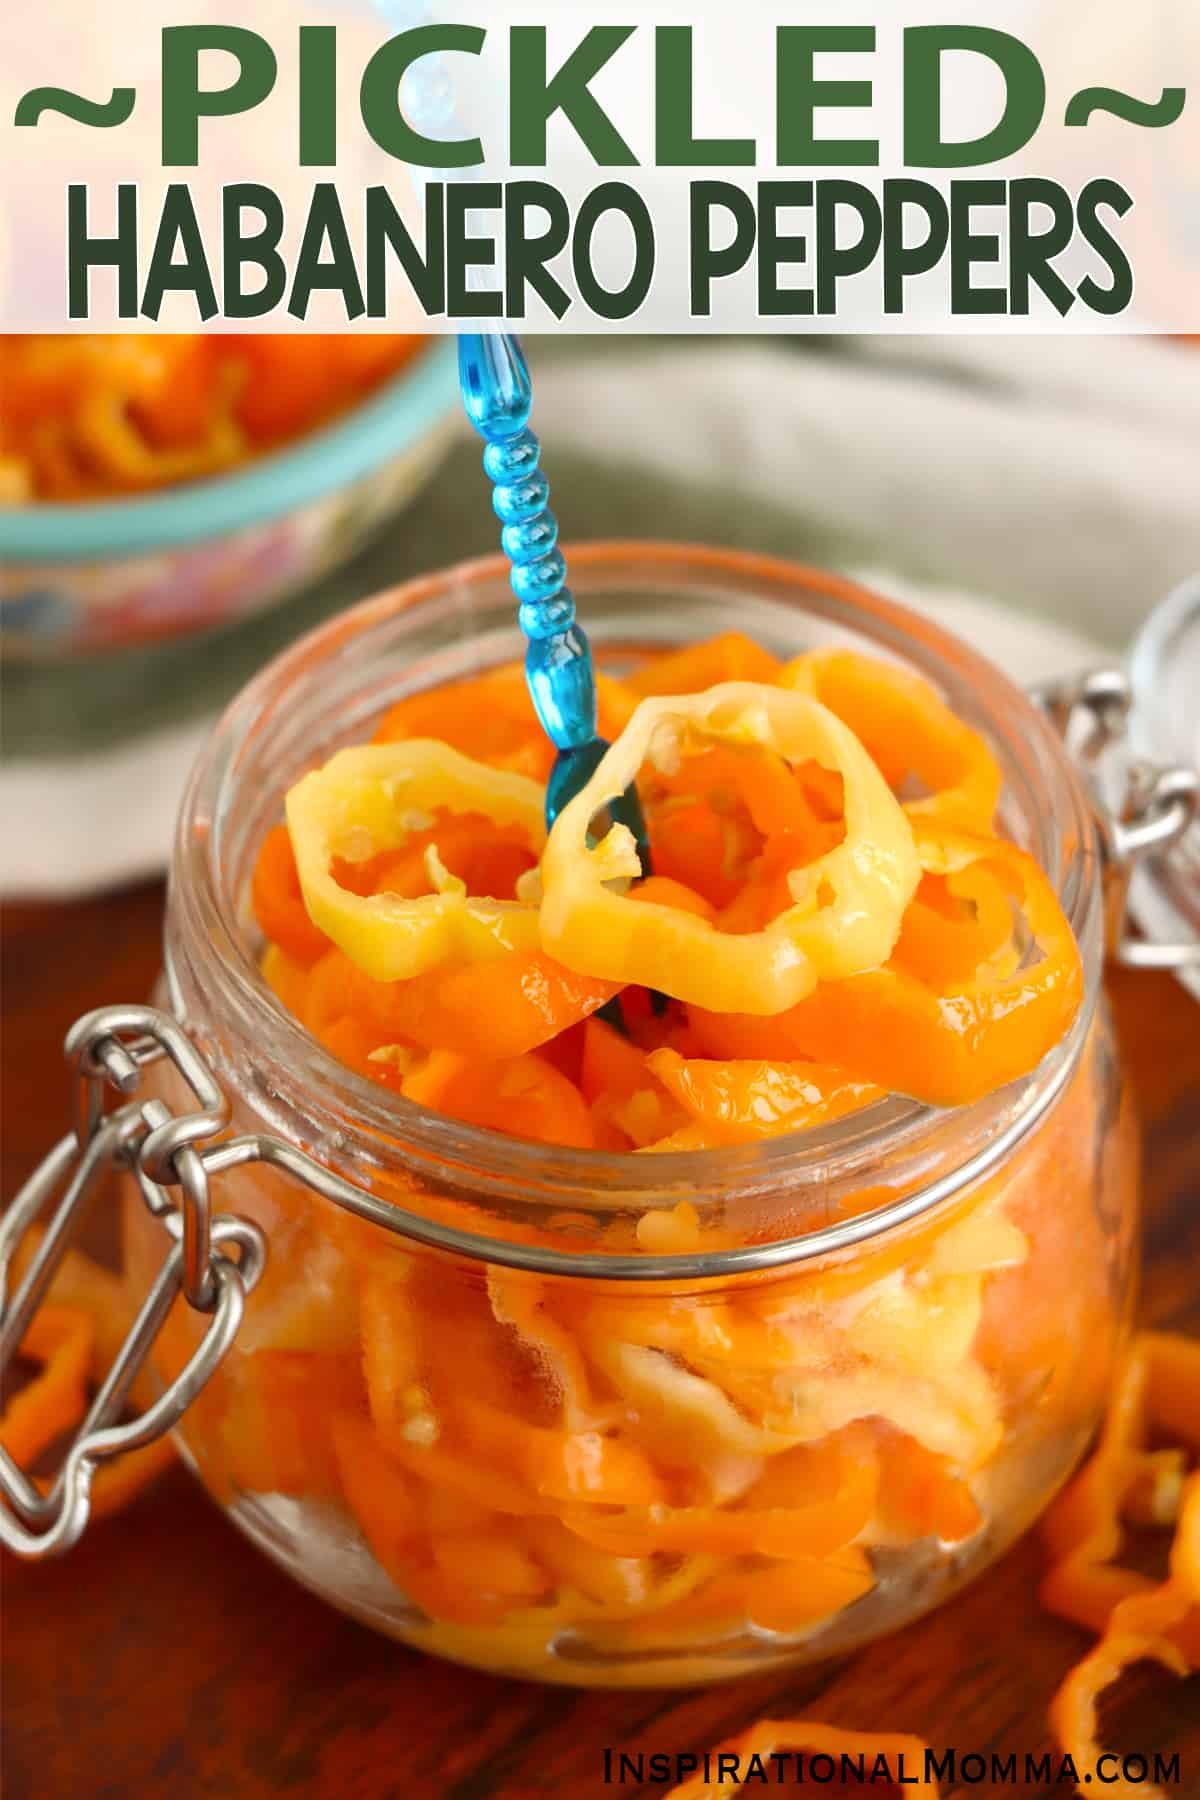
Easy Steps: How To Pickle Habanero Peppers Like A Pro
Craving a fiery kick to add to your dishes? Learn how to pickle habanero peppers! Tantalize your taste buds with the perfect blend of heat and tanginess. Grab your fresh habaneros and get ready to preserve their vibrant flavor. It’s time to elevate your culinary creations effortlessly. Let’s dive into the simple yet delicious process of how to pickle habanero peppers.

How to Pickle Habanero Peppers
Welcome, spice lovers and culinary enthusiasts! Today, we are diving into the wonderful world of pickling habanero peppers. If you enjoy a fiery kick in your dishes, habaneros are the perfect choice. Pickling these vibrant peppers not only enhances their flavor but also preserves them for future use. In this comprehensive guide, we will walk you through the step-by-step process of pickling habanero peppers right in your own kitchen. Let’s get started!
The Magic of Pickled Habanero Peppers
Before we jump into the pickling process, let’s talk about why pickled habanero peppers are such a fantastic addition to your culinary repertoire. These fiery peppers pack a punch of heat and flavor that can elevate a wide range of dishes. By pickling habaneros, you can mellow out their intensity slightly while infusing them with tangy and savory notes.
Whether you enjoy adding a spicy kick to sandwiches, tacos, salads, or even cocktails, pickled habanero peppers are a versatile ingredient that can take your recipes to the next level. Plus, pickling is a great way to extend the shelf life of these peppers, allowing you to enjoy their bold flavors long after the growing season has ended.
Choosing the Right Peppers
When it comes to pickling habanero peppers, selecting the right peppers is key to achieving the perfect balance of heat and flavor. Look for firm, fresh habaneros with vibrant orange or red colors. Avoid peppers that are soft, wrinkled, or blemished, as they may affect the quality of the final product.
Keep in mind that the level of heat in habanero peppers can vary, so it’s a good idea to taste a small piece before pickling to gauge their spiciness. If you prefer a milder option, you can remove the seeds and membranes from the peppers before pickling them.
Ingredients You’ll Need:
Before you embark on your pickling adventure, make sure you have the following ingredients on hand:
Ingredients:
- 2 lbs habanero peppers
- 2 cups white vinegar
- 2 cups water
- 3 cloves of garlic, crushed
- 2 tbsp sugar
- 2 tbsp salt
- Optional: spices like peppercorns, mustard seeds, or bay leaves for added flavor
Step-by-Step Pickling Guide
Now that you have your ingredients ready, it’s time to pickle some habanero peppers! Follow these simple steps to create your own batch of tangy and spicy pickled peppers:
Step 1: Prepare the Peppers
Wash the habanero peppers thoroughly under running water. Wear gloves to protect your skin from the spicy oils. Slice the peppers into rings or chunks, depending on your preference. If you want a milder flavor, you can remove the seeds and membranes from the peppers.
Step 2: Prepare the Pickling Liquid
In a saucepan, combine the white vinegar, water, crushed garlic, sugar, salt, and any optional spices you’d like to include. Bring the mixture to a boil, then reduce the heat and simmer for 5-10 minutes to allow the flavors to meld together.
Step 3: Pack the Peppers
Place the sliced habanero peppers into clean, sterilized jars. Pour the hot pickling liquid over the peppers, making sure they are fully submerged. Leave a half-inch of headspace at the top of the jars to allow for expansion during the pickling process.
Step 4: Seal and Store
Wipe the rims of the jars with a clean, damp cloth to ensure a good seal. Place the lids on the jars and tighten them securely. Allow the jars to cool to room temperature before transferring them to the refrigerator. Let the peppers pickle for at least 24 hours before enjoying them.
Ways to Enjoy Pickled Habanero Peppers
Now that you have a batch of delicious pickled habanero peppers ready to go, the possibilities are endless! Here are some creative ways to enjoy your pickled peppers:
1. Tacos and Burritos:
Add a tangy and spicy kick to your favorite Mexican dishes by topping them with pickled habanero peppers.
2. Sandwiches and Wraps:
Elevate your sandwiches and wraps by layering in some pickled habanero peppers for a burst of flavor.
3. Salads:
Toss pickled habanero peppers into salads for a zesty twist that will liven up your greens.
4. Charcuterie Boards:
Include pickled habanero peppers on your charcuterie boards for a colorful and flavorful addition to your spread.
5. Cocktails:
Add a spicy kick to your cocktails by garnishing them with pickled habanero peppers for a unique twist.
Congratulations! You’ve successfully pickled your own batch of habanero peppers and unlocked a world of flavor possibilities. Whether you’re a seasoned pickling pro or trying your hand at pickling for the first time, the process of pickling habanero peppers is a rewarding culinary adventure that will spice up your meals in more ways than one. So, grab a jar of pickled habanero peppers and let your taste buds dance with delight!
Remember, feel free to experiment with different spices and flavor combinations to customize your pickled peppers to suit your taste preferences. Enjoy the heat, savor the tang, and get creative in the kitchen with your newfound pickling skills. Happy pickling!
How to Make Pickled Habaneros | The Frugal Chef
Frequently Asked Questions
How do I prepare habanero peppers for pickling?
To pickle habanero peppers, start by washing the peppers thoroughly. Then, slice them into your desired size, ensuring to wear gloves to protect your skin from the spicy oils. Remove the seeds if you prefer milder pickled peppers.
What ingredients do I need to pickle habanero peppers?
For pickling habanero peppers, you will need habanero peppers, vinegar (like white vinegar or apple cider vinegar), water, salt, sugar, and optional spices like garlic, peppercorns, or bay leaves for added flavor.
What is the best method for pickling habanero peppers?
The best method for pickling habanero peppers is to create a pickling brine by heating vinegar, water, salt, and sugar until the salt and sugar dissolve. Pack the sliced habanero peppers into sterilized jars, pour the hot brine over the peppers, and seal the jars. Allow them to cool before refrigerating.
How long do pickled habanero peppers need to sit before eating?
Pickled habanero peppers taste best when they have had time to pickle in the brine. Allow the pickled peppers to sit in the refrigerator for at least 1-2 weeks before consuming them. The longer they sit, the more flavorful they will become.
Final Thoughts
In conclusion, pickling habanero peppers is a straightforward process that results in a delicious and versatile condiment. Start by preparing the peppers, slicing them as desired. Next, bring a brine solution to a boil and pour it over the peppers in a sterilized jar. Seal the jar and let it sit for a few days to allow the flavors to develop. Experiment with different spices and vinegar types to customize your pickled habanero peppers to suit your taste preferences. Enjoy the spicy kick and tangy flavor they add to your favorite dishes!