


Efficient Guide: How To Load Motorcycle In Truck
To load a motorcycle in a truck safely and efficiently, follow these practical steps. Start by ensuring the truck bed is clear of any debris or obstacles. Next, use a sturdy loading ramp to guide the motorcycle into the truck. Once the motorcycle is in place, secure it properly with tie-down straps. Remember, knowing how to load a motorcycle in a truck is not just about convenience but also crucial for ensuring both the bike and the truck are kept safe during transportation.

How to Load a Motorcycle in a Truck
Transporting your motorcycle in a truck can be a convenient and efficient way to get your bike to a workshop, race track, or simply to take it along on a road trip. However, loading a motorcycle into a truck requires careful planning and execution to ensure the safety of your bike and those around you. In this comprehensive guide, we will walk you through the step-by-step process of loading a motorcycle in a truck like a pro!
Step 1: Prepare Your Truck and Loading Equipment
Before you begin loading your motorcycle, make sure your truck is parked on a level surface and that the loading ramp is securely attached to the truck bed. Check the tie-down straps and ensure they are in good condition and capable of securing your motorcycle during transit. It’s also a good idea to have a friend or family member assist you in loading the bike for added safety.
Step 2: Position the Truck and Ramp
Position your truck in a way that allows for a smooth and straight entry for your motorcycle onto the loading ramp. Make sure there are no obstacles or obstructions that could hinder the loading process. Extend the loading ramp fully and secure it in place to provide a stable platform for your bike.
Step 3: Prepare Your Motorcycle
Prior to loading your motorcycle, ensure that the bike is in neutral gear and that the handlebars are straight. If your bike has a center stand, engage it to provide additional stability during the loading process. Double-check the tire pressure and ensure that the brakes are functioning properly.
Step 4: Push or Ride the Motorcycle onto the Ramp
Depending on the weight of your motorcycle and your comfort level, you can either push the bike up the ramp or ride it up slowly and steadily. If you choose to ride the bike, make sure to maintain a steady speed and keep the bike centered on the ramp to prevent tipping.
Step 5: Secure the Motorcycle in the Truck
Once your motorcycle is in the truck bed, use high-quality tie-down straps to secure the bike in multiple locations. Attach the straps to solid anchor points on the truck bed to prevent the bike from shifting during transit. Make sure the straps are tight and secure, but not overly tight to avoid damaging the bike’s suspension.
Step 6: Check and Double-Check
Before hitting the road, double-check that all straps are securely fastened and that the motorcycle is stable in the truck bed. Test the bike by gently rocking it side-to-side to ensure it is properly secured. It’s also a good idea to check the tie-down straps periodically during your journey to ensure they remain tight and secure.
Additional Tips for Loading a Motorcycle in a Truck
Here are some additional tips to make the loading process smoother and safer:
Use a Loading Assistant:
Having a friend or family member assist you during the loading process can make it easier and safer, especially if you encounter any difficulties.
Practice Makes Perfect:
If you are new to loading a motorcycle in a truck, practice in a safe and controlled environment before attempting it on your own. This will help you gain confidence and ensure a smooth loading process.
Invest in Quality Tie-Down Straps:
High-quality tie-down straps are essential for securing your motorcycle during transit. Make sure to invest in straps that are designed for motorcycles and can withstand the weight and vibrations during travel.
Check Local Regulations:
Before transporting your motorcycle in a truck, make sure to check local regulations and requirements for securing the bike. Some areas may have specific guidelines for transporting motorcycles, so it’s important to comply with these regulations to avoid any issues.
By following these step-by-step instructions and tips, you can safely and effectively load your motorcycle in a truck and transport it to your desired destination with ease. Remember to always prioritize safety and take your time to ensure that your bike is securely fastened for a smooth journey!
Happy riding and safe travels!
How To Load a Motorcycle Into a Truck at RevZilla.com
Frequently Asked Questions
How can I safely load a motorcycle into a truck?
To safely load a motorcycle into a truck, start by ensuring the truck’s loading ramp is securely in place and at a suitable angle for the bike. Next, carefully push or ride the motorcycle up the ramp while applying the brakes gently. Use tie-down straps to secure the motorcycle in an upright position, making sure to fasten them to sturdy anchor points in the truck bed. Double-check all connections before driving off to ensure the motorcycle is stable during transportation.
What are the key steps to follow when loading a motorcycle into a truck alone?
If you are loading a motorcycle into a truck alone, consider using a ramp designed for motorcycle loading to make it easier. Before loading, ensure the truck is parked on a flat surface and the ramp is secure. You may need to use a combination of pushing and engine power to get the motorcycle up the ramp safely. Take your time, use caution, and consider employing a spotter to assist you if possible.
Are there any specific safety precautions to keep in mind while loading a motorcycle into a truck?
When loading a motorcycle into a truck, prioritize safety by wearing appropriate gear, such as gloves and sturdy footwear, to protect yourself during the process. It’s crucial to ensure the loading ramp is stable and secure before attempting to load the motorcycle. Always keep the motorcycle under control and avoid sudden movements that could lead to accidents or damage. Regularly inspect the tie-down straps and connections to confirm they are secure throughout the journey.
Final Thoughts
To load a motorcycle in a truck, follow these steps: secure the truck ramp, align the motorcycle with the ramp, and then carefully push or ride the motorcycle onto the truck bed. Use tie-down straps to secure the motorcycle in place and ensure it is stable during transport. Remember to double-check all connections before hitting the road. Loading a motorcycle in a truck requires attention to detail and careful execution to ensure a safe and successful transport.

Step-By-Step Guide: How To Write A Check For $400
Writing a check for $400 is a simple yet essential task that many people may encounter. To do so, start by writing the current date on the top right corner. Next, write the recipient’s name on the “Pay to the order of” line and then the amount in both words and numbers to avoid any confusion. Ensure to sign the check at the bottom right corner. Mastering the art of writing a check for $400 ensures smooth financial transactions and organization in your personal finances. Let’s dive into the details!

How to Write a Check for $400
Introduction
Writing a check may seem like an outdated concept in today’s digital world, but it is still a valuable skill to have. Whether you are paying bills, making a donation, or simply transferring money, knowing how to write a check properly is essential. In this guide, we will walk you through the step-by-step process of writing a check for the specific amount of $400.
Why Write a Check for $400?
Before diving into the details of how to write a check for $400, it’s important to understand the significance of this specific amount. $400 can represent different things to different people. It could be the amount needed to cover a monthly utility bill, pay for a special gift, or contribute to a savings goal. Regardless of the reason, having the ability to write a check for $400 gives you the freedom and flexibility to manage your finances effectively.
Step 1: Fill in the Date Line
The first step in writing a check for $400 is to fill in the date line. This is usually located at the top right-hand corner of the check. Writing the date ensures that the check is valid and can be processed by the bank. Be sure to use the correct format, such as “MM/DD/YYYY.”
Step 2: Write the Payee’s Name
Next, you will need to write the name of the person or organization you are paying $400 to on the “Pay to the Order of” line. Make sure to write the name clearly and accurately to avoid any confusion when the check is deposited.
Step 3: Fill in the Amount in Numbers
In this step, you will write the amount of $400 in numbers on the appropriate line next to the dollar sign. Be sure to place the decimal point where it belongs, even if there are no cents involved in this particular transaction.
Step 4: Write the Amount in Words
After writing the amount in numbers, the next step is to write it out in words on the line underneath the payee’s name. Remember to start with “Four Hundred” followed by the word “dollars.” This step is crucial to prevent any alterations to the numerical amount.
Step 5: Memo Line (Optional)
The memo line is an optional field on the check where you can include a brief description of the purpose of the payment. For example, you could write “Birthday gift” or “Payment for services.” While this step is not mandatory, it can help both you and the payee keep track of the transaction.
Step 6: Sign the Check
The final step in writing a check for $400 is to sign it at the bottom right-hand corner. Your signature serves as a form of authorization and confirms that you have authorized the payment. Without your signature, the check will not be valid.
Security Tips for Writing Checks
1. Keep Your Checks Secure
It’s crucial to keep your checks in a safe and secure location to prevent unauthorized use. Avoid leaving blank checks lying around or sharing your checkbook with others.
2. Double-Check Your Entries
Before finalizing the check, double-check all the details you have written, including the date, payee’s name, and the amount in both numbers and words. Any errors can lead to complications when processing the check.
3. Record Your Transactions
Keeping a record of all your check transactions can help you monitor your finances and track your spending. Make a note of the payee, amount, and purpose of each check you write.
4. Use Secure Payment Methods
Consider using secure payment methods, such as electronic transfers or online bill pay, for recurring payments. This can help reduce the risk of check fraud and ensure timely transactions.
In conclusion, knowing how to write a check for $400 is a valuable skill that can come in handy in various financial situations. By following the steps outlined in this guide and implementing the security tips provided, you can write checks confidently and securely. Remember, practice makes perfect, so feel free to write out a few practice checks to get comfortable with the process. Writing a check may be a traditional method of payment, but it remains a useful tool in managing your finances effectively.
How To Write A Check
Frequently Asked Questions
How do I write a check for $400?
To write a check for $400, start by writing the current date on the top right corner of the check. Next, write “Four Hundred” in the payment amount section. Make sure to include the dollar sign ($) to indicate the currency. Then, write “400.00” in the box provided. Finally, sign the check at the bottom right corner and add any necessary memos in the memo line.
Can I write a check for $400 without cents?
Yes, you can write a check for $400 without including any cents. In the payment amount section, simply write “Four Hundred.” However, make sure to accurately fill out the box provided for the numeric amount by writing “400.00” to avoid any confusion or errors.
What should I do if I make a mistake when writing a $400 check?
If you make a mistake when writing a check for $400, do not attempt to correct it by scribbling or using correction fluid. Instead, void the check and start over with a new one to ensure clarity and accuracy. Remember to securely destroy the voided check to prevent misuse.
Final Thoughts
When writing a check for $400, start by clearly writing the recipient’s name and the amount in both numbers and words. Include the purpose of the payment on the memo line if necessary. Be sure to sign the check at the bottom to authorize the transaction. To write a check for $400 correctly, follow these simple steps for a seamless payment process. Remember, accuracy is key when writing a check for $400.

How Long Does A Fill In Take: The Complete Guide
How long does a fill in take? A typical fill in session can last anywhere from 20 to 45 minutes, but the exact duration depends on various factors. From the type of service you’re getting to the intricacy of the design, each aspect plays a role in determining the time frame. To demystify the process and offer insights into what you can expect, let’s delve into the factors that influence how long does a fill in take and how you can make the most of your appointment.

How Long Does a Fill In Take: Your Ultimate Guide
Welcome, young quiz enthusiasts! Have you ever wondered how long it takes to complete a fill-in puzzle? Fill-ins, also known as fill-in-the-blank puzzles, are a fun and challenging way to test your vocabulary and logic skills. In this guide, we will explore the ins and outs of fill-ins and give you some tips on how to solve them quickly and efficiently. So, grab your pencil and let’s dive in!
Understanding Fill-In Puzzles
Before we get into how long it takes to complete a fill-in puzzle, let’s first understand what these puzzles are all about. Fill-in puzzles consist of a grid with empty squares that you need to fill in with words or phrases based on the provided clues. The goal is to fill in all the squares correctly to reveal a hidden quote or message.
Fill-ins are a great way to improve your vocabulary, spelling, and critical thinking skills. They come in various difficulty levels, from easy to challenging, so there’s always a puzzle that suits your skill level. Now, let’s move on to the main question: how long does it take to solve a fill-in puzzle?
Factors Affecting the Time to Complete a Fill In
The time it takes to complete a fill-in puzzle can vary depending on several factors. Here are some key elements that can influence how long it takes to solve a fill in:
1. Puzzle Difficulty
The difficulty level of the fill-in puzzle plays a significant role in determining how long it will take to complete. Easy puzzles with simple clues and common words can be solved quickly, while challenging puzzles with complex clues and obscure words may take more time.
2. Your Vocabulary and Spelling Skills
Your vocabulary and spelling skills also impact how long it takes to solve a fill-in puzzle. The more words you know and the better you are at spelling them correctly, the faster you’ll be able to fill in the grid.
3. Focus and Concentration
Another factor that affects the time to complete a fill-in puzzle is your focus and concentration. If you can stay focused and avoid distractions while working on the puzzle, you’ll be able to solve it more quickly.
Tips for Solving Fill-In Puzzles Quickly
Now that you know the factors that can influence how long it takes to complete a fill-in puzzle, here are some tips to help you solve them quickly and efficiently:
1. Start with the Easy Words
Scan the clues and fill in the easy words first. This will give you a head start and help you build momentum as you work on the more challenging parts of the puzzle.
2. Use Crossword Puzzle Techniques
If you’re familiar with crossword puzzles, you can apply some of the same techniques to fill-ins. Look for hints in the clues, such as tense or context, to help you fill in the correct words.
3. Check Your Answers Twice
Once you’ve completed the puzzle, go back and double-check all your answers. This will help you catch any mistakes or typos you might have made along the way.
In conclusion, the time it takes to complete a fill-in puzzle can vary depending on the puzzle’s difficulty, your skills, and your level of focus. By following the tips outlined in this guide, you can improve your speed and accuracy when solving fill-in puzzles. So, next time you tackle a fill-in puzzle, remember to stay focused, start with the easy words, and double-check your answers. Happy puzzling!
There you have it, young wordsmiths! The ultimate guide on how long it takes to complete a fill-in puzzle. We hope you’ve found this information helpful and that it inspires you to tackle more fill-ins in the future. Keep sharpening those brain cells and happy puzzling!
Steps the dentist takes to fill YOUR cavity. #cavity #dentist #filling
Frequently Asked Questions
How long does a fill-in procedure typically take?
The duration of a fill-in procedure can vary depending on the extent of work needed and the individual’s specific needs. On average, a fill-in appointment usually takes around 30 to 60 minutes to complete.
Can the time needed for a fill-in be affected by the condition of my nails?
Yes, the condition of your nails can influence the duration of the fill-in procedure. If your nails require more extensive filing, shaping, or repairs, it may take longer to complete the fill-in process.
Are there factors that could speed up or prolong the time required for a fill-in?
Several factors can impact the time needed for a fill-in. Key factors include the skill level of the nail technician, the complexity of the design or style chosen, any additional nail services requested, and the overall health and condition of your natural nails.
Is it advisable to schedule additional time for a fill-in appointment to accommodate any unexpected delays?
It’s generally a good idea to allocate some extra time for your fill-in appointment, especially if you are getting intricate designs or if your nails require significant repairs. By allowing for flexibility in your schedule, you can ensure that the technician has ample time to provide quality service without feeling rushed.
Final Thoughts
In conclusion, a fill-in appointment typically takes around 30 minutes. The time may vary depending on the complexity of the filling and the dentist’s schedule. Patients can expect the process to be quick and efficient, ensuring minimal disruption to their day. Ultimately, understanding how long does a fill-in take can help individuals better plan their dental visits.
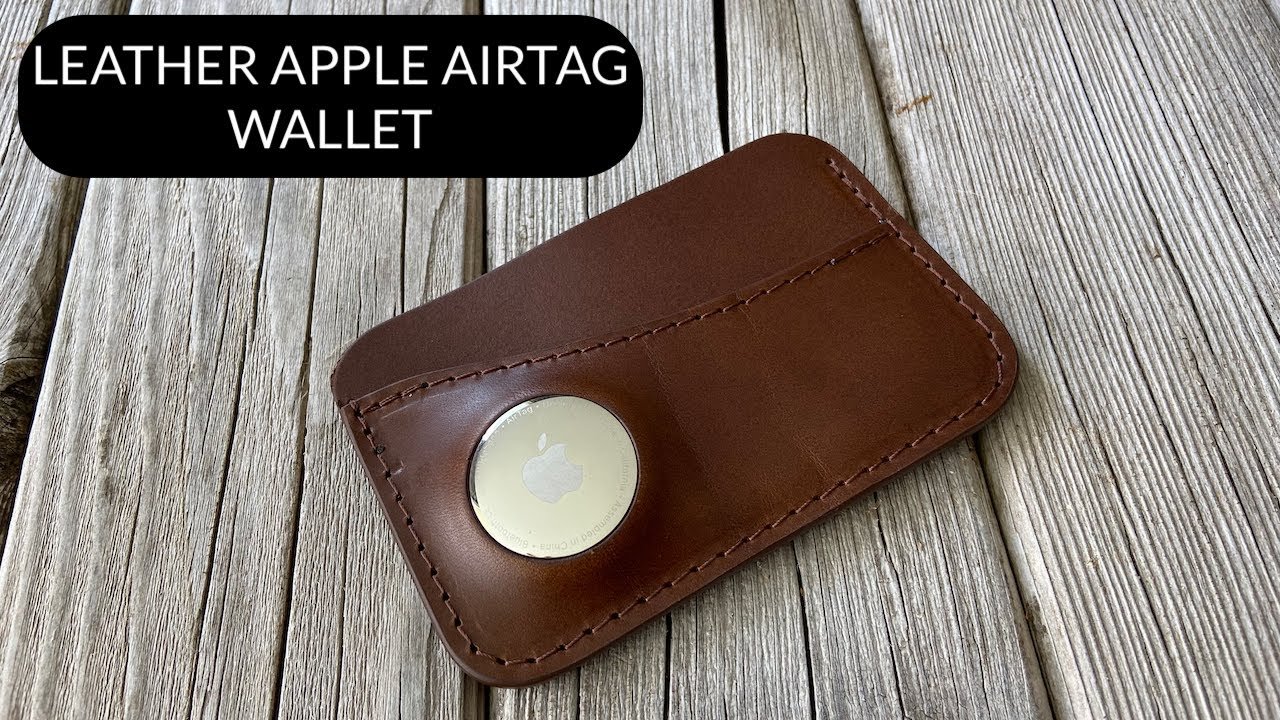
Secure Your Wallet: How To Attach Airtag Effortlessly
Attaching your AirTag to your wallet is a quick and simple process. Start by securing the AirTag inside your wallet. Next, connect the AirTag to the loop or holder using a keyring or adhesive. Now, your wallet is trackable and easily locatable in case it gets misplaced. Enhance the security of your belongings effortlessly by following these easy steps on how to attach AirTag to wallet.

How to Attach AirTag to Wallet
Have you ever found yourself frantically searching for your wallet, only to realize it’s been misplaced? With Apple’s innovative AirTag technology, you can now easily track and locate your wallet with just a few simple steps. In this guide, we will walk you through how to attach an AirTag to your wallet securely, ensuring you never lose track of it again.
What is an AirTag?
Before we dive into the process of attaching an AirTag to your wallet, let’s first understand what an AirTag is. An AirTag is a small, lightweight tracking device designed by Apple to help you find and keep track of your belongings using the Find My app on your iPhone or iPad.
Why Attach an AirTag to Your Wallet?
Attaching an AirTag to your wallet provides an added layer of security and convenience. By connecting your AirTag to your wallet, you can easily locate it if it goes missing. Whether your wallet slips between couch cushions or gets left behind at a restaurant, the AirTag will help you pinpoint its exact location.
Steps to Attach AirTag to Your Wallet
Step 1: Prepare Your AirTag
The first step in attaching an AirTag to your wallet is to prepare the AirTag itself. Make sure your AirTag is powered on by removing the plastic tab that covers the battery. You will hear a sound indicating that the AirTag is active and ready to be paired with your device.
Step 2: Open the Find My App
Next, open the Find My app on your iPhone or iPad. This app is where you will be able to pair your AirTag with your device and customize its settings.
Step 3: Add New Item
Within the Find My app, tap on the “Add New Item” option. Select “AirTag” from the list of available devices. Follow the on-screen instructions to pair your AirTag with your device.
Step 4: Attach AirTag to Your Wallet
Once your AirTag is successfully paired with your device, it’s time to attach it to your wallet. There are a few different methods you can use to secure the AirTag to your wallet:
Method 1: Inserting AirTag into Wallet Pocket
If your wallet has a dedicated pocket or compartment, you can simply slide the AirTag into this pocket. Make sure the AirTag is positioned securely and won’t easily fall out.
Method 2: Using an AirTag Holder
Alternatively, you can purchase an AirTag holder specifically designed for wallets. These holders come in various styles and designs, allowing you to attach the AirTag to your wallet in a secure and stylish way.
Method 3: Using a Keyring
Another option is to attach the AirTag to your wallet using a keyring. Simply loop the keyring through the opening on the AirTag and then attach it to a secure area on your wallet.
Tips for Securely Attaching AirTag to Your Wallet
When attaching your AirTag to your wallet, consider the following tips to ensure it is securely attached:
- Choose a secure attachment method that works best for your wallet.
- Avoid blocking any essential compartments or slots in your wallet.
- Regularly check the attachment to ensure the AirTag is still securely in place.
Attaching an AirTag to your wallet is a simple yet effective way to prevent the stress and inconvenience of losing such an essential item. By following the steps outlined in this guide and utilizing the tips provided, you can enjoy the peace of mind that comes with knowing your wallet is always within reach.
Take advantage of Apple’s innovative AirTag technology and keep track of your wallet with ease. With just a few simple steps, you can attach an AirTag to your wallet and never have to worry about misplacing it again.
Now that you have the knowledge and tools to attach an AirTag to your wallet, go ahead and give it a try. You’ll thank yourself the next time you misplace your wallet but can easily locate it with the help of your trusty AirTag.
Remember, a securely attached AirTag means a peace of mind knowing your wallet is always by your side.
How to set up and use your AirTag | Apple Support
Frequently Asked Questions
How do I attach an AirTag to my wallet?
To attach an AirTag to your wallet, simply place the AirTag inside your wallet or secure it to the outside using a key ring or adhesive backing. Make sure the AirTag is securely attached to your wallet to prevent it from getting lost.
Can I use a key ring to attach the AirTag to my wallet?
Yes, you can use a key ring to securely attach the AirTag to your wallet. Simply loop the key ring through the small opening on the AirTag and then attach it to a secure area on your wallet. This method ensures that the AirTag stays in place and is easily accessible.
Is it recommended to use adhesive backing to attach the AirTag to my wallet?
Using adhesive backing to attach the AirTag to your wallet is another option. You can stick the AirTag securely to the outside of your wallet using the adhesive backing. Ensure the surface is clean and dry before applying the adhesive for a strong attachment.
Final Thoughts
Attaching your AirTag to your wallet is a simple and effective way to keep track of your valuables. Simply slide the AirTag into your wallet’s designated slot or use a key ring holder for quick access. This ensures you can easily locate your wallet using the Find My app. Securely attaching your AirTag to your wallet provides peace of mind and added security. Remember, how to attach AirTag to wallet is an essential step in safeguarding your belongings.
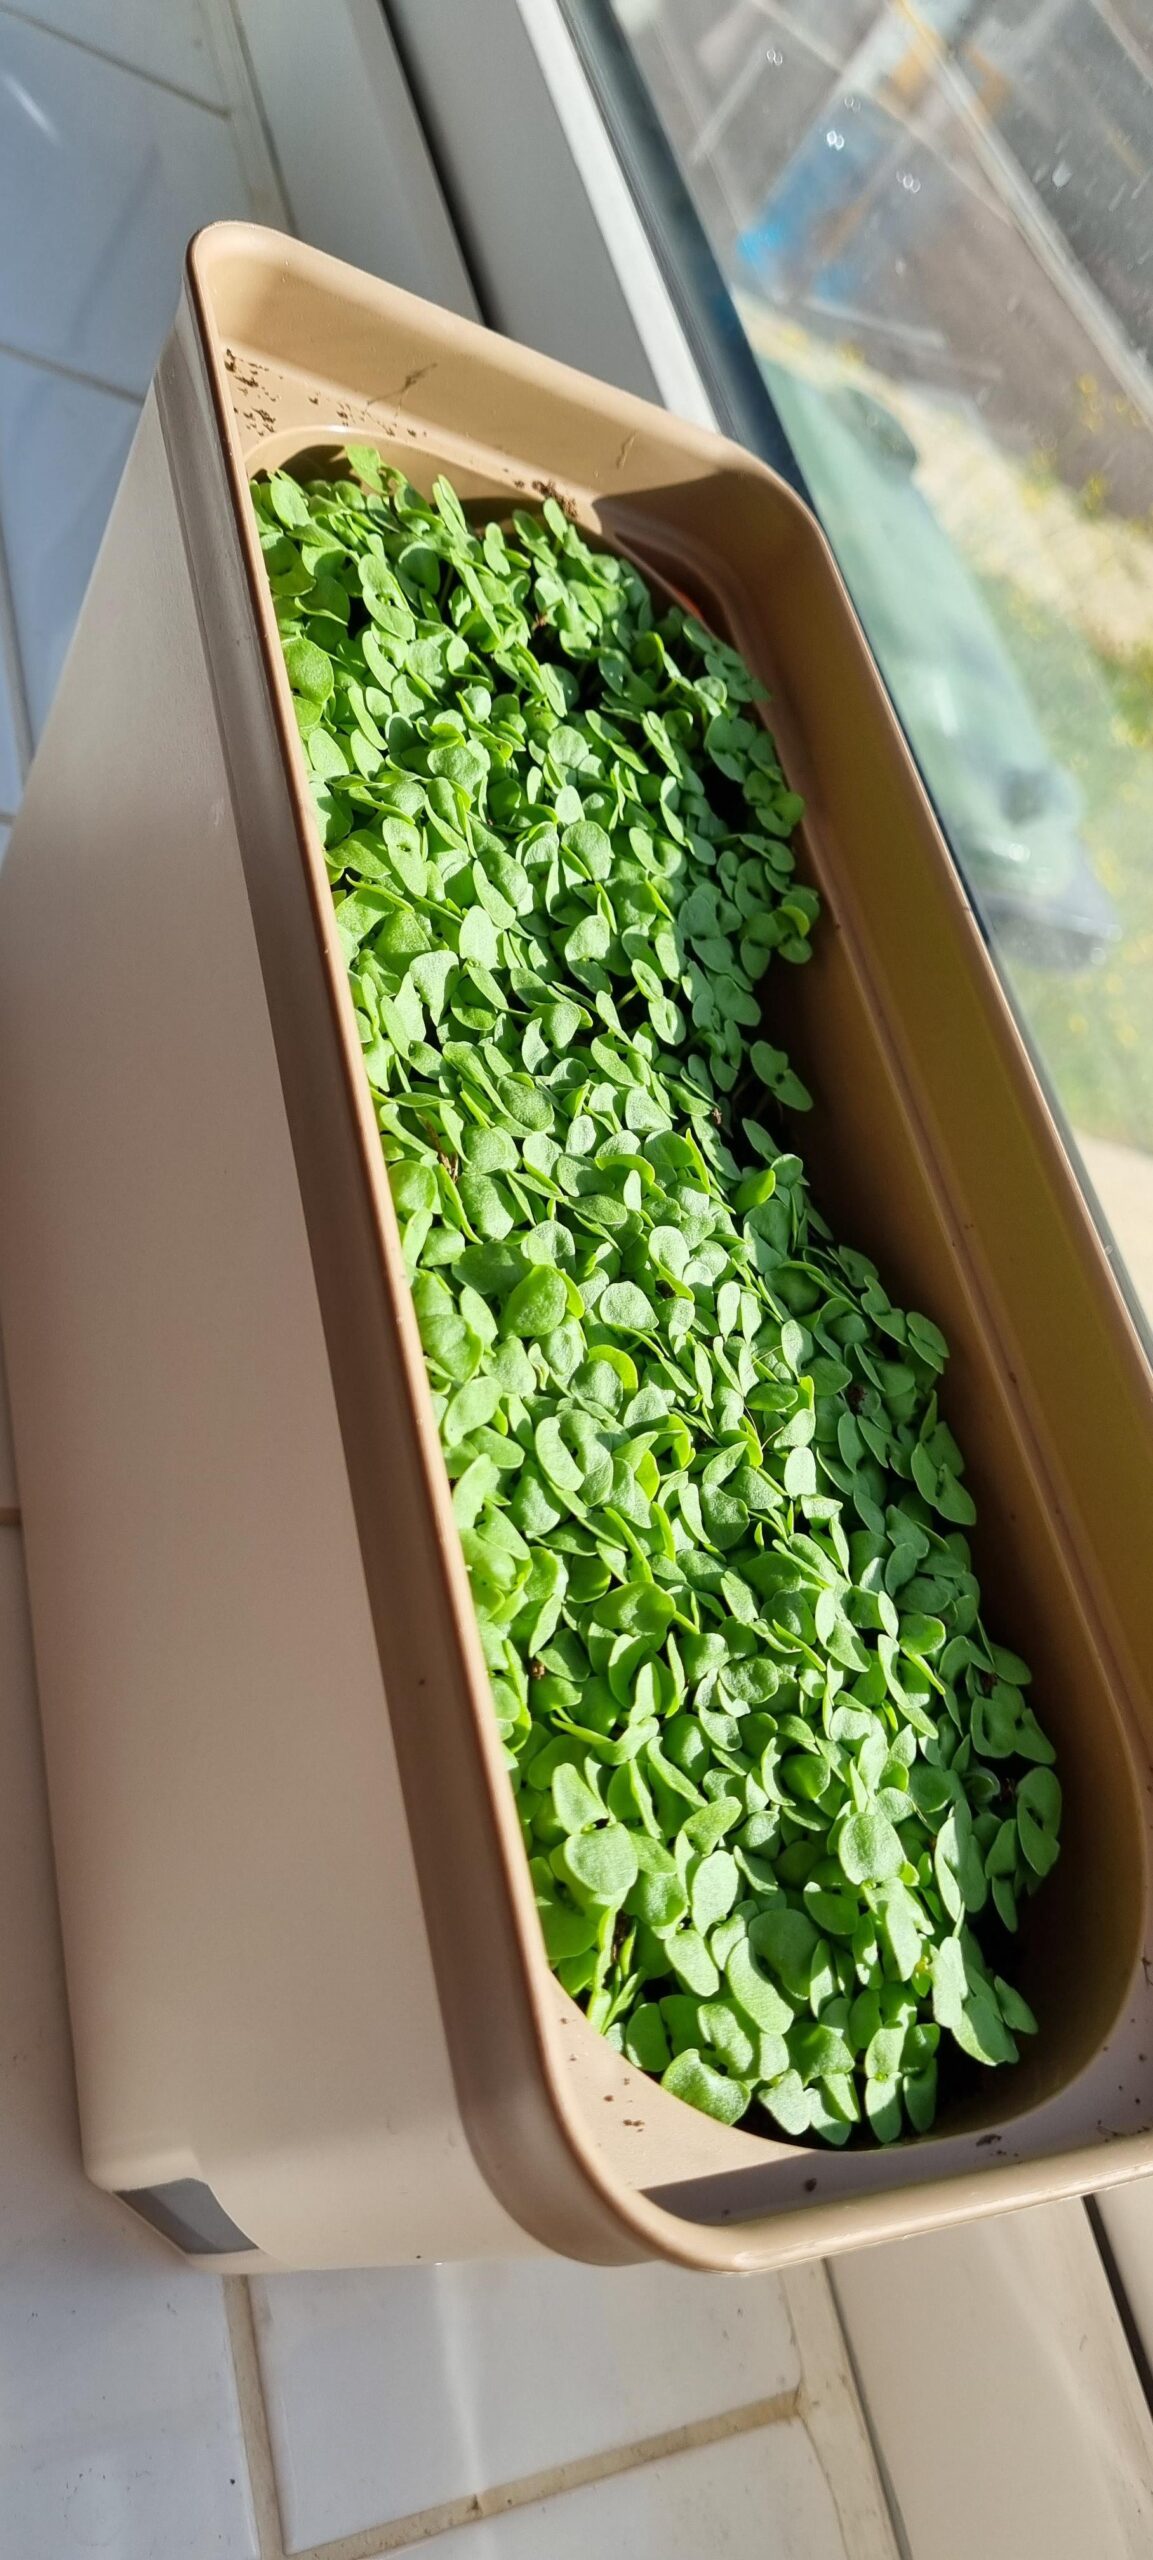
Optimal Basil Seed Quantity: How Many Basil Seeds Per Hole
Planting basil seeds with precision can significantly enhance your harvest. To answer the question, “how many basil seeds per hole,” it is recommended to sow 2-3 seeds per hole. This practice increases the chances of successful germination, ensuring a healthier crop. Overcrowding can lead to stunted growth, so spacing the seeds adequately is key. Let’s explore the art of planting basil seeds effectively for a thriving herb garden.

How Many Basil Seeds per Hole: A Complete Guide
Welcome, young gardeners, to our ultimate guide on how many basil seeds to plant per hole! Basil is a fragrant herb that can add a burst of flavor to your culinary creations. But do you know the secret to growing healthy basil plants? It all starts with the right amount of seeds per hole. Let’s dive in and discover the magic number together!
The Basics of Planting Basil Seeds
Before we get into the nitty-gritty details, let’s learn the basics of planting basil seeds. Basil is a warm-weather herb that thrives in well-drained soil and plenty of sunlight. Whether you’re growing basil in a garden bed, a pot, or a container, the key to success lies in starting with quality seeds and giving them the right growing conditions.
Now, let’s talk about how many basil seeds you should plant per hole to ensure your basil plants grow strong and healthy.
Factors to Consider
When deciding how many basil seeds to plant per hole, there are a few factors to consider. These factors will help you determine the optimal number of seeds for successful germination and plant growth. Let’s take a closer look at each one:
Seed Size
One important factor to consider is the size of the basil seeds. Some basil seeds are larger than others, which can affect how many seeds you should plant per hole. Generally, larger seeds require more space to grow, so you may need to adjust the number of seeds accordingly.
Germination Rate
Another crucial factor is the germination rate of the seeds. Germination rate refers to the percentage of seeds that will sprout and grow into healthy plants. If you have seeds with a high germination rate, you may not need to plant as many seeds per hole to achieve a full crop.
Growing Conditions
The growing conditions in your garden or planting area can also impact how many basil seeds you should plant per hole. Factors such as soil quality, sunlight exposure, and watering frequency can affect the success of your basil plants. Make sure to provide the right conditions for your basil seeds to thrive.
Recommended Number of Basil Seeds per Hole
So, how many basil seeds should you plant per hole? While the exact number may vary based on the factors mentioned above, a general guideline is to plant 2-3 basil seeds per hole. This allows for some seeds not to germinate and ensures that you will have at least one healthy basil plant per hole.
Once the seeds have sprouted and grown a few inches tall, you can thin out the weaker seedlings, leaving only the strongest basil plant in each hole. Thinning out the seedlings will give the remaining plant more space, nutrients, and sunlight to thrive.
Tips for Successful Basil Seed Planting
To help your basil seeds grow into healthy plants, here are some tips to keep in mind:
Watering
Make sure to water your basil seeds regularly, keeping the soil moist but not waterlogged. Basil plants prefer consistent moisture, so check the soil daily and water when needed.
Light
Provide your basil plants with plenty of sunlight, at least 6-8 hours per day. If you’re growing basil indoors, place the pots near a sunny window or under a grow light to ensure adequate light exposure.
Fertilization
Once your basil plants have established themselves, you can fertilize them with a balanced fertilizer to promote healthy growth. Follow the instructions on the fertilizer package for best results.
Now that you’ve learned the ins and outs of how many basil seeds to plant per hole, you’re ready to grow your own delicious basil at home. Remember to consider factors like seed size, germination rate, and growing conditions when deciding how many seeds to plant. By following our tips and guidelines, you’ll be on your way to a bountiful basil harvest in no time!
Happy planting, young gardeners!
Start Basil from Seeds & Stop Buying Expensive Transplants: How to Grow Beautiful Basil Plants!
Frequently Asked Questions
Question: How many basil seeds should I plant per hole?
It is recommended to plant 2-3 basil seeds per hole to increase the chances of successful germination. Planting multiple seeds can compensate for any seeds that may not germinate.
Question: Is it necessary to thin out basil seedlings after planting multiple seeds per hole?
Yes, once the basil seedlings have grown a few inches tall, it’s essential to thin them out to allow adequate space for the remaining plants to grow. Thinning helps prevent overcrowding and ensures healthy plant development.
Question: What should I consider when deciding how many basil seeds to plant per hole?
When determining the number of basil seeds to plant per hole, consider factors such as the age of the seeds, their germination rate, and the available space in your garden or container. It’s important to strike a balance between ensuring germination success and preventing overcrowding.
Question: Can I plant just one basil seed per hole instead of planting multiple seeds?
While planting multiple basil seeds per hole is a common practice to increase the chances of successful germination, you can certainly choose to plant one seed per hole if you have high-quality seeds and prefer a more controlled planting approach. Just be prepared to provide extra care and attention to ensure the single seed germinates successfully.
Final Thoughts
In conclusion, when planting basil seeds, it is recommended to put 2-3 seeds per hole. This practice increases the chances of successful germination. Overcrowding can hinder growth, so it’s important not to plant too many seeds in one hole. By following the guideline of how many basil seeds per hole, you can ensure a healthy and thriving basil plant in your garden.

Unveiling The Truth: How Tall Is Mx Explained
MX stands tall at an impressive height of 5 feet 11 inches. Their towering presence often sparks curiosity among fans and followers, prompting the question: How tall is MX? Delving into the heights of each member unravels a fascinating dimension to the group’s dynamics. From I.M’s commanding stature to Kihyun’s endearing charm, the diverse heights of the members add a unique flair to their performances. Let’s embark on a journey to explore not just their music but also the heights that elevate MX to new heights in the world of K-pop.

The Ultimate Guide to Answering: How Tall is MX?
Exploring the Height of MX
MX, a popular K-pop group, has garnered a massive fan following around the world. Along with their exceptional talent and music, fans are always curious about various aspects of their favorite idols, including how tall they are.
Understanding Height Measurements
Before we delve into the heights of each member of MX, it’s essential to understand how height is typically measured. In most countries, including South Korea where MX originates from, height is measured in centimeters.
Meet the Members of MX
MX consists of seven talented members. Let’s take a look at the heights of each member:
Shownu
Shownu, the leader of MX, stands at an impressive height of 181 cm.
Wonho
Wonho, known for his charming personality, is 177 cm tall.
Minhyuk
Minhyuk, the energetic member, has a height of 178 cm.
Kihyun
Kihyun, with his powerful vocals, stands at 170 cm.
Hyungwon
Hyungwon, who is well-known for his visuals, is 181 cm tall.
Jooheon
Jooheon, the talented rapper of the group, is 177 cm in height.
I.M.
The youngest member of MX, I.M., has a height of 175 cm.
Comparing Heights and Fun Facts
It’s interesting to note the varying heights among the members of MX. Shownu and Hyungwon are the tallest members of the group, both standing at 181 cm, while Kihyun is the shortest at 170 cm. Despite their height differences, the members of MX have incredible chemistry both on and off the stage.
In conclusion, the members of MX each have their unique heights, contributing to the diversity and appeal of the group. Knowing their heights adds another layer of understanding and appreciation for these talented individuals who continue to captivate audiences worldwide.
So, the next time someone asks you, “How tall is MX?” you’ll be armed with the knowledge to impress them with the exact heights of each member!
Can tall drivers fit into the Mazda MX-5 Miata??
Frequently Asked Questions
How tall is MX?
The members of MX have varying heights. As of the latest data available, the tallest member of MX is approximately 6 feet (183 cm) tall, while the shortest member is around 5 feet 7 inches (170 cm) tall.
Is there a specific height range for MX members?
Yes, the heights of MX members generally range between 5 feet 7 inches (170 cm) to 6 feet (183 cm) tall. This range includes all the members of the group.
Who is the tallest member in MX?
The tallest member in MX is known to be around 6 feet (183 cm) tall, making them stand out as the tallest among all the members of the group.
What is the height of the shortest member in MX?
The shortest member in MX is approximately 5 feet 7 inches (170 cm) tall, reflecting the diversity in heights among the group’s members.
Final Thoughts
In conclusion, MX’s height is approximately 5 feet 9 inches. The group members have similar heights, with slight variations. Fans are often curious about how tall MX is, and their average height is quite standard for Korean pop idols. Knowing how tall MX is can provide fans with a better understanding of their physical presence.

How Long Does It Take For Water To Turn To Pee: Explained
“How long does it take for water to turn to pee? The answer lies in the complex journey our body puts water through once it’s consumed. From the moment water enters your system, it begins a fascinating transformation process. Our kidneys work tirelessly to filter out waste and excess water, converting it into urine. The time taken for this journey varies depending on several factors, but generally, water can be transformed into pee within a couple of hours. Let’s delve deeper into this intriguing process.”

How Long Does It Take for Water to Turn to Pee?
Welcome, curious minds! Have you ever wondered how long it takes for the water you drink to eventually become the pee you release? It’s a fascinating journey inside our bodies that involves various organs and processes. Let’s dive in and explore the answer to the intriguing question: How long does it take for water to turn to pee?
The Journey Begins: Drinking Water
It all starts with a simple act – drinking water. When you take a sip of water, it travels down your throat and into your stomach. From there, the water is absorbed into your bloodstream through the walls of your intestines. This process happens quite quickly, usually within minutes of drinking water.
Once in the bloodstream, the water is carried to every cell in your body, providing essential hydration for proper functioning. But not all the water you drink stays in your body; some of it is filtered out as waste.
Filtering Process: Kidneys at Work
Your kidneys play a vital role in filtering out waste and excess water from your bloodstream. The kidneys are like the body’s filtration system, constantly working to maintain the right balance of water and nutrients in your body.
As the water reaches your kidneys, they start the process of filtering out waste and excess water to create urine. This process involves complex mechanisms that help regulate your body’s water levels and remove toxins and byproducts from your bloodstream.
Urine Formation
Urine is primarily made up of water, but it also contains various waste products that need to be removed from your body. The kidneys filter the water and waste products, which then travel through the ureters to the bladder, where urine is stored until you’re ready to pee.
It’s important to note that the time it takes for water to turn into pee can vary depending on several factors, such as your hydration levels, kidney function, and overall health.
The Final Destination: Time to Pee!
Once your bladder is full and you get the signal from your brain that it’s time to pee, you head to the bathroom to release the urine. The act of peeing is controlled by a muscle called the sphincter, which opens to allow urine to flow out of your body.
As you pee, the water that you drank earlier has now been processed by your body and turned into urine. The color and odor of your pee can also give you clues about your hydration levels and overall health.
Factors Affecting the Process
Several factors can influence how long it takes for water to turn into pee. For example, if you’re well-hydrated, your kidneys may produce more urine, leading to more frequent trips to the bathroom. On the other hand, if you’re dehydrated, your body may hold on to more water, resulting in darker and more concentrated urine.
Other factors, such as age, diet, and medical conditions, can also impact the urine formation process. It’s essential to listen to your body and stay hydrated to ensure that your kidneys can function properly and eliminate waste efficiently.
So, to answer the burning question – how long does it take for water to turn to pee? The journey from drinking water to peeing it out can take anywhere from a few minutes to a few hours, depending on various factors. Our bodies are incredibly efficient at processing water and eliminating waste, thanks to the intricate systems in place, such as the kidneys and bladder.
Next time you take a sip of water, remember the incredible journey it takes inside your body before eventually becoming the pee you release. Stay hydrated, listen to your body, and marvel at the wonders of the human anatomy!
Thank you for joining this exploration of the water-to-pee journey. Cheers to staying hydrated and keeping our bodies happy and healthy!
How Are Water And Other Fluids Digested In The Human Body?
Frequently Asked Questions
How long does it generally take for water to be converted into urine in the body?
Once water is consumed, it typically takes about 30 minutes to 2 hours for it to be filtered by the kidneys and for the excess water to be excreted as urine. The actual time can vary depending on individual factors like hydration levels, metabolism, and overall health.
What factors can affect the speed at which water is turned into urine?
Several factors can influence the rate at which water is converted into urine, including the amount of water consumed, individual hydration levels, kidney function, and any underlying health conditions. Additionally, factors like temperature, physical activity, and medication intake can also impact the process.
Is there a specific timeframe within which water must be converted into urine?
There is no specific timeframe within which water must be turned into urine as the body continuously regulates hydration levels based on various factors. However, maintaining a regular intake of fluids throughout the day is essential to support proper kidney function and overall health.
Final Thoughts
Water typically takes about 20-30 minutes to reach the bladder after drinking. Once in the bladder, it can take anywhere from 30 minutes to 2 hours to turn into urine. So, overall, the process of water turning into pee can take around 1-3 hours. While the exact timing varies depending on factors like hydration levels and individual metabolism, understanding how long it takes for water to turn to pee can offer insights into our bodies’ natural processes.

Exploring How Many Fluid Ounces Are In A Water Bottle
Water bottles vary in size, but typically contain 16.9 fluid ounces, making them a popular choice for hydration on the go. Size matters when it comes to staying properly hydrated throughout the day, and understanding how many fluid ounces are in a water bottle can help you meet your daily water intake goals. Whether you prefer a reusable bottle or a disposable one, knowing the volume of water it holds is key to ensuring you stay hydrated wherever you go. Let’s dive into the world of water bottle sizes and how they can impact your daily hydration routine.

How Many Fluid Ounces Are in a Water Bottle
Welcome, young explorers! Have you ever wondered how much water you can drink from a water bottle? Well, today we are going to dive into the world of fluid ounces and unravel the mystery of how many fluid ounces are in a water bottle. So, grab your magnifying glass and let’s begin our adventure!
Understanding Fluid Ounces
Before we talk about water bottles, let’s first understand what fluid ounces are. A fluid ounce is a unit of volume used to measure liquids. It helps us know how much liquid something can hold, like water, juice, or milk. Think of it as a special potion that tells us how much liquid is inside a container.
When we talk about fluid ounces in a water bottle, we are trying to figure out how much water we can carry with us wherever we go. It’s like having a magical potion that keeps us hydrated and healthy!
Types of Water Bottles
Water bottles come in all shapes and sizes, just like the cups and bowls in your kitchen cabinet. There are small water bottles that fit in your lunchbox, big water bottles for sports practice, and even reusable water bottles that help protect our planet. Each type of water bottle can hold a different amount of liquid, measured in fluid ounces.
Small Water Bottles
Small water bottles, also known as mini water bottles, are usually around 8 to 12 fluid ounces. These are perfect for carrying a quick sip of water with you on a short trip or to school. They are like the tiny fairies of the water bottle world, small yet magical!
Medium-Sized Water Bottles
Medium-sized water bottles are a bit bigger and can hold between 16 to 24 fluid ounces. These are great for activities like hiking or playing in the park when you need a bit more hydration to keep you going. They are like the friendly elves, always ready to help you stay refreshed!
Large Water Bottles
Large water bottles are the giants of the water bottle kingdom, holding 32 fluid ounces or more. These bottles are perfect for long trips, sports games, or hanging out with friends at the beach. They are like the powerful wizards, keeping you hydrated through any adventure!
Choosing the Right Water Bottle
Now that you know about the different sizes of water bottles, how do you choose the right one for you? It’s essential to think about where and when you’ll be using your water bottle. If you’re going to school, a small water bottle might be perfect. If you’re going on a hike, a medium-sized bottle could be a better fit. And if you’re spending the whole day outside, a large water bottle might be just what you need!
Remember, the most important thing is to stay hydrated and take care of your body. Water is like a magical elixir that keeps us strong and energetic throughout the day. So, choose a water bottle that makes it easy for you to drink enough water every day!
Congratulations, young adventurers! You’ve now discovered the secret of how many fluid ounces are in a water bottle. Whether you prefer small, medium, or large water bottles, the most crucial thing is to drink enough water every day to keep your body happy and healthy. So, grab your favorite water bottle, fill it up with refreshing water, and embark on your next exciting journey!
Stay hydrated, stay curious, and keep exploring the wonders of the world around you. Until next time, happy sipping!
About how many cups of water are in a 16.9 FL OZ water bottle?
Frequently Asked Questions
What is the typical amount of fluid ounces in a standard water bottle?
Most standard water bottles contain 16.9 fluid ounces, which is equivalent to around 500 milliliters of water.
Are there different sizes of water bottles available based on fluid ounces?
Yes, you can find water bottles in various sizes, ranging from small sizes like 8 ounces to larger bottles that can hold up to 32 ounces of liquid.
How do I determine the number of fluid ounces in a water bottle if it’s not labeled?
If the water bottle is not labeled with the fluid ounces, you can use a measuring cup or a kitchen scale to measure the amount of liquid it can hold and convert it to fluid ounces.
Can reusable water bottles also hold the same amount of fluid ounces as disposable ones?
Reusable water bottles come in different sizes, so the amount of fluid ounces they can hold may vary. However, many reusable water bottles are designed to hold similar volumes as standard disposable water bottles.
Final Thoughts
In conclusion, it is important to know how many fluid ounces are in a water bottle to stay hydrated throughout the day. Standard water bottles typically hold 16.9 fluid ounces, providing an adequate amount of water for daily consumption. By being aware of the volume of water in each bottle, individuals can track their intake easily. Remember, ensuring you are drinking enough water each day is essential for overall health and well-being. So, grab that water bottle and stay hydrated with 16.9 fluid ounces at your disposal.

Essential Guide: How To Care For Baby Mice
Taking care of baby mice is a delicate task that requires attention and compassion. To ensure their well-being, it’s crucial to provide them with the right environment and nourishment. Baby mice need warmth, gentle handling, and a proper diet to thrive. By understanding how to take care of baby mice, you can help these tiny creatures grow into healthy adults. Join us as we explore the essential steps to nurture these adorable little beings.

How to Take Care of Baby Mice
Introduction
So, you’ve found yourself taking care of some cute baby mice, and you want to make sure they grow up healthy and happy. Baby mice, also known as pinkies or pups, require special care and attention to thrive. In this comprehensive guide, we will walk you through everything you need to know about taking care of these tiny, delicate creatures.
Setting Up Their Home
Before bringing baby mice into your home, it’s important to set up a warm and safe environment for them. A small plastic or glass aquarium with a secure lid works best as a temporary home for baby mice. Line the bottom of the tank with soft, clean bedding such as paper towels or shredded paper to keep them cozy.
Temperature Control
Baby mice are sensitive to temperature, so it’s crucial to keep their environment warm. Maintain a temperature of around 75-80°F (24-27°C) in their enclosure to ensure they stay comfortable and healthy. You can use a heat lamp or a heating pad placed under one side of the tank to create a warm spot for them to snuggle up to.
Lighting and Noise
Mice are nocturnal creatures, so it’s best to keep their living area in a quiet and dimly lit room during the day to allow them to rest. Avoid sudden loud noises or bright lights that can startle or stress out the baby mice.
Feeding Schedule
Proper nutrition is essential for the growth and development of baby mice. If you are taking care of orphaned or abandoned pups, you may need to hand-feed them using a small syringe or dropper. A specialized formula for rodent babies can be obtained from a pet store or veterinarian.
Frequency of Feeding
Baby mice need to be fed every 2-3 hours, including during the night, as they have tiny stomachs that empty quickly. Make sure the formula is at room temperature before feeding and only offer small amounts at a time to prevent overfeeding, which can lead to health issues.
Transitioning to Solid Food
As the baby mice grow, you can start introducing solid food into their diet. Soft foods like oats, fruits, and vegetables can be offered to them once they are about two weeks old. Make sure to provide fresh water in a shallow dish for them to drink from.
Handling and Socialization
It’s important to handle baby mice gently and with care to prevent injuries and stress. Slowly introduce handling by picking them up for short periods a few times a day to help them get used to human interaction. This will help them become more social and comfortable around people as they grow older.
Creating Bonding Time
Spending time with baby mice is crucial for their social development. Sit near their cage and talk to them softly to get them used to your voice. Offering them small treats like sunflower seeds or mealworms can also help build trust and create a positive association with humans.
Playtime and Enrichment
Baby mice are curious and active creatures, so providing them with toys and items to explore can help keep them engaged and stimulated. Simple items like toilet paper rolls, cardboard tubes, and small climbing structures can offer entertainment and enrichment for the baby mice.
Health and Wellness
Monitoring the health and wellness of baby mice is essential to ensure they are thriving and free from illness. Keep an eye out for any signs of distress, such as lethargy, loss of appetite, or difficulty breathing, and consult a veterinarian if you notice any concerning symptoms.
Cleaning and Hygiene
Maintaining a clean environment is crucial for the health of baby mice. Regularly clean their enclosure by removing any uneaten food, soiled bedding, and droppings to prevent the buildup of bacteria and odors. Replace the bedding at least once a week and sanitize the tank with a mild detergent.
Veterinary Care
If you notice any unusual behavior or symptoms in the baby mice, it’s important to seek veterinary care promptly. A veterinarian experienced in treating small animals like mice can provide proper diagnosis and treatment for any health issues that may arise.
Taking care of baby mice requires patience, attention to detail, and a lot of love. By providing them with a warm, safe environment, nutritious food, gentle handling, and regular health check-ups, you can ensure that these tiny creatures grow up healthy and happy. Remember, each baby mouse is unique, so observing their behavior and adapting your care routine accordingly is key to their well-being. Enjoy the journey of watching these adorable creatures grow and thrive under your care!
How to Care for Baby Mice
Frequently Asked Questions
What should I feed baby mice?
Baby mice, also known as pinkie mice, should be fed a special formula designed for neonatal rodents. This formula can be purchased at pet stores or online. It’s important to feed them every few hours, as they have high energy needs for growth and development.
How often should I clean the baby mice’s cage?
It is essential to keep the baby mice’s cage clean to prevent health issues. Clean the cage at least once a day, removing any soiled bedding and food remnants. Make sure to replace the bedding with fresh material to keep the environment hygienic.
How do I provide warmth for baby mice?
Baby mice are unable to regulate their body temperature, so they require a warm environment. Use a heating pad or a heat lamp placed at one end of their enclosure to create a gentle warmth for them. It’s crucial to monitor the temperature regularly to ensure it stays within a safe range.
Final Thoughts
Taking care of baby mice involves providing warmth, proper nutrition, and gentle handling. Keep them in a cozy environment with clean bedding and ensure they are fed a diet suitable for their age. It’s important to monitor their growth and development closely to ensure they are healthy and thriving. By following these guidelines on how to take care of baby mice, you can help them grow into strong and healthy adults.

Discover How Tall Is Maverick Baker – In-Depth Analysis
Maverick Baker stands at an impressive height of 5 feet 10 inches.
Curiosity often strikes about how tall Maverick Baker is, and today we delve into this intriguing question. As an internet sensation and established personality, his height remains a topic of interest among fans worldwide.
Join us as we explore the dimensions of this talented young influencer and uncover the truth behind ‘How tall is Maverick Baker.’ Get ready for an insightful journey into the world of Maverick Baker’s stature.

Unveiling the Height of Maverick Baker
Have you ever wondered how tall Maverick Baker, the popular social media personality and content creator, really is? In this article, we are going to delve into the topic of Maverick Baker’s height and explore various aspects related to this intriguing question. So, let’s embark on this exciting journey to discover the mystery behind Maverick Baker’s height!
The Basics: Who is Maverick Baker?
Before we dive into the specifics of Maverick Baker’s height, let’s first understand who Maverick Baker is. Maverick Baker is a talented TikTok star, singer, and social media influencer known for his entertaining videos, captivating songs, and vibrant personality. With millions of followers across various social media platforms, Maverick Baker has captured the hearts of fans worldwide with his unique content and creative talent.
Height Matters: How Tall is Maverick Baker?
Now, let’s address the burning question: How tall is Maverick Baker? As of the latest available information, Maverick Baker stands at approximately 5 feet and 9 inches tall. This places him in the average height range for a young adult male. However, it’s essential to note that height can vary depending on factors such as genetics, nutrition, and overall health.
The Genetics Factor
Genetics play a significant role in determining an individual’s height. Traits passed down from parents can influence how tall or short a person grows to be. In Maverick Baker’s case, his height may be influenced by his family’s genetic background, which could contribute to his current height of 5 feet 9 inches.
Health and Lifestyle
Aside from genetics, a person’s overall health and lifestyle choices can also impact their height. Proper nutrition, regular exercise, and adequate sleep are essential factors that can contribute to healthy growth and development. It is likely that Maverick Baker maintains a healthy lifestyle to support his physical well-being, which may have influenced his current height.
Height Comparisons: Maverick Baker vs. Other Celebrities
Now that we have a clearer picture of Maverick Baker’s height, let’s compare it to the heights of other well-known celebrities. While height is just one aspect of a person’s physical appearance, it can be interesting to see how different individuals measure up against each other.
Maverick Baker vs. Jacob Sartorius
Another popular social media personality, Jacob Sartorius, is known for his music and online presence. Standing at around 5 feet 7 inches tall, Jacob Sartorius is slightly shorter than Maverick Baker. Despite the height difference, both stars have garnered massive followings and achieved success in their respective fields.
Maverick Baker vs. Addison Rae
Addison Rae, a prominent TikTok star and influencer, is approximately 5 feet 6 inches tall. While Addison Rae may be shorter than Maverick Baker, she has risen to fame through her engaging content and charismatic personality. Height differences aside, both Maverick Baker and Addison Rae have made a significant impact in the world of social media.
Embracing Individuality: Height and Self-Confidence
It’s essential to remember that height is just one aspect of a person’s physical appearance and does not define their worth or capabilities. Maverick Baker, despite his height of 5 feet 9 inches, has achieved remarkable success and continues to inspire his followers with his creativity and passion. Ultimately, it’s the unique qualities and talents of an individual that truly shine through, regardless of their height.
Height is Just a Number
So, the next time you find yourself wondering about Maverick Baker’s height or comparing it to others, remember that height is simply a number. What truly matters is the impact a person makes through their actions, words, and contributions to the world. Maverick Baker’s height may be 5 feet 9 inches, but his influence and talent extend far beyond any measurement. Let’s celebrate individuality and embrace the diversity that makes each person special in their way!
As we conclude our exploration of Maverick Baker’s height, we hope this article has provided valuable insights and a deeper understanding of this fascinating topic. Remember, it’s not about how tall you are, but how you stand tall in everything you do!
Bigger brother?
Frequently Asked Questions
How tall is Maverick Baker?
Maverick Baker is approximately 5 feet 11 inches tall.
Is Maverick Baker considered tall?
Compared to the average height, Maverick Baker’s height of 5 feet 11 inches is above average for males, but not exceptionally tall.
Does Maverick Baker’s height influence his career in entertainment?
While height can sometimes play a role in certain casting decisions, it is not a defining factor in Maverick Baker’s career in entertainment. His talent and skills are more significant in determining his success.
Final Thoughts
Maverick Baker stands at an impressive height of 6 feet 3 inches. This tall stature adds to his charismatic presence on social media platforms. Fans often wonder, “How tall is Maverick Baker?” Now, the mystery is solved – he is indeed a tall figure in the world of influencers.