

Master The Art Of How To Train Your Dragon Jewelry
Looking to master the art of how to train your dragon jewelry? Dive into a world where elegance meets the mystical allure of dragons. Transform ordinary accessories into breathtaking statement pieces that capture the essence of these legendary creatures. Unleash your creativity and craft unique jewelry inspired by the vibrant colors and fierce beauty of dragons. Let’s embark on a journey where imagination knows no bounds as we explore the enchanting realm of dragon-inspired jewelry making.

Discover the Magic of How to Train Your Dragon Jewelry
Welcome, dragon enthusiasts! Are you ready to embark on a magical journey into the world of “How to Train Your Dragon” jewelry? Whether you are a fan of the beloved book series or the thrilling movies, this guide will help you uncover the wonders of dragon-themed jewelry and how you can incorporate these mythical creatures into your everyday style.
The Fascination with Dragons
Dragons have intrigued humans for centuries with their majestic presence and mystical abilities. From ancient folklore to modern pop culture, dragons have captured our imagination and inspired countless stories and legends. “How to Train Your Dragon,” created by author Cressida Cowell, has brought these fantastical creatures to life in a heartwarming tale of friendship, bravery, and adventure.
Why Wear Dragon Jewelry?
Wearing dragon jewelry is a way to show your love for these mythical beings and express your unique personality. Dragon-themed accessories can add a touch of fantasy and mystery to your look, whether you’re attending a cosplay event or just want to add a bit of whimsy to your everyday outfits. From dragon pendants to rings to earrings, there are endless ways to incorporate these magical creatures into your jewelry collection.
Types of Dragon Jewelry
When it comes to “How to Train Your Dragon” jewelry, the options are as vast as the world of dragons itself. Here are some popular types of dragon-themed jewelry that you can explore:
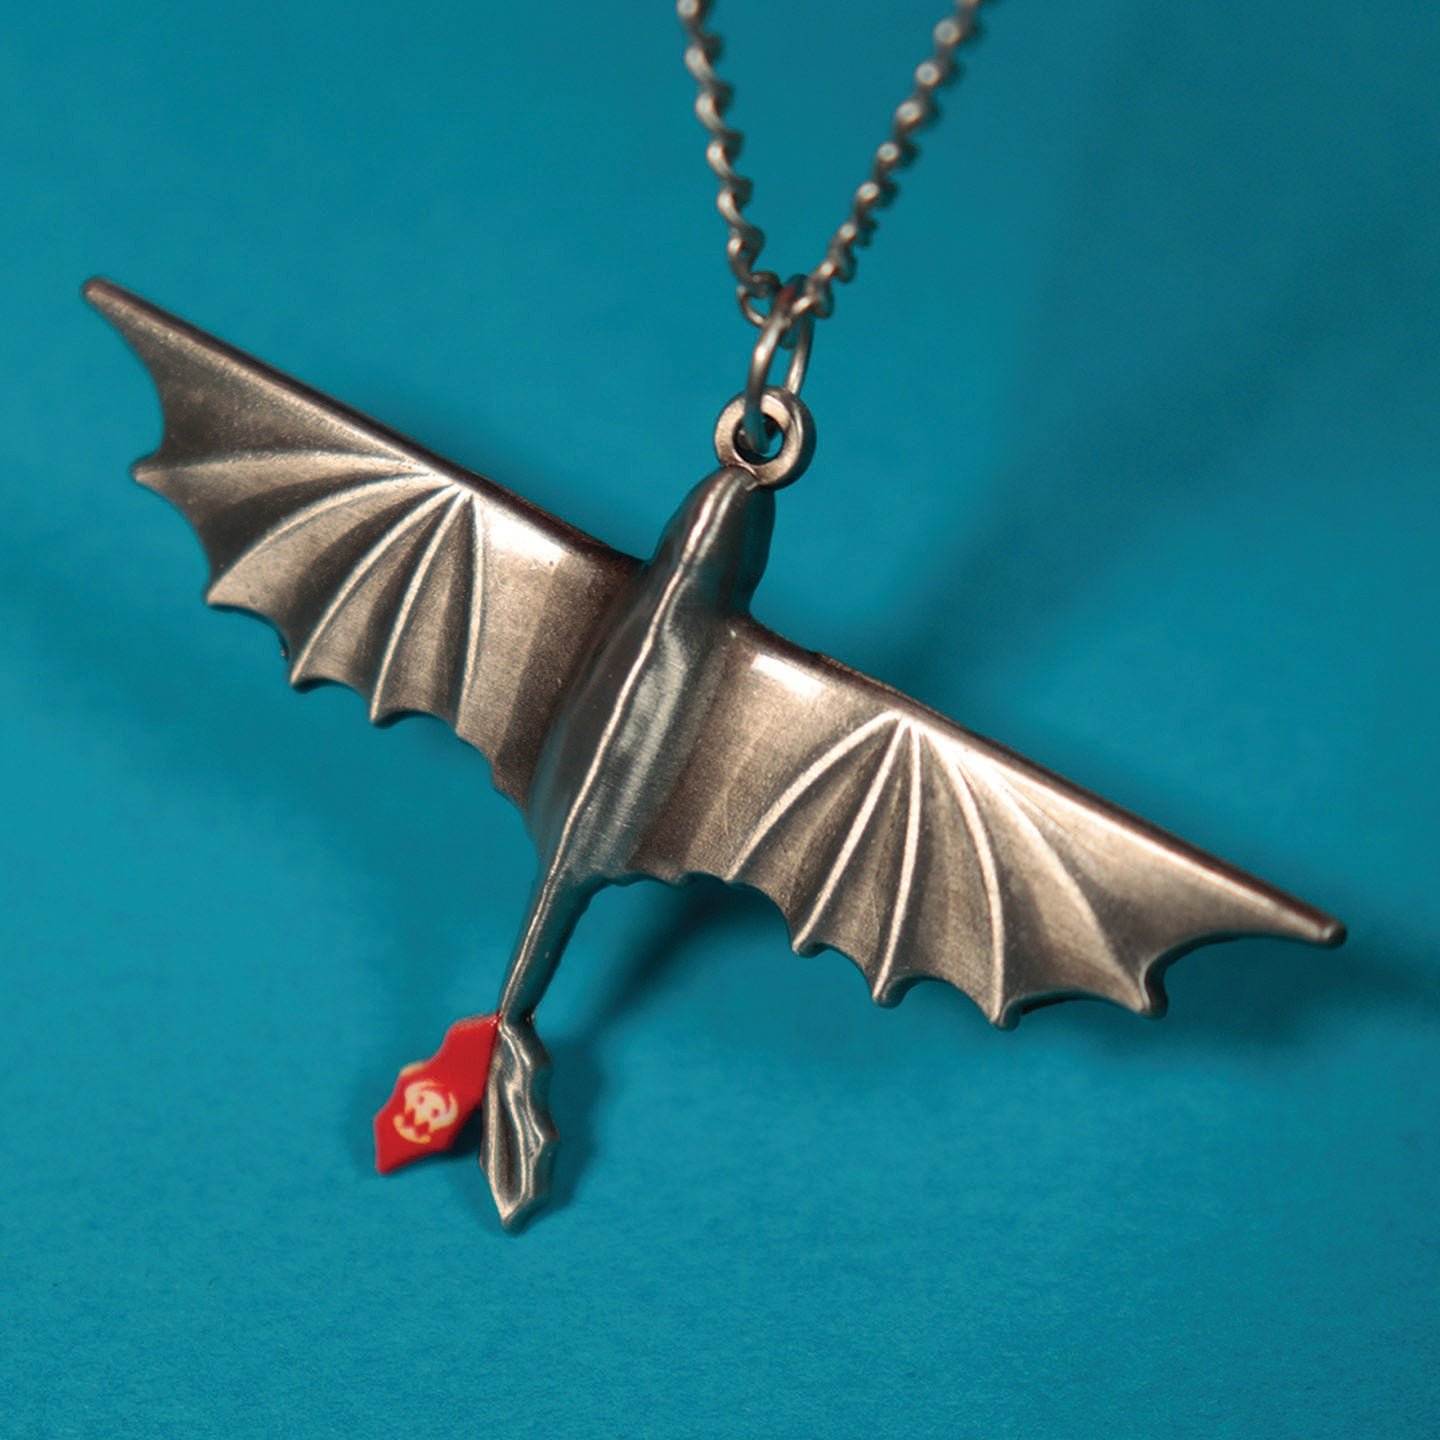
Dragon Pendants
Dragon pendants are a classic choice for those who want to make a bold statement with their jewelry. These intricate pieces often feature detailed dragon designs in various poses, from fierce and menacing to graceful and majestic. Dragon pendants can be worn on chains or cords and are perfect for adding a touch of fantasy to any outfit.
Dragon Rings
Dragon rings are a popular choice for both men and women who want to showcase their love for dragons in a subtle yet stylish way. These rings come in a variety of designs, from simple bands with dragon motifs to more elaborate creations with gemstone accents. Whether you prefer a sleek and modern look or a more vintage-inspired design, there is a dragon ring out there for everyone.
Dragon Earrings
For those who want to add a touch of whimsy to their jewelry collection, dragon earrings are the perfect choice. These playful accessories come in a variety of styles, from dainty studs to statement ear cuffs, all featuring charming dragon motifs. Dragon earrings are a fun way to inject some fantasy into your everyday look and make a bold fashion statement.
How to Choose the Perfect Dragon Jewelry
With so many options available, finding the perfect piece of “How to Train Your Dragon” jewelry can seem like a daunting task. Here are some tips to help you choose the right dragon accessory for you:
Consider Your Style
Before you start shopping for dragon jewelry, think about your personal style and how you can incorporate dragon-themed accessories into your wardrobe. If you prefer a more subtle look, opt for small, understated pieces like dragon stud earrings or a delicate dragon pendant. For those who want to make a statement, bold dragon rings or earrings with intricate designs are the way to go.
Choose Quality Materials
When selecting dragon jewelry, pay attention to the materials used in the piece. Look for high-quality materials like sterling silver, gold, or stainless steel, which are durable and long-lasting. If the jewelry features gemstones, make sure they are genuine and securely set to prevent them from falling out.
Embrace Your Creativity
Don’t be afraid to mix and match different pieces of dragon jewelry to create a unique and personalized look. Layer dragon pendants with other necklaces, stack dragon rings on different fingers, or pair dragon earrings with other whimsical accessories to show off your creative flair. The key is to have fun and experiment with different combinations until you find a style that speaks to you.
Caring for Your Dragon Jewelry
To ensure that your “How to Train Your Dragon” jewelry stays in top condition, it’s essential to take proper care of your pieces. Here are some tips to help you keep your dragon accessories looking their best:
Store Your Jewelry Properly
When you’re not wearing your dragon jewelry, store it in a cool, dry place away from direct sunlight and humidity. Consider keeping your pieces in a jewelry box or pouch to prevent them from getting scratched or tangled with other accessories.
Clean Your Jewelry Regularly
To maintain the luster of your dragon jewelry, clean it regularly using a soft, lint-free cloth to remove dirt, oil, and sweat residue. Avoid using harsh chemicals or abrasive materials that could damage the metal or gemstones. For intricate designs, you can also use a soft-bristled brush to gently scrub hard-to-reach areas.
Avoid Exposing Your Jewelry to Harsh Chemicals
When wearing your dragon jewelry, avoid exposing it to harsh chemicals such as perfumes, lotions, and hair products, as they can tarnish the metal and dull the gemstones. Remove your jewelry before swimming or showering to prevent damage from chlorine and saltwater.
Where to Find How to Train Your Dragon Jewelry
If you’re ready to add some dragon magic to your jewelry collection, there are plenty of places where you can find “How to Train Your Dragon” jewelry. Here are some popular options to help you get started:
Online Retailers
Online retailers like Etsy, Amazon, and Hot Topic offer a wide selection of dragon-themed jewelry inspired by “How to Train Your Dragon.” You can browse through various designs, materials, and price ranges to find the perfect piece that speaks to your dragon-loving heart.
Local Jewelry Stores
Visit your local jewelry stores or boutiques to explore their collections of dragon jewelry. Many stores carry unique and handmade pieces that you won’t find anywhere else, allowing you to support local artisans and find one-of-a-kind treasures that reflect your love for dragons.
Fan Conventions and Events
If you’re a die-hard “How to Train Your Dragon” fan, consider attending fan conventions and events dedicated to the series. These gatherings often feature vendors selling dragon-themed merchandise, including jewelry, apparel, and collectibles. You can meet fellow fans, discover new artists, and immerse yourself in the enchanting world of dragons.
Unleash Your Inner Dragon
Now that you’ve learned all about “How to Train Your Dragon” jewelry, it’s time to unleash your inner dragon and embrace the magic of these mythical creatures. Whether you’re a seasoned dragon aficionado or just dipping your toes into the world of dragon jewelry, there’s a piece out there waiting to join your collection and ignite your imagination.
So go ahead, explore, experiment, and wear your dragon jewelry with pride. Let these awe-inspiring creatures accompany you on your daily adventures and remind you of the power of friendship, courage, and the boundless possibilities of the imagination. Happy dragon hunting!
How To Train Your Dragon | Gnoce Collection 2025 Review!
Frequently Asked Questions
Q: What types of jewelry can be inspired by “How to Train Your Dragon”?
A: Jewelry inspired by “How to Train Your Dragon” can include dragon-themed necklaces, bracelets, earrings, and rings. These pieces often feature dragon scales, wings, claws, or character symbols from the movie.
Q: How can I incorporate dragon motifs into my jewelry designs?
A: You can incorporate dragon motifs into your jewelry designs by using dragon-shaped pendants, adding dragon-scale textures, or including gemstones that represent dragon colors like green for Toothless or red for Hookfang.
Q: What materials are commonly used to make “How to Train Your Dragon” jewelry?
A: Common materials used to make “How to Train Your Dragon” jewelry include sterling silver, gold, enamel, and semi-precious stones. These materials help capture the essence of the mystical world of dragons.
Final Thoughts
In conclusion, training your dragon jewelry is an exciting journey worth embarking on. By following our tips and guidance, you can ensure your jewelry remains in top condition. Remember to clean and store your dragon jewelry properly to maintain its beauty and shine. With a little care and attention, your how to train your dragon jewelry will continue to dazzle for years to come.

Exploring The Cost: How Much Is Hibachi Per Person
Hibachi per person typically ranges from $20 to $50 at most restaurants. The experience of dining at a hibachi grill is not just about the food but also the fantastic display of culinary skills right in front of you. The sizzling sounds, the artful knife techniques, and the delicious aroma all create an atmosphere that makes the price worth it. Whether you’re celebrating a special occasion or just in the mood for a memorable meal, hibachi per person is an experience that combines entertainment and delicious cuisine.

How Much is Hibachi Per Person: A Detailed Guide
Welcome, curious food enthusiasts! Today, we are diving into the delicious world of hibachi and exploring the question that many wonder about – how much does it cost per person to experience the joy of hibachi dining? Whether you are a seasoned hibachi lover or a newcomer to this culinary adventure, this guide will provide you with all the information you need to know about the costs associated with hibachi dining on a per person basis. So, let’s fire up the grill and get started!
What is Hibachi?
Before we talk about the cost, let’s first understand what hibachi is. Hibachi is a traditional Japanese style of cooking that involves grilling meat, seafood, and vegetables on a high-heat iron griddle. The term “hibachi” actually refers to the heating device itself, which is a portable charcoal or gas grill. In modern times, hibachi dining has evolved into a fun and interactive culinary experience where skilled chefs cook your food right in front of you on a large flat grill.
The Hibachi Experience
When you dine at a hibachi restaurant, you are not just enjoying a meal; you are part of a show. The hibachi chef, also known as a teppanyaki chef, entertains diners with impressive knife skills, dazzling tricks, and a playful attitude. From creating onion volcanoes to flipping shrimp tails into their hats, these chefs are masters of both cooking and showmanship.
Menu Options
Most hibachi restaurants offer a variety of menu options that typically include combinations of steak, chicken, seafood, and vegetarian dishes. Some restaurants may also have premium options like Kobe beef or lobster tail for those looking to indulge in a more luxurious dining experience. Additionally, hibachi meals are usually served with soup, salad, rice, and vegetables, providing a well-rounded dining experience.
How Much Does Hibachi Cost Per Person?
Now, let’s get to the heart of the matter – how much can you expect to pay per person when dining at a hibachi restaurant? The cost of hibachi per person can vary depending on several factors such as the location of the restaurant, the quality of ingredients used, the level of skill of the chefs, and the overall dining experience offered. On average, however, you can expect to pay around $20 to $50 per person for a standard hibachi meal.
Factors Affecting the Cost
1. Location: Hibachi restaurants in larger cities or upscale neighborhoods may have higher prices compared to those in smaller towns or more casual settings.
2. Quality of Ingredients: Restaurants that use high-quality ingredients, such as prime steak or fresh seafood, may charge more for their hibachi meals.
3. Chef’s Skill Level: Highly skilled hibachi chefs who put on elaborate performances and showcase their culinary talents may command higher prices for their services.
4. Restaurant Reputation: Popular hibachi restaurants with a strong reputation for excellent food and service may have higher prices due to the demand for their dining experience.
Tips for Saving Money
If you are looking to enjoy the hibachi experience without breaking the bank, here are a few tips to help you save money:
1. Lunch Specials
Many hibachi restaurants offer lunch specials that are more affordable than their dinner menu. By dining during lunch hours, you can enjoy a similar hibachi experience at a discounted price.
2. Early Bird Discounts
Some restaurants may offer early bird discounts for diners who visit during off-peak hours. Taking advantage of these promotions can help you save on your hibachi meal.
3. Group Discounts
If you are dining with a group of friends or family members, inquire about group discounts or special group packages that hibachi restaurants may offer. Group rates are often more budget-friendly per person.
In conclusion, the cost of hibachi per person can vary depending on various factors, but on average, you can expect to pay between $20 to $50 for a standard hibachi meal. Hibachi dining is not just about the food; it’s about the experience. The lively atmosphere, skilled chefs, and interactive cooking style make it a dining experience unlike any other. So, whether you are celebrating a special occasion or simply looking to enjoy a memorable meal, hibachi is a fantastic choice for a fun and delicious dining experience.
Now that you know how much hibachi costs per person and have some money-saving tips in your pocket, go ahead and treat yourself to a hibachi feast. Your taste buds and your inner foodie will thank you!
Hibachi 4 U: 8.4/10 & $50 per person 🇯🇵#chicagohibachi #hibachi #chicago
Frequently Asked Questions
What factors influence the cost of hibachi per person?
The cost of hibachi per person can vary depending on factors such as the location of the restaurant, the type of hibachi experience chosen, the quality of ingredients used, and any additional services offered.
Are there any all-inclusive hibachi dining options available?
Some hibachi restaurants offer all-inclusive dining options that include a set menu and a fixed price per person, which can be a convenient and cost-effective choice for those looking for a hassle-free dining experience.
Do hibachi prices typically include drinks and side dishes?
Most hibachi prices are generally for the main course and do not include drinks or additional side dishes. Customers may have the option to order drinks and extra sides separately, which could impact the overall cost per person.
Can group discounts be availed for hibachi dining?
Some hibachi restaurants offer group discounts for larger parties, which can help lower the cost per person. It’s advisable to inquire about any group deals or special offers when making a reservation for a group hibachi dining experience.
Final Thoughts
Hibachi dining experience varies in cost, typically ranging from $20 to $50 per person. Factors influencing the price include the restaurant’s location, quality of ingredients, and the chef’s expertise. When planning a hibachi meal, consider the budget and preferences of the group to ensure an enjoyable experience. Understanding how much is hibachi per person is essential for making informed dining choices.
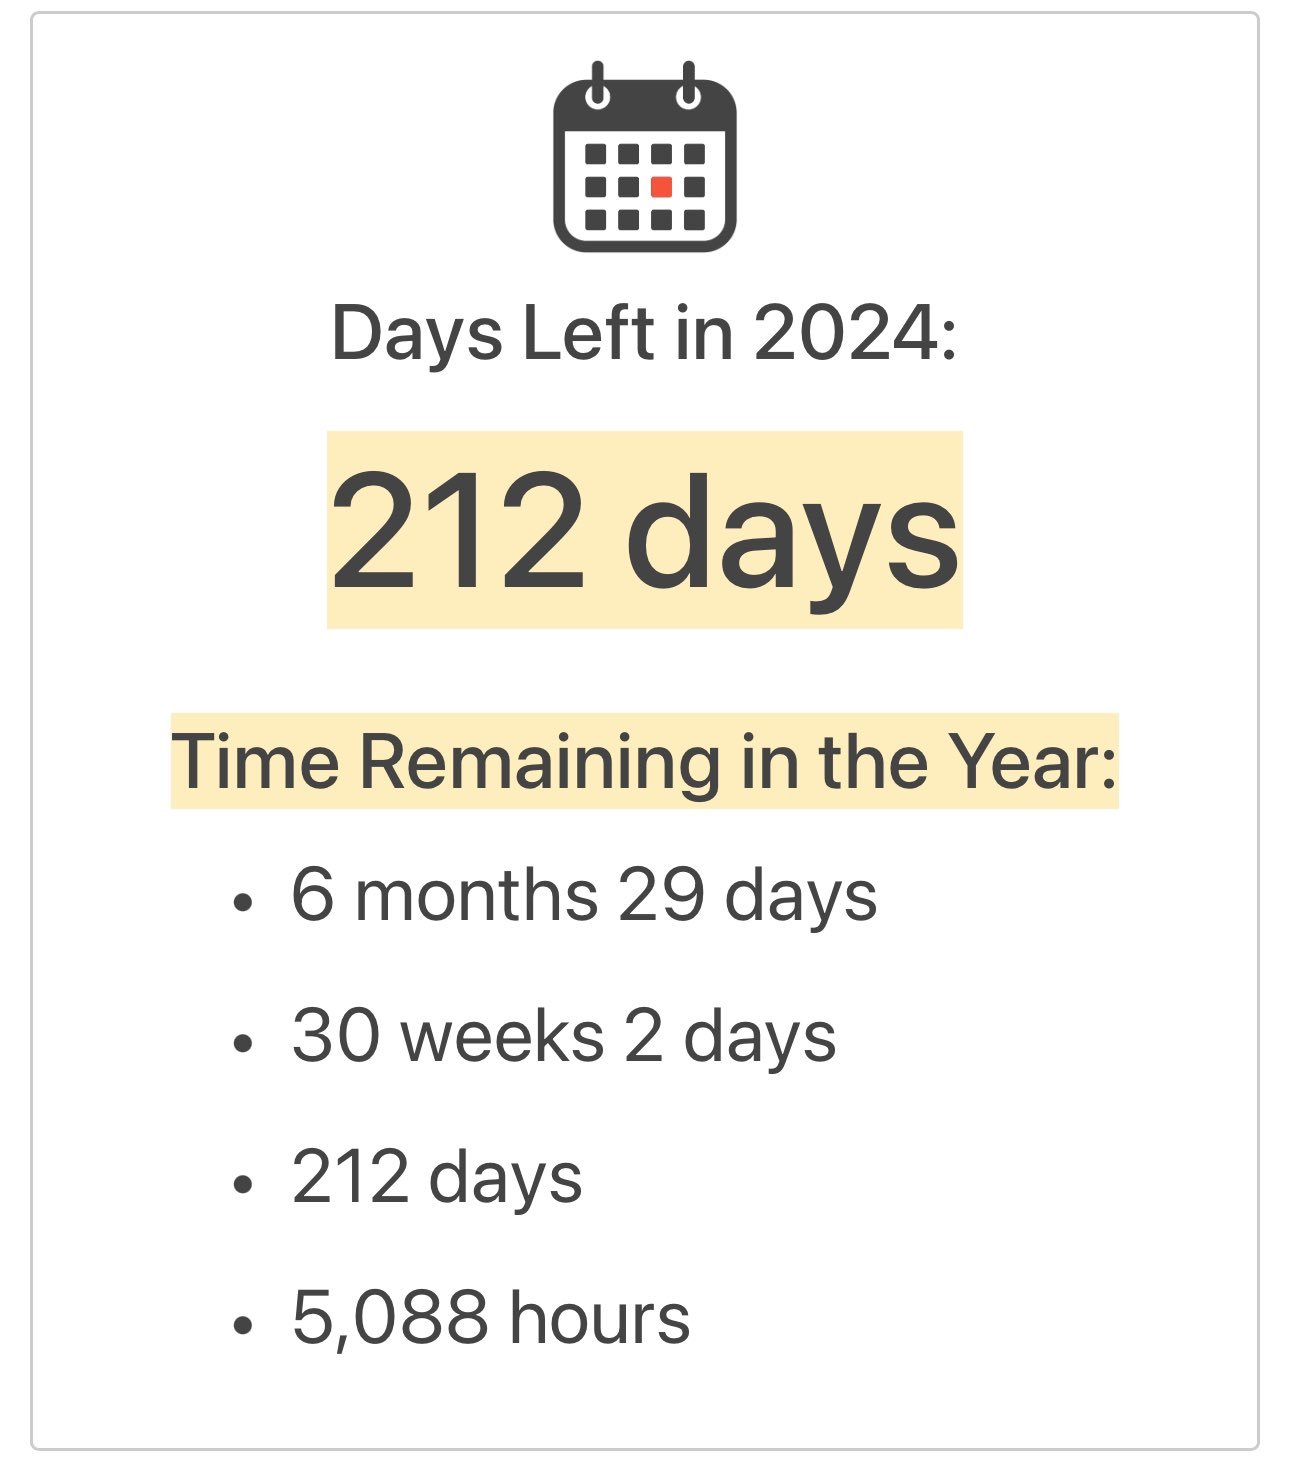
How Many Months Is 212 Days: Everything You Need To Know
212 days is equivalent to approximately 7 months. Have you ever wondered how long 212 days actually translates into months? Understanding this conversion can provide clarity when planning long-term goals or events based on a monthly timeline. Knowing the answer to the question “how many months is 212 days” can help you manage your time effectively and stay organized in your tasks and projects. Let’s delve deeper into the conversion of days to months and explore the significance of this calculation in everyday life.

Understanding How Many Months is 212 Days
Have you ever wondered how many months are in 212 days? It might sound like a tricky question, but with a little bit of math and some fun facts, we can unravel the mystery together!
Breaking Down the Days into Months
Let’s start by looking at how we can convert days into months. A month can have varying numbers of days, with some months having 30 days, while others have 31. February is a bit different, as it typically has 28 days, except in leap years when it has 29 days. To figure out how many months 212 days is, we need to consider the differences in days each month.
Understanding the Average Number of Days in a Month
To make things simpler, we can start by looking at the average number of days in a month. If we take into account the varying days in a month, the average comes out to around 30.4 days per month. This average helps us estimate the number of months in a given number of days more accurately.
Calculating the Months in 212 Days
Now that we have an idea of the average days in a month, let’s calculate how many months are in 212 days. To do this, we can divide the total number of days by the average days in a month.
212 days ÷ 30.4 (average days in a month) ≈ 6.97 months
So, approximately, 212 days is equal to about 6.97 months. This means that 212 days is almost 7 months!
Fun Facts About Months and Days
Did you know that the ancient Romans were the first to introduce the concept of a 12-month calendar? They based it on the cycles of the moon, with each month roughly corresponding to a lunar cycle. This is why some months have 30 or 31 days, mirroring the phases of the moon.
Another fascinating fact is that the word “month” comes from the word “moon.” In many ancient cultures, months were actually based on the lunar cycle, making a month roughly the time it takes for the moon to complete one full cycle of its phases.
Leap Years and February
Remember when we mentioned leap years and February having 29 days instead of 28? Leap years occur every four years to help synchronize the calendar year with the solar year. This extra day in February gives us a total of 366 days in a leap year instead of the usual 365 days.
So, if you were curious about how many months are in a leap year, it would be slightly more than in a regular year due to that extra day in February!
Real-Life Examples of 212 Days
Now that we know how many months are in 212 days, let’s explore some real-life scenarios where this timeframe might be significant. For example, 212 days could be approximately how long it takes to grow certain fruits or vegetables from seed to harvest. It could also represent the time it takes to complete a school year, with breaks and holidays included.
Thinking about time in terms of months and days helps us understand the passing of time in a more relatable way. Whether you’re counting down to a special event or just curious about time, breaking it down into months and days can make it more manageable and interesting!
So, the next time someone asks you how many months are in 212 days, you can impress them with your newfound knowledge! Remember that while days and months can be tricky to convert, a little math and some fun facts can make it all the more enjoyable to explore.
Time is a fascinating concept that we experience every day, and understanding how it breaks down into smaller units like months and days can help us appreciate its passage even more. Keep exploring and learning about time – who knows what other exciting discoveries you might make!
After 212 days it FINALLY happened!
Frequently Asked Questions
How many months is 212 days equivalent to?
212 days is approximately equal to 7 months when considering a standard month of 30 days. To calculate this, divide 212 by 30 days per month, which gives you around 7 months with a few days left over.
Can you convert 212 days into years and months?
When converting 212 days into years and months, you end up with about 7 months. To break it down further, there are roughly 0 years and 7 months in 212 days if we consider a year to be 365 days.
How many months and weeks make up 212 days?
212 days consist of approximately 7 months and 3 weeks. To find this, divide 212 by 30 days per month to get 7 months. After that, the remaining days can be divided by 7 days per week, resulting in around 3 weeks.
Final Thoughts
So, how many months is 212 days? It is approximately 7 months. Time calculations can vary based on different factors, but this estimation provides a simple way to understand the duration in terms of months. Keep in mind that months have different lengths, so the exact number may fluctuate slightly. Understanding the relationship between days and months can help in planning and organizing tasks efficiently.
The Ultimate Guide: How To Count Bars In Rap
Counting bars in rap can be a challenge for beginners. A bar in rap typically consists of four beats, representing a fundamental unit in structuring lyrics and music. To count bars effectively, listen closely to the beat and identify when it repeats every four beats. Understanding how to count bars in rap is crucial for artists, producers, and enthusiasts to create cohesive and rhythmic verses. Let’s dive into this essential skill and master the art of counting bars in rap!

How to Count Bars in Rap: A Comprehensive Guide for Beginners
Welcome to our detailed guide on how to count bars in rap music. If you’ve ever found yourself nodding your head to a rap song and wondering how rappers keep their flow so smooth, you’ve come to the right place. Bars are the building blocks of rap lyrics, and understanding how to count them can help you appreciate the artistry behind your favorite rap songs. In this article, we’ll break down what bars are, why they matter, and most importantly, how you can count them like a pro. So, grab your notebook and let’s dive in!
What Are Bars in Rap Music?
Before we get into the nitty-gritty of counting bars, let’s first understand what bars actually are. In music, a bar (also known as a measure) is a unit of time that organizes the beats of a song. In rap music, a bar typically consists of a specific number of beats, with each beat representing a specific moment in the music where you could tap your foot or clap your hands. Bars create a rhythmic structure that rappers use to craft their lyrics and flow.
Think of bars as the musical framework that rappers use to deliver their rhymes. Just like a painter uses a canvas to create a masterpiece, a rapper uses bars to create lyrical magic. Understanding bars is essential if you want to appreciate the intricacies of rap music and gain a deeper insight into how rappers construct their verses.
Why Counting Bars Matters
Counting bars in rap music is like deciphering a secret code that unlocks the rhythm and flow of a song. By learning how to count bars, you can develop a keen ear for music and better appreciate the skill and artistry that goes into crafting rap lyrics. Whether you’re an aspiring rapper looking to improve your own skills or simply a fan who wants to delve deeper into the world of hip-hop, mastering the art of counting bars is a valuable skill to have.
When you can count bars in a rap song, you’ll be able to anticipate changes in the music, understand the structure of the verses, and even predict where the beat will drop next. It’s like having a superpower that lets you connect more deeply with the music and pick up on nuances that others might miss. So, if you’re ready to level up your rap game, let’s learn how to count bars!
How to Count Bars in Rap
Now that you know why counting bars is important, let’s get into the practical steps of how to actually count bars in rap music. Don’t worry if you’re not musically inclined – anyone can learn how to count bars with a bit of practice and patience. Here’s a step-by-step guide to help you master the art of counting bars:
Step 1: Listen for the Beat
The first step in counting bars is to listen for the beat of the song. The beat is the underlying pulse that drives the music forward, and it’s what you’ll use as a reference point to count bars. Pay attention to the rhythm of the instrumental – you’ll notice that certain sounds repeat at regular intervals. Try tapping your foot or nodding your head to the beat to help you stay in time.
Step 2: Identify the Pattern
Once you’ve tuned into the beat, listen for a recurring pattern in the music. In rap songs, beats are often structured in groups of four, with each group representing a bar. This means that you’ll typically hear a pattern repeat every four beats. By identifying this pattern, you’ll be able to start counting bars more accurately.
Step 3: Count Out Loud
As the instrumental plays, start counting out loud to the beat. Say “one, two, three, four” at each interval to mark the end of a bar. When you reach the fourth beat, you’ve completed one bar. Keep counting in groups of four until you’ve gone through the entire song. Don’t worry if you lose track at first – counting out loud can help you stay on course.
Step 4: Practice, Practice, Practice
Like any skill, counting bars takes practice. The more you listen to rap music and actively count bars, the easier it will become. Challenge yourself by counting bars in different songs and genres to strengthen your rhythmic skills. With time and dedication, you’ll be able to count bars like a seasoned pro.
Common Mistakes to Avoid
As you embark on your journey to master the art of counting bars in rap music, it’s important to be aware of common mistakes that beginners often make. Here are some pitfalls to watch out for:
Mistake 1: Focusing Only on the Lyrics
While the lyrics are a crucial part of rap music, counting bars requires you to pay attention to the underlying beat and rhythm of the song. Don’t get too caught up in deciphering the words – instead, focus on the musical structure of the track.
Mistake 2: Losing Track of the Beat
It’s easy to get carried away by the flow of a rap song and lose track of the beat. Remember that the beat is your guide for counting bars, so stay tuned in to the rhythm to avoid getting off course.
Mistake 3: Overthinking It
Counting bars should be a fun and engaging exercise, not a stressful task. Don’t overthink it – let the music guide you and enjoy the process of unraveling the rhythmic patterns within each song.
Congratulations on making it through our guide on how to count bars in rap music! We hope you’ve gained valuable insights into the importance of bars in rap, how to count them effectively, and common mistakes to avoid along the way. Remember, mastering the art of counting bars is a skill that takes time to develop, so don’t be discouraged if you don’t get it right away.
Keep practicing, keep listening to rap music with a critical ear, and most importantly, have fun with it! The world of rap is rich with creativity and rhythm, and by learning how to count bars, you’re unlocking a new layer of appreciation for the genre. So, put your newfound knowledge to the test, crank up your favorite rap song, and start counting bars like a pro!
Happy rapping!
How To Count and Write 16 Bars in Rap
Frequently Asked Questions
How can I accurately count bars in rap music?
To accurately count bars in rap music, focus on identifying the recurring pattern of beats in the instrumental. Bars typically consist of 4 beats each, so listen closely to the rhythm and note when the pattern repeats. Pay attention to the music’s structure and where the verses or chorus start and end, as this can help you determine the length of each bar.
What tools can help me count bars in rap songs effectively?
Utilize tools like a metronome or beat counter to assist you in counting bars in rap songs. These tools provide a steady beat that can help you stay on track and accurately count the number of bars. Additionally, consider using software that visually displays the waveform of the song, making it easier to identify the start and end of each bar.
Are there any tips for beginners to improve their ability to count bars in rap music?
For beginners looking to improve their ability to count bars in rap music, practice is key. Start by listening to rap songs with a clear, consistent beat and try to count along with the music. Focus on distinguishing the different sections of the song and identifying when a new bar begins. Over time, your ear will become more attuned to the structure and rhythm of rap music, making it easier to count bars accurately.
Final Thoughts
To count bars in rap, simply listen for the repeated pattern of the beat. Each group of 4 beats generally equals one bar. Pay attention to where the rhymes start and end to help you stay on track. Remember, practice makes perfect when it comes to mastering how to count bars in rap.
Calculating How Many Hours Is 109 Minutes
109 minutes is equivalent to 1 hour and 49 minutes. Understanding the conversion from minutes to hours can be beneficial in various situations, from calculating time for tasks to managing schedules effectively. By knowing how many hours is 109 minutes, you can easily plan your day with precision. Let’s delve deeper into the concept of time conversion and explore the significance of this calculation in daily life.

How Many Hours is 109 Minutes: A Detailed Exploration
Understanding Time Measurement
Time is a fascinating concept that helps us organize our days and keep track of activities. We measure time in various units, such as seconds, minutes, hours, days, and more. In this article, we will focus on converting minutes to hours and specifically delve into the question: how many hours is 109 minutes?
Converting Minutes to Hours
To understand how many hours 109 minutes represent, we first need to know the relationship between minutes and hours. One hour consists of 60 minutes. Therefore, to convert minutes to hours, we divide the number of minutes by 60. Let’s apply this conversion method to find out how many hours are in 109 minutes.
Calculating 109 Minutes in Hours
To determine how many hours 109 minutes equate to, we divide 109 by 60:
109 minutes ÷ 60 = 1 hour and 49 minutes
Therefore, 109 minutes is equivalent to 1 hour and 49 minutes. This means that 109 minutes is a little less than 2 hours.
Understanding the Concept with Examples
Let’s break it down further with a simpler example. Imagine you have a piece of music that is 30 minutes long. If you were to listen to this music three times in a row, you would have spent a total of 90 minutes listening to it. To find out how many hours this is, you divide 90 by 60:
90 minutes ÷ 60 = 1 hour and 30 minutes
This calculation shows that listening to a 30-minute music piece three times amounts to 1 hour and 30 minutes.
Real-World Applications
Understanding how to convert minutes to hours can be beneficial in various real-world scenarios. For instance, if you are planning a movie night and want to schedule movies back-to-back, knowing how many hours each movie lasts can help you plan your evening effectively.
Similarly, in sports, coaches often need to keep track of players’ training schedules, which may involve specifying training sessions in hours and minutes. Being able to convert minutes to hours allows them to allocate time efficiently and maximize training benefits.
In conclusion, 109 minutes is equivalent to 1 hour and 49 minutes. By mastering the art of converting minutes to hours, you can streamline your daily tasks, manage your time effectively, and enhance your overall productivity. Remember, time is a precious resource, so making the most of it is key to achieving your goals. Next time you come across the question “how many hours is x minutes,” you’ll be ready to crack the code!
Continue exploring the fascinating world of time measurement and unraveling its mysteries one minute at a time! Time truly does fly, but with a bit of math, you can stay on track and make the most of every hour, minute, and second.
Enjoy your time adventures!
What happens when 99 minutes and 59 seconds are exceeded on stopwatch? #shorts
Frequently Asked Questions
How many hours is 109 minutes?
To convert 109 minutes to hours, you divide the number of minutes by 60 since there are 60 minutes in an hour. So, 109 minutes is equal to 1 hour and 49 minutes.
Can you explain how to convert 109 minutes to hours?
To convert 109 minutes to hours, you divide 109 by 60 because there are 60 minutes in an hour. After the division, you get 1 hour and 49 minutes as the result.
What is the equivalent time in hours for 109 minutes?
Converting 109 minutes to hours gives you 1 hour and 49 minutes. It’s important to remember that there are 60 minutes in an hour when doing this conversion.
Final Thoughts
In summary, 109 minutes is equal to 1 hour and 49 minutes. To convert 109 minutes into hours, divide by 60 since there are 60 minutes in an hour. This calculation gives us 1 hour with a remainder of 49 minutes. Therefore, 109 minutes is equivalent to 1 hour and 49 minutes. Remember, it’s crucial to understand these conversions for accurate timekeeping.
Exploring How Many Times The Word Joy Appears In The Bible
The word “joy” appears over 150 times in the Bible, embodying a profound sense of gladness and celebration throughout the text. It serves as a beacon of hope and a reminder of the joy found in faith. As we delve into the significance of this powerful word in the scriptures, we uncover layers of inspiration and encouragement that resonate with our souls. Join us on a journey through the pages of the Bible as we explore the abundant presence of joy and its transformative impact on our lives.

Exploring the Frequency of the Word ‘Joy’ in the Bible
Introduction
Have you ever wondered how many times the word ‘joy’ appears in the Bible? The concept of joy is central to many religions, including Christianity. In the Bible, joy represents a deep sense of happiness, contentment, and celebration. Join me on a fascinating journey as we uncover just how often the word ‘joy’ graces the pages of this ancient and revered text.
What Does ‘Joy’ Mean in the Bible?
Before we dive into the numbers, let’s first understand what ‘joy’ signifies in the context of the Bible. In the Bible, joy goes beyond mere happiness; it is a profound sense of inner contentment and peace that comes from a spiritual source. Joy is often associated with gratitude, worship, and faith in God. It is a powerful emotion that can uplift the spirit and bring hope in times of trouble.
How Many Times Does the Word ‘Joy’ Appear in the Bible?
The word ‘joy’ appears numerous times throughout the Bible, especially in the Old Testament and the New Testament. In total, the word ‘joy’ is mentioned over 150 times in various translations of the Bible. This frequency highlights the importance of joy as a recurring theme in the scriptures.
Instances of ‘Joy’ in the Old Testament
In the Old Testament, the word ‘joy’ is often associated with praising God, celebrating victories, and expressing gratitude. One notable example is found in Psalm 30:5, which proclaims, “Weeping may endure for a night, but joy comes in the morning.” This verse illustrates the enduring nature of joy and how it can follow times of hardship.
Instances of ‘Joy’ in the New Testament
In the New Testament, the word ‘joy’ is closely linked to the teachings of Jesus Christ and the promise of salvation. For instance, in Luke 15:7, Jesus declares, “I say to you that likewise there will be more joy in heaven over one sinner who repents than over ninety-nine just persons who need no repentance.” This verse emphasizes the profound joy that comes from redemption and forgiveness.
The Many Forms of Joy in the Bible
Joy in the Bible takes on various forms, reflecting the diverse experiences of humanity in relation to faith and spirituality. Some common manifestations of joy in the Bible include:
1. Joy in Worship
Throughout the Bible, joy is often connected with worship and praise. In Psalm 100:2, it says, “Serve the Lord with gladness; come before His presence with singing.” This verse highlights the joy that comes from worshipping and recognizing the greatness of God.
2. Joy in Salvation
Another prevalent theme is the joy that comes from experiencing salvation and redemption. In Isaiah 61:10, it states, “I will greatly rejoice in the Lord; my soul shall be joyful in my God, for He has clothed me with the garments of salvation.” This verse expresses the uncontainable joy that stems from being saved by God.
3. Joy in Fellowship
The Bible also emphasizes the importance of finding joy in fellowship with others. In Philippians 1:4, the Apostle Paul writes, “I thank my God upon every remembrance of you.” This passage highlights the joy that comes from sharing life with fellow believers and building community.
The Significance of Joy in the Christian Faith
In Christianity, joy is considered a fruit of the Holy Spirit, a gift that believers receive through their relationship with God. Joy is seen as a source of strength, a beacon of hope, and a reflection of God’s love for His people. By cultivating joy in their lives, Christians can experience a deeper connection to their faith and a greater sense of peace and fulfillment.
In conclusion, the word ‘joy’ appears over 150 times in the Bible, underscoring its significance as a central theme in the scriptures. Joy is presented in various contexts, from worship and salvation to fellowship and gratitude. As believers engage with the word of God and embrace the message of joy it conveys, they can find comfort, inspiration, and renewed faith in their spiritual journey. So, let us remember the profound impact of joy in the Bible and strive to cultivate this powerful emotion in our own lives.
Bible Verses On Joy | Blessed Scripture Passages About Joy Of The Lord
Frequently Asked Questions
How frequently does the word “joy” appear in the Bible?
In the Bible, the word “joy” appears approximately 165 times across different translations. It is often used to describe feelings of gladness, happiness, and rejoicing throughout various passages.
Where can I find references to the word “joy” in the Bible?
You can find mentions of the word “joy” in both the Old and New Testaments of the Bible. It is commonly associated with praising God, celebrating victories, and experiencing inner peace.
What are some biblical contexts in which the word “joy” is used?
The word “joy” in the Bible is often linked to themes of salvation, worship, and thanksgiving. It is frequently mentioned in Psalms, Proverbs, and the writings of the apostles as a testament to the believers’ delight in God’s goodness.
Why is the concept of “joy” significant in the biblical context?
In the Bible, “joy” is considered a fruit of the Spirit and a manifestation of faith. It symbolizes a deep sense of contentment and fulfillment that comes from a relationship with God, serving as a source of strength and resilience in times of trials.
Final Thoughts
The word “joy” appears over 150 times in the Bible, emphasizing its significance in the scriptures. Joy is portrayed as a source of strength and a fruit of the Spirit. Understanding how many times joy is mentioned in the Bible can inspire believers to seek and cultivate joy in their lives. Joy serves as a constant reminder of God’s presence and promises throughout the pages of the Bible.
Determining How Many Years Is 4166 Days
4166 days equate to approximately 11.4 years. Converting days into years can often be a puzzling task, but worry not! Understanding the measurement of time in different units is key. Let’s delve into the conversion process of how many years is 4166 days. Time is a fascinating dimension we navigate daily, and knowing how to interpret it is both enlightening and practical. Join us on this journey of deciphering the relationship between days and years.

Understanding Time: Exploring How Many Years 4166 Days Equal
How Many Years is 4166 Days?
Have you ever wondered about the relationship between days and years? Let’s dive in and explore how many years exactly are in 4166 days.
Breaking Down the Numbers
To understand how many years are in 4166 days, we need to break it down into manageable parts. Let’s start by looking at how many days are in a year.
On average, a year consists of 365 days. However, every four years, we have a leap year with 366 days. This additional day helps keep our calendar aligned with the Earth’s revolutions around the sun.
Calculating Years from Days
Now, let’s do some math to find out how many years 4166 days equal. We can begin by dividing the total number of days by the average number of days in a year:
4166 days ÷ 365 days/year = 11.41 years
So, 4166 days are approximately equal to 11 years and 4 months. It’s fascinating to see how a simple calculation can convert days into years!
Real-World Applications
Understanding the relationship between days and years can have practical applications in various fields. For instance, in history, knowing how to convert days into years can help us accurately interpret timelines and historical events.
In science, converting days into years is crucial for calculating the age of celestial bodies or studying the growth of living organisms over extended periods.
Conclusion
In conclusion, we’ve discovered that 4166 days are equivalent to approximately 11 years and 4 months. This exercise highlights the interconnectedness of time and the importance of understanding how different units of time relate to each other.
Next time you come across a large number of days, try converting it into years using the simple formula we discussed. It’s a fun way to explore the concept of time and appreciate the significance of each passing moment.
Longest Video on YouTube 10,000,000 Hours but it’s 9 seconds
Frequently Asked Questions
How many years is 4166 days?
4166 days is equivalent to approximately 11 years and 5 months. To calculate this, you can divide the total number of days by 365 days (the average number of days in a year). This gives you the number of years, and the remaining days will give you the additional months.
Can you convert 4166 days into years?
Yes, 4166 days equals about 11 years and 5 months. By dividing the total number of days by 365 days (the average length of a year), you can determine the equivalent in years and months.
What is the equivalent number of years for 4166 days?
The total of 4166 days can be converted to approximately 11 years and 5 months. This calculation involves dividing the total days by the average number of days in a year (365) to get the years and months.
Final Thoughts
In conclusion, 4166 days is equivalent to approximately 11 years and 4 months. This time frame spans over a significant period, providing ample opportunity for growth and change. Understanding how many years 4166 days represents allows for better perspective on the passing of time and the importance of making the most out of each day. Time is a valuable resource, and it is essential to make the most of every moment.
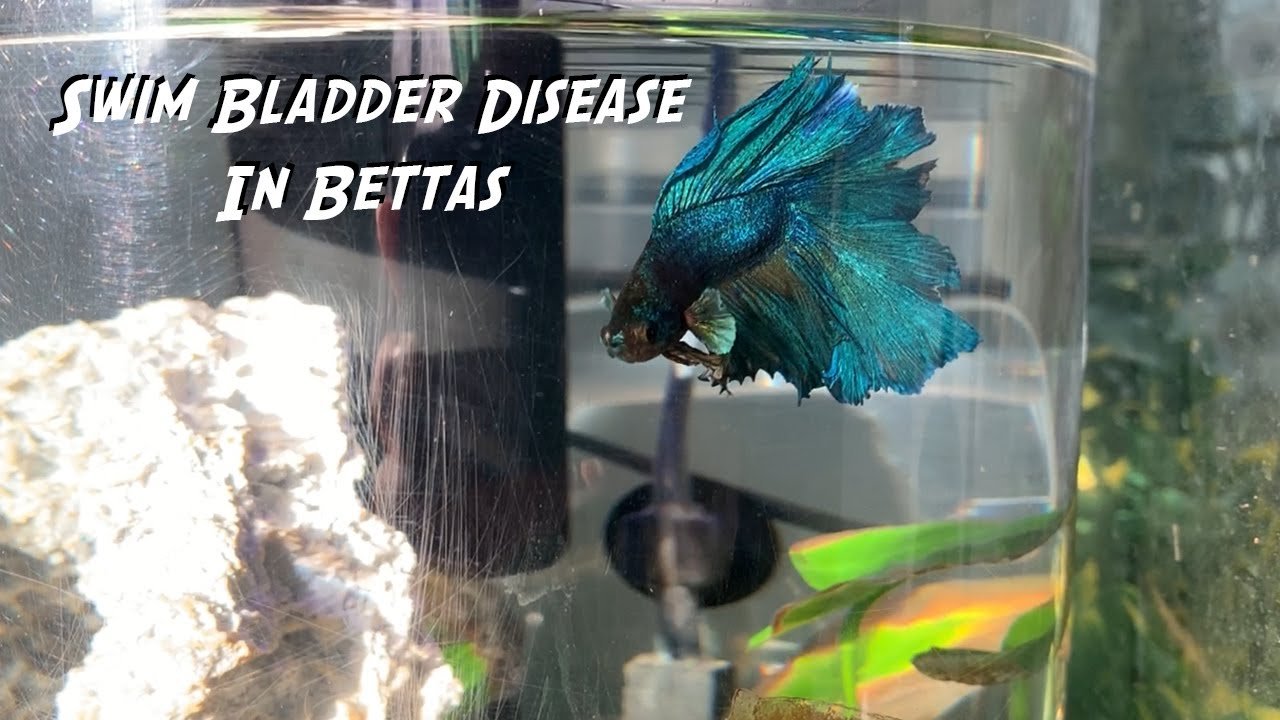
Effective Tips: Cure Swim Bladder Disease In Betta
Are you worried about how to cure swim bladder disease in betta? The good news is that with the right care and treatment, your beloved fish can make a full recovery. Understanding the signs and symptoms of this common ailment is crucial in providing prompt assistance. By following a few simple steps and making adjustments to their environment, you can help your betta fish overcome swim bladder disease and thrive once again. Let’s delve into the practical tips and strategies to ensure your betta’s health and well-being.

How to Cure Swim Bladder Disease in Betta
Welcome, Betta fish enthusiasts! If you’ve noticed your Betta fish struggling with swim bladder disease, you’re not alone. This common condition can cause your fish to have difficulty swimming, floating uncontrollably, or even swimming upside down. But fear not, because in this comprehensive guide, we will dive into everything you need to know about swim bladder disease in Betta fish and how to cure it effectively.
Understanding Swim Bladder Disease
Before we discuss how to cure swim bladder disease in Betta fish, let’s understand what this condition actually is. The swim bladder is an essential organ that helps fish control their buoyancy and move up or down in the water. When this organ becomes impaired, it can lead to swim bladder disease.
There are several factors that can contribute to swim bladder disease in Betta fish, including overfeeding, constipation, poor water quality, and genetic predisposition. By identifying the root cause, you can take the necessary steps to cure and prevent this condition in your beloved Betta.
Signs and Symptoms of Swim Bladder Disease
Recognizing the signs of swim bladder disease is crucial in providing timely treatment for your Betta fish. Some common symptoms include:
- Difficulty swimming upright
- Constant floating or sinking
- Swimming sideways or upside down
- Loss of appetite
- Bloated or swollen appearance
If you notice any of these symptoms in your Betta fish, it’s essential to act promptly to ensure their health and well-being.
Treating Swim Bladder Disease in Betta Fish
1. Fasting
One of the initial steps in treating swim bladder disease in Betta fish is fasting. By withholding food for 3-4 days, you can help alleviate constipation, which is a common cause of swim bladder issues. During this fasting period, ensure your fish has access to clean, warm water to aid in digesting any blockages.
2. Adjusting Water Conditions
Maintaining ideal water conditions is essential for the overall health of your Betta fish. Ensure the water temperature is between 75-80°F (24-27°C) and that the tank is clean and properly filtered. Performing regular water changes can help reduce stress on your fish and promote healing.
3. Providing Peas
Feeding your Betta fish blanched peas can help relieve constipation and aid in digestion. Remove the skin from the peas and offer them to your fish in small, bite-sized pieces. Peas are a natural and gentle way to regulate your Betta’s digestive system.
4. Medications
If the above steps do not show improvement in your Betta fish’s condition, consider consulting a vet specializing in fish health. They may recommend medications or treatments to address any underlying infections or issues causing swim bladder disease.
Preventing Swim Bladder Disease
While it’s essential to know how to cure swim bladder disease in Betta fish, prevention is always better than cure. To help prevent this condition, consider the following tips:
- Feed your Betta fish a balanced and varied diet
- Avoid overfeeding, as this can lead to digestive issues
- Maintain good water quality by regularly cleaning the tank and performing water changes
- Monitor your Betta fish for any signs of illness or abnormal behavior
- Provide your Betta with enough space to swim and exercise
By following these preventive measures, you can reduce the risk of swim bladder disease and ensure your Betta fish remains healthy and happy.
In conclusion, swim bladder disease is a common ailment that can affect Betta fish, but with proper care and attention, it can be effectively treated and prevented. By understanding the causes, symptoms, and treatment options for swim bladder disease, you can ensure your Betta fish lives a long and happy life.
Remember, always consult with a vet or experienced fish keeper if you are unsure about the health of your Betta fish. With the right knowledge and proactive care, you can help your Betta swim happily and healthily once more!
Thank you for reading, and we hope this guide has been helpful in learning how to cure swim bladder disease in Betta fish.
How to Heal Swim Bladder Disease in Bettas
Frequently Asked Questions
What are the common symptoms of swim bladder disease in betta fish?
Common symptoms of swim bladder disease in betta fish include erratic swimming behavior, difficulty staying upright, floating to the surface or sinking to the bottom, lack of appetite, and bloating in the abdomen area.
How can I treat swim bladder disease in my betta fish?
To treat swim bladder disease in betta fish, you can try fasting your fish for 3-4 days to relieve pressure on the swim bladder. After fasting, feed them small, high-fiber meals such as daphnia or cooked peas. Adjusting the water temperature and maintaining good water quality can also help in the recovery process.
Is there a need to isolate the betta fish with swim bladder disease from other tank mates?
It is not necessary to isolate a betta fish with swim bladder disease from other tank mates unless they are showing signs of aggression towards the affected fish. Providing a stress-free environment can aid in the recovery process, so maintaining a peaceful tank environment is essential.
Final Thoughts
In conclusion, curing swim bladder disease in betta requires adjusting their diet, maintaining good water quality, and providing proper tank conditions. Ensure bettas are not overfed and feed them high-quality, easily digestible food. Regular water changes and a well-maintained tank can help prevent swim bladder issues. Consult a veterinarian if symptoms persist despite following these steps. By addressing the root causes and providing proper care, you can effectively treat swim bladder disease in bettas and help them thrive.

How Much Is An Allergy Test Without Insurance: Cost Guide
An allergy test without insurance can range from $200 to $1,000, depending on the type of test and where it is conducted. This crucial diagnostic procedure allows individuals to identify the specific allergens triggering their symptoms, paving the way for effective treatment and relief. Without insurance coverage, the cost of an allergy test may seem daunting, but there are strategies to make it more affordable. Understanding the options available and seeking out discounted clinics can help mitigate the financial burden of obtaining an allergy test without insurance.

How Much is an Allergy Test Without Insurance: Understanding the Costs
Welcome to our guide on understanding the costs associated with allergy testing, particularly for those individuals who do not have insurance coverage. Allergies can impact our daily lives significantly, and getting tested is crucial to pinpointing the allergens that may be causing discomfort. However, the price of allergy testing can vary depending on the type of test needed and the healthcare provider you visit. In this article, we will delve into the specifics of how much an allergy test costs without insurance, explore the different types of allergy tests available, discuss possible alternatives for affordable testing, and provide tips on managing allergy-related expenses.
The Importance of Allergy Testing
Before diving into the costs associated with allergy testing, let’s first understand why getting tested is essential. Allergy testing helps identify specific allergens that trigger allergic reactions in individuals. By knowing what you are allergic to, you can take necessary precautions to avoid exposure to these allergens, leading to better symptom management and improved quality of life.
Common allergy symptoms include sneezing, itching, nasal congestion, skin rashes, and difficulty breathing. If you experience any of these symptoms regularly, it may be a sign that you have allergies and could benefit from testing to determine the exact triggers.
Types of Allergy Tests
There are several types of allergy tests available, each with its own costs and benefits. The most common allergy tests include:
Skin Prick Test
The skin prick test is one of the most common methods used to diagnose allergies. During this test, a small amount of allergen extract is placed on the skin, and then a small prick or puncture is made through the drop. If you are allergic to the substance, you will develop a reaction at the site within 15-20 minutes.
Blood Test (RAST or IgE test)
Blood tests, such as the RAST (radioallergosorbent) test or IgE test, measure the level of specific antibodies in your blood that your immune system produces in response to allergens. These tests are especially useful for individuals who cannot undergo skin prick testing due to skin conditions or other medical reasons.
Elimination Diet
An elimination diet involves removing specific foods from your diet that are known to cause allergies and then slowly reintroducing them to identify any allergic reactions. While this method can be effective, it is essential to consult a healthcare provider or allergist before attempting an elimination diet to ensure proper guidance and monitoring.
Cost of Allergy Testing Without Insurance
One of the primary concerns for individuals without insurance is the cost associated with allergy testing. Typically, the price of allergy testing without insurance can range from $200 to $1000 or more, depending on the type of test, the number of allergens being tested for, and the location where the test is conducted.
For example, a skin prick test may cost around $60 to $300 per allergen panel, with additional charges for the appointment and consultation. Blood tests can range from $200 to $1000 or more, depending on the specific tests needed and the laboratory fees involved.
Affordable Alternatives for Allergy Testing
If you are concerned about the high costs of allergy testing without insurance, there are several affordable alternatives you can explore:
Community Health Clinics
Community health clinics often offer discounted or sliding scale fees for medical services, including allergy testing. Contact your local clinic to inquire about their pricing options and eligibility requirements.
Local Universities or Research Centers
Universities and research centers may conduct allergy testing as part of their research studies or training programs. You may be able to participate in these studies at a reduced cost or even for free, while also contributing to scientific research.
Telemedicine Services
Some telemedicine services offer virtual allergy consultations and testing kits that you can use at home. While these services may not be as comprehensive as in-person testing, they can provide a more affordable option for initial assessment and guidance.
Managing Allergy-Related Expenses
Aside from the cost of testing, managing allergy-related expenses involves several strategies to minimize the financial burden:
Insurance Coverage
If you do not have insurance, consider exploring affordable insurance options through government programs or healthcare exchanges. Having insurance coverage can significantly reduce the out-of-pocket costs for allergy testing and treatment.
Generic Medications
Opting for generic allergy medications instead of brand-name drugs can help save money without compromising on effectiveness. Many over-the-counter antihistamines and nasal sprays are available as generics at a lower cost.
Allergen Avoidance
One of the most effective ways to manage allergies is by avoiding exposure to known allergens. Taking proactive measures to minimize contact with triggers, such as dust mites, pollen, pet dander, and mold, can help reduce the need for medications and medical interventions.
In conclusion, while the cost of allergy testing without insurance can be a significant concern for many individuals, there are options available to make testing more accessible and affordable. By understanding the different types of allergy tests, exploring cost-effective alternatives, and implementing strategies to manage allergy-related expenses, you can take control of your allergies without breaking the bank. Remember to consult with a healthcare provider or allergist to determine the best course of action for diagnosing and managing your allergies effectively.
Thank you for reading our comprehensive guide on how much allergy testing costs without insurance. Stay informed, stay healthy!
How Much Do Epinephrine Autoinjectors Cost Without Insurance? | Allergy Relief Guide
Frequently Asked Questions
How much does an allergy test cost without insurance?
An allergy test without insurance can range from $100 to $300 for skin prick tests and up to $1,000 for blood tests. Costs vary depending on the type of test needed and the provider’s fees.
Are there any affordable options for allergy testing without insurance?
Some clinics and laboratories may offer discounted rates or payment plans for individuals without insurance. It’s advisable to research and inquire about such options to find the most affordable solution.
Can I negotiate the cost of an allergy test if I don’t have insurance?
Yes, it is possible to negotiate the cost of an allergy test without insurance. You can speak directly with the healthcare provider or facility to discuss payment options, potential discounts, or payment plans to make the test more affordable for you.
What factors can influence the price of an allergy test for someone without insurance?
Several factors can impact the cost of an allergy test for individuals without insurance, including the type of test required, the healthcare provider’s fees, the location of the facility, and any additional services or consultations needed as part of the testing process.
Final Thoughts
In conclusion, an allergy test without insurance can range anywhere from $200 to $1000, depending on the type of test and where it is conducted. It is important to shop around and compare prices to find the best option for your budget. Many clinics and healthcare providers offer payment plans or discounts for self-pay patients. Remember to inquire about any available financial assistance programs. Ultimately, being proactive and informed about the cost of an allergy test without insurance can help you make the best decision for your healthcare needs.
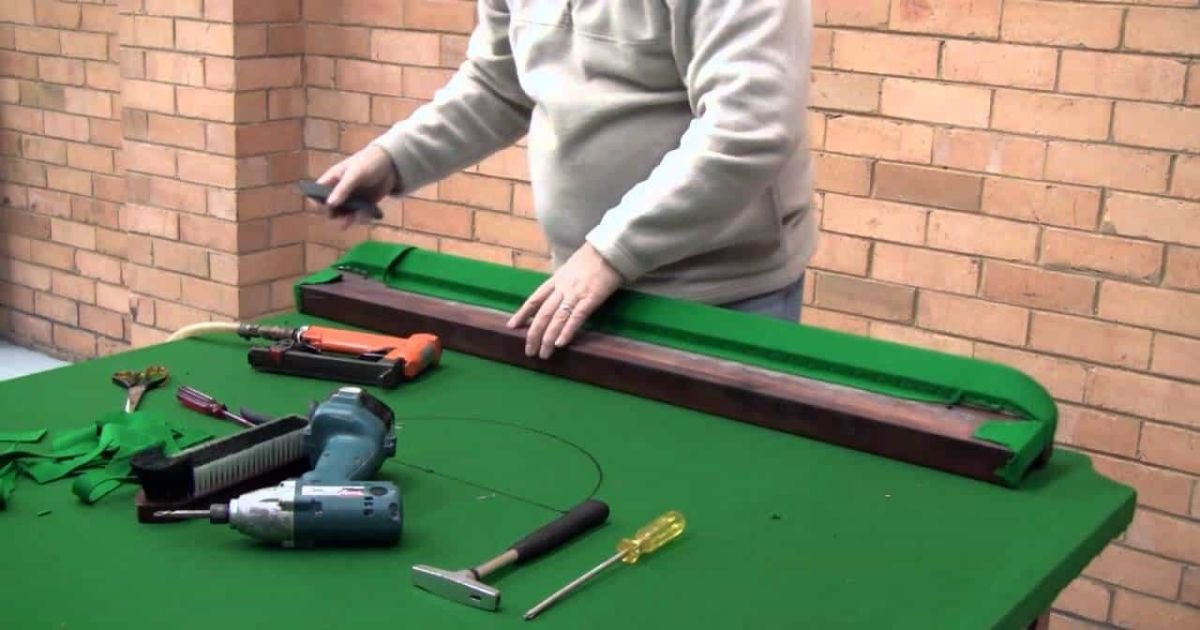
Cost Of Refelting A Pool Table: How Much Is It To Refelt A Pool Table
Refelting a pool table typically costs between $250 and $500, depending on various factors. The process involves removing the old felt, applying new cloth, and ensuring a smooth, level playing surface. While the price may vary based on size, quality of material, and additional services, hiring a professional ensures a high-quality finish. Consider the investment as not just a monetary one, but also in the enjoyment and longevity of your pool table. How much is it to refelt a pool table remains a common query among billiards enthusiasts seeking to maintain their playing surface in top condition.

How Much Does it Cost to Refelt a Pool Table?
Welcome to the ultimate guide on understanding the costs associated with refelting a pool table. If you’re a pool enthusiast or a proud owner of a pool table, you may have wondered about the expenses involved in keeping your table in top condition. In this article, we will break down the factors that influence the cost of refelting a pool table and provide you with all the information you need to make an informed decision.
Why Refelting a Pool Table is Important
Before we delve into the costs, let’s understand why refelting a pool table is crucial. The felt, also known as the cloth, on a pool table is a vital component that affects the game’s playability and aesthetics. Over time, the felt may wear out, tear, or become damaged, impacting the ball’s roll and accuracy of shots. By refelting your pool table, you can restore its smooth surface, ensuring a consistent playing experience.
Factors Influencing the Cost of Refelting
Several factors can influence the cost of refelting a pool table. Here are some key considerations:
Size of the Pool Table
The size of your pool table plays a significant role in determining the cost of refelting. Standard pool tables come in different sizes, such as 7 feet, 8 feet, and 9 feet. Larger tables require more felt material, which can increase the overall expenses.
Quality of the Felt
The quality of the felt you choose can impact the total cost. Higher-quality felts made from premium materials may cost more upfront but can offer better durability and playability in the long run. Cheaper felts may save you money initially but might wear out faster, necessitating more frequent refelting.
Professional Installation
Hiring a professional to refelt your pool table can add to the overall cost. While some individuals may attempt a DIY refelting project, it is advisable to seek the expertise of a professional to ensure the job is done correctly. Professional installers have the knowledge and experience to handle the delicate process of refelting with precision.
Additional Services
Depending on the condition of your pool table, you may require additional services, such as leveling the table, replacing cushions, or repairing any structural damage. These supplementary services can increase the overall cost of refelting. It’s essential to assess the table’s condition to determine if any extra work is needed.
Typical Costs of Refelting a Pool Table
Now that we’ve discussed the factors that influence the cost, let’s take a look at the typical expenses you can expect when refelting a pool table:
Material Costs
The cost of the felt itself can range from $100 to $500, depending on the quality and size needed for your pool table. Higher-end felts may cost more, but they can offer superior performance and longevity.
Labor Costs
The labor costs for refelting a pool table can vary based on location and the expertise of the installer. On average, you can expect to pay anywhere from $200 to $500 for professional installation. DIY enthusiasts may save on labor costs but should be prepared for the challenges that come with refelting a pool table.
Additional Services
If your pool table requires any additional services, such as cushion replacement or structural repairs, you should budget extra for these expenses. The cost of these services can vary depending on the extent of the work needed.
Tips for Saving Money on Refelting
If you’re looking to refelt your pool table without breaking the bank, consider the following tips:
Shop Around for Quotes
Get estimates from multiple pool table refelting professionals to compare prices and services. By shopping around, you can find the best deal that fits your budget.
Consider DIY Options
If you’re handy with tools and enjoy a good DIY project, you may opt to refelt your pool table yourself. Keep in mind that DIY refelting requires precision and patience, so make sure you’re up for the challenge before taking it on.
Maintain Your Pool Table
Regular maintenance of your pool table can help prolong the life of the felt and prevent premature wear and tear. Simple practices like brushing the felt regularly and avoiding spills can go a long way in preserving the playing surface.
Refelting a pool table is an essential maintenance task that ensures your table remains in optimal condition for years to come. By understanding the factors that influence the cost of refelting and exploring ways to save money, you can make informed decisions regarding the upkeep of your pool table. Remember, investing in the care of your pool table can enhance your playing experience and prolong the lifespan of this beloved game piece.
How To Refelt A Pool Table – Easy DIY
Frequently Asked Questions
How much does it typically cost to refelt a pool table?
Refelting a pool table can cost anywhere from $250 to $600 on average. The actual price may vary depending on factors such as the size of the pool table, the quality of the felt material, and any additional services required during the refelting process.
What factors can influence the cost of refelting a pool table?
The cost of refelting a pool table can be influenced by various factors including the size of the table, the type and quality of the felt material chosen, the location of the table, and whether any additional repairs or maintenance are needed before the refelting process can begin.
Are there any additional costs to consider when refelting a pool table?
In addition to the cost of the actual refelting service, there may be additional costs to consider such as transportation fees if the pool table needs to be moved, any repairs or adjustments needed to the table structure, and potential fees for dismantling and reassembling the table.
Can I refelt a pool table by myself to save money?
While it is possible to refelt a pool table by yourself to save money, it is a complex and delicate process that requires specific skills and tools. Attempting to refelt a pool table without the necessary expertise can lead to costly mistakes and potentially damage the table, so it is often recommended to hire a professional for the job.
Final Thoughts
Refelting a pool table typically costs between $250 to $600. Factors such as the size of the table, type of cloth, and any additional services can affect the total price. Ensure to get quotes from multiple professionals to find the best deal. When considering how much it is to refelt a pool table, it is essential to balance quality and affordability.