


Discover The Cost Of Gel X Nails: How Much Is Gel X Nails
Gel X nails offer a durable and trendy manicure option. So, how much is Gel X nails? The cost can vary depending on the salon, location, and additional services. It’s essential to consider the quality and expertise in the pricing. In this article, we will delve into the factors that influence the cost of Gel X nails and provide tips on finding the best value for your money. Let’s get started!

How Much is Gel X Nails: A Complete Guide to Pricing and Benefits
Introduction
Have you ever wondered how much it costs to get Gel X nails? In this comprehensive guide, we will delve into the world of Gel X nails, exploring their prices, benefits, and everything else you need to know before your next nail appointment.
What Are Gel X Nails?
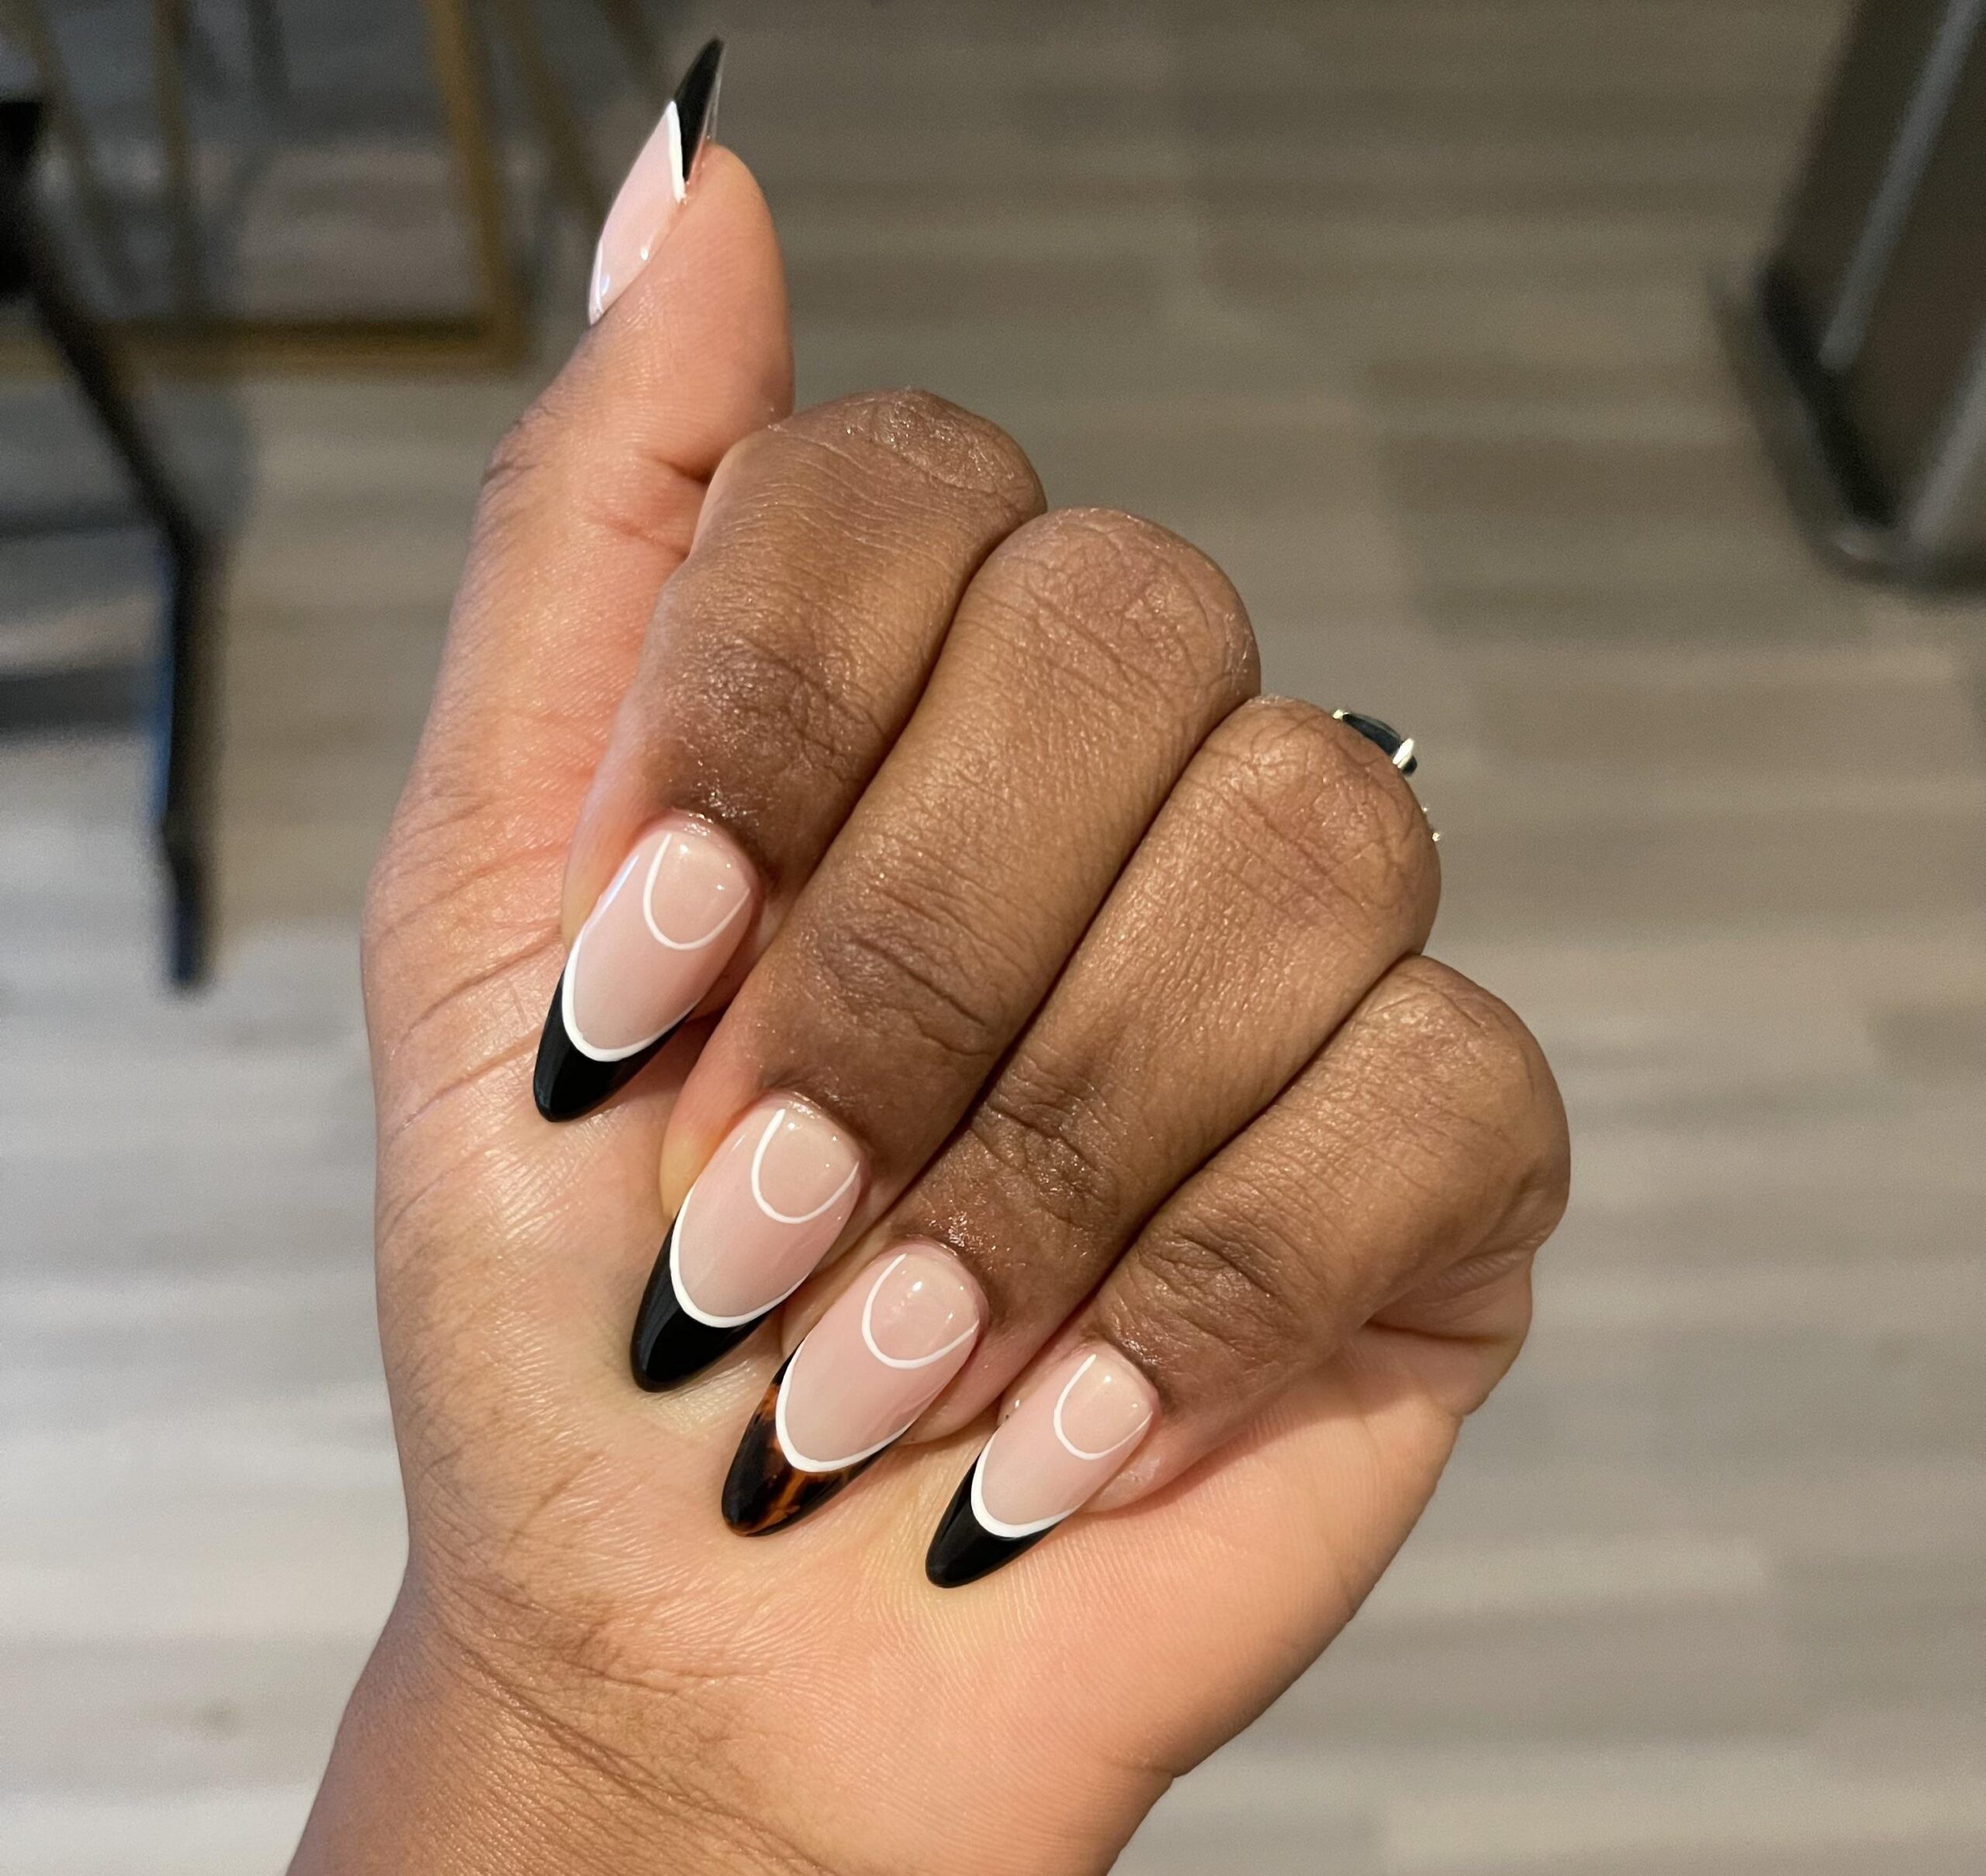
Gel X nails are a type of nail enhancement that combines the flexibility of gel with the strength of acrylic. They are applied using pre-made gel tips that are secured to the natural nail and then shaped and polished to perfection. Gel X nails are popular for their durability and long-lasting wear.
Understanding the Cost
The cost of Gel X nails can vary depending on several factors, including the salon location, the experience of the nail technician, and any additional services you may opt for. On average, Gel X nails can range from $50 to $150 per set. Keep in mind that prices may also differ based on the complexity of the design or the length of the nails.
Factors Influencing Pricing
Some salons may charge extra for nail art, intricate designs, or additional services such as cuticle care or nail shaping. It’s essential to inquire about the total cost upfront to avoid any surprises when it comes time to pay.
The Benefits of Gel X Nails
One of the primary advantages of Gel X nails is their durability. Unlike traditional manicures, Gel X nails can last up to three weeks without chipping or peeling. They are also more flexible than acrylic nails, making them less prone to breakage.
Long-Lasting Wear
Gel X nails are perfect for individuals with busy lifestyles who don’t have time for frequent touch-ups. Whether you’re typing away on a keyboard or washing dishes, Gel X nails can withstand daily wear and tear.
Natural Look and Feel
Another benefit of Gel X nails is their natural look and feel. The gel tips are lightweight and mimic the appearance of natural nails, giving you a flawless finish without the bulkiness often associated with acrylics.
Tips for Maintaining Gel X Nails
To extend the life of your Gel X nails, it’s essential to follow a few maintenance tips. Avoid using your nails as tools, always wear gloves when doing household chores, and moisturize your cuticles regularly to keep your nails looking their best.
Proper Nail Care
Investing in a good cuticle oil and nail strengthener can help keep your Gel X nails healthy and strong. Regularly trimming and shaping your nails will also prevent any snagging or lifting, ultimately prolonging the lifespan of your manicure.
In conclusion, the cost of Gel X nails can vary depending on several factors, but the benefits of this nail enhancement make it a worthwhile investment. Whether you’re looking for long-lasting wear, a natural look, or durability, Gel X nails have you covered. So, the next time you’re due for a manicure, consider treating yourself to a set of Gel X nails for a flawless and lasting finish.
What to Know About Gel X Nails 101 – Pros & Cons
Frequently Asked Questions
What factors determine the cost of Gel X nails?
The cost of Gel X nails can vary depending on several factors such as the complexity of the design, the experience of the nail technician, the location of the salon, and any additional services included in the appointment.
Can I get a price estimate for Gel X nails without visiting the salon?
It’s challenging to provide an accurate price estimate for Gel X nails without a consultation at the salon. Prices can differ based on individual preferences and specific requirements, so it’s best to schedule a consultation for an accurate quote.
Do Gel X nails cost more than traditional acrylic nails?
Gel X nails generally tend to be more expensive than traditional acrylic nails. This is because Gel X nails are considered a premium service that offers a more durable and natural-looking result compared to traditional acrylics.
Final Thoughts
In conclusion, Gel X nails offer a convenient and long-lasting solution for beautiful manicures. The cost of Gel X nails may vary depending on the salon or technician you choose. When considering how much Gel X nails cost, it’s essential to factor in the quality of products and expertise of the nail technician. Ultimately, the investment in Gel X nails is worth it for those seeking a durable and flawless nail enhancement option.
Discover How Many Babies Do Shrimp Have: A Complete Guide
Shrimp can have anywhere from 1,000 to 30,000 babies at a time, making them quite prolific reproducers. These tiny crustaceans may seem unassuming, but their reproductive capabilities are nothing short of fascinating. Have you ever wondered how many babies do shrimp have, and how they manage to care for such large broods? Let’s dive into the intriguing world of shrimp reproduction and uncover the secrets behind their impressive offspring numbers. Get ready to be amazed by the wonders of nature unfolding within the depths of the ocean.

How Many Babies Do Shrimp Have?
Shrimp are fascinating creatures that live in oceans, rivers, and lakes all around the world. One of the most interesting things about shrimp is their reproduction process. Have you ever wondered how many babies a shrimp can have? Let’s dive into the wonderful world of shrimp reproduction and find out!
The Life of a Shrimp
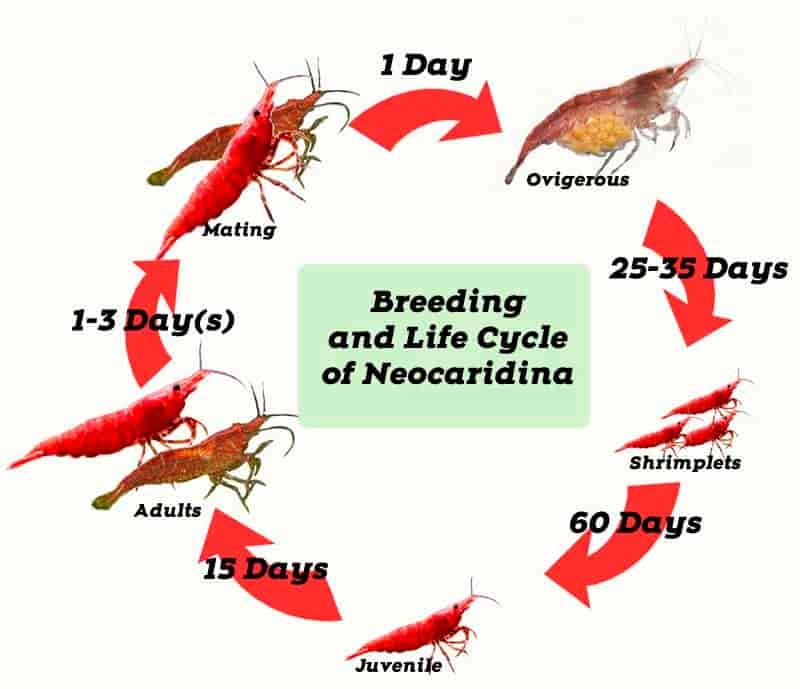
Before we talk about how many babies shrimp can have, let’s first understand a bit about the life cycle of a shrimp. Shrimp start their lives as tiny eggs, which are usually laid by the mother shrimp. These eggs hatch into larvae, which then grow into juvenile shrimp. As they continue to grow, they become adult shrimp ready to reproduce and continue the cycle.
Shrimp Reproduction
Now, let’s focus on the exciting part – shrimp reproduction! Female shrimp can lay hundreds to thousands of eggs at a time, depending on the species. Once these eggs are fertilized by male shrimp, they are carried under the female’s abdomen until they hatch. This process is called “brooding.”
Brooding Process
During the brooding process, the female shrimp carefully tends to her eggs, ensuring they get enough oxygen and nutrients to develop properly. This can take anywhere from a few weeks to a few months, depending on the shrimp species and environmental conditions.
Once the eggs hatch, tiny larvae emerge, ready to embark on their own journey in the vast waters. It’s truly amazing to think about how many baby shrimp come into this world through this process!
Factors Affecting Shrimp Reproduction
Several factors can influence how many babies a shrimp can have. Environmental conditions such as water temperature, salinity, and food availability play a crucial role in the reproductive success of shrimp. Healthy adult shrimp are more likely to produce a larger number of offspring compared to stressed or malnourished shrimp.
Species Variation
Additionally, different shrimp species have varying reproductive capacities. Some species are known to produce more offspring than others. For example, certain species of freshwater shrimp may have smaller broods compared to marine shrimp species.
Life Expectancy
Another factor to consider is the life expectancy of shrimp. Some shrimp species have shorter lifespans, which may result in fewer opportunities for reproduction compared to species that live longer.
Importance of Shrimp Reproduction
Shrimp play a vital role in aquatic ecosystems as they serve as a food source for many other aquatic animals. Their reproductive success is crucial for maintaining healthy populations and ecological balance. By producing a large number of offspring, shrimp contribute to the diversity and abundance of marine life.
Human Impact
However, human activities such as overfishing, habitat destruction, and pollution can have a detrimental impact on shrimp populations. It’s essential for us to understand and appreciate the delicate balance of nature to ensure the sustainability of shrimp and other marine species.
In conclusion, the number of babies a shrimp can have varies depending on various factors such as species, environmental conditions, and individual health. From hundreds to thousands, each baby shrimp is a precious addition to the aquatic world, playing a vital role in the ecosystem. By learning more about shrimp reproduction, we can develop a deeper appreciation for these fascinating creatures and their importance in the marine environment.
Next time you enjoy a delicious shrimp dish, take a moment to think about the incredible journey these tiny creatures go through to bring joy to our taste buds!
Examples of the 4 Stages of Shrimp Pregnancy & Growth: (HD 2022 Version) Cherry Shrimp Life Cycle.
Frequently Asked Questions
How many babies do shrimp typically have at one time?
Shrimp usually give birth to a large number of babies at once, with the exact quantity varying depending on the species. Commonly, a single female shrimp can release anywhere from 50 to over 1,000 baby shrimp called larvae during a single reproductive cycle.
What is the process of shrimp reproduction like?
Female shrimp carry their eggs externally until they hatch, after which the larvae are released into the water. Shrimp reproduce through a process called spawning, where females fertilize their eggs with sperm from males. The larvae go through several stages of development before reaching adulthood.
How often do shrimp reproduce and have babies?
Shrimp typically reproduce multiple times throughout their lifetime, with some species reproducing every few weeks under optimal conditions. The frequency of reproduction can vary based on factors such as environmental conditions, food availability, and maturity of the shrimp.
Final Thoughts
Shrimp can have anywhere from 1,000 to 2,000 babies in a single brood. The number of babies a shrimp can have varies depending on species and environmental conditions. It is fascinating to learn about how many babies shrimp can have, showcasing their remarkable reproductive abilities. Researchers continue to study and learn more about the reproduction and life cycle of these intriguing crustaceans.

Ultimate Guide: How To Adjust A Propane Regulator
Adjusting a propane regulator is a crucial step in ensuring your gas appliances work efficiently. To adjust a propane regulator properly, you need to understand the process and follow the right steps. Proper adjustment ensures proper gas flow and pressure, which are essential for safe and effective operation. In this guide, we will walk you through the steps on how to adjust a propane regulator correctly to keep your appliances running smoothly. Let’s dive in and learn the necessary skills to maintain your propane system.

How to Adjust a Propane Regulator: A Comprehensive Guide
Welcome to our guide on adjusting a propane regulator! Propane regulators are crucial components of your gas system, ensuring a safe and steady flow of propane to your appliances. Whether you’re a seasoned DIY enthusiast or a novice homeowner looking to learn more about propane systems, this step-by-step guide will walk you through the process of adjusting a propane regulator with ease.
Understanding the Basics of a Propane Regulator
Before we delve into the adjustment process, let’s first understand what a propane regulator does. A propane regulator is a device that controls the flow of propane from your tank to your appliances. It reduces the high pressure of the propane in the tank to a safe and consistent pressure for use in your home.
Regulators have a pressure rating measured in BTUs (British Thermal Units) per hour, indicating the maximum flow rate they can handle. It’s essential to ensure that your regulator is correctly adjusted to prevent issues such as fluctuating flame sizes or inefficient appliance operation.
Gathering the Necessary Tools
Before you start adjusting your propane regulator, make sure you have the following tools on hand:
- Adjustable wrench
- Manometer (for measuring gas pressure)
- Protective gloves
- Safety goggles
Checking for Gas Leaks
Before proceeding with any adjustments, it’s crucial to check for gas leaks in your system. To do this, mix a solution of soapy water and apply it to the regulator connections and the gas line fittings. Turn on the gas, and if you see bubbles forming, it indicates a leak. In this case, turn off the gas immediately and tighten the connections or seek professional help.
Adjusting the Pressure
Now, let’s move on to the actual adjustment process. Follow these steps to adjust the pressure of your propane regulator:
Step 1: Locate the Regulator
The propane regulator is usually located near the propane tank or at the beginning of the gas line. It looks like a cylindrical device with an inlet and outlet connection.
Step 2: Turn Off the Gas
Before making any adjustments, ensure that the gas supply to the regulator is turned off. This can usually be done by closing the valve on the propane tank.
Step 3: Loosen the Locking Nut
Using an adjustable wrench, loosen the locking nut on the regulator. This nut secures the adjustment screw in place.
Step 4: Adjust the Pressure
With the locking nut loosened, use a screwdriver to turn the adjustment screw clockwise to increase the pressure or counterclockwise to decrease the pressure. Use the manometer to check the pressure and make precise adjustments.
Step 5: Secure the Locking Nut
Once you’ve achieved the desired pressure setting, tighten the locking nut to secure the adjustment screw in place. Ensure it is snug but not overtightened.
Testing the Regulator
After adjusting the pressure, it’s essential to test the regulator to ensure it’s functioning correctly. Turn on the gas and check the flame on your appliances. The flame should be steady and blue. If you notice any issues, double-check the pressure setting and make adjustments as necessary.
Maintaining Your Propane System
Regular maintenance of your propane system is key to ensuring its efficiency and safety. In addition to adjusting the regulator, it’s essential to check for leaks, replace worn-out components, and schedule professional inspections periodically.
Adjusting a propane regulator may seem daunting at first, but with the right tools and knowledge, you can confidently maintain your gas system at home. By following the steps outlined in this guide and staying vigilant about safety precautions, you’ll be able to ensure a smooth and reliable flow of propane to your appliances. Remember, if you’re ever unsure about making adjustments to your propane system, don’t hesitate to seek help from a qualified professional.
Thank you for reading our comprehensive guide on how to adjust a propane regulator. We hope you found it informative and empowering. Stay safe and enjoy the benefits of a well-maintained propane system in your home!
How To Reset Your Propane Regulator
Frequently Asked Questions
What tools are needed to adjust a propane regulator?
To adjust a propane regulator, you will typically need an adjustable wrench, a screwdriver, soapy water solution for leak testing, and protective gloves or goggles for safety.
How can I tell if my propane regulator needs adjustment?
If you notice inconsistent flame patterns, yellow or flickering flames, or difficulties maintaining a steady heat output on your propane appliance, it might indicate that the regulator needs adjustment.
Can I adjust the pressure output of a propane regulator myself?
Yes, you can adjust the pressure output of a propane regulator yourself by carefully following the manufacturer’s instructions and using the appropriate tools. However, if you are unsure, it’s best to seek professional help to avoid any potential risks.
What is the recommended procedure for adjusting a propane regulator?
First, turn off the propane supply and disconnect the regulator. Use the appropriate tools to adjust the pressure setting according to the manufacturer’s guidelines. Reconnect the regulator, check for leaks using soapy water, and test the propane appliance to ensure proper functioning.
Final Thoughts
To adjust a propane regulator, follow these steps: first, carefully locate the adjustment screw. Next, use a screwdriver to turn the screw clockwise to increase pressure or counterclockwise to decrease. Ensure to test the pressure with a gauge after each adjustment to ensure it’s within the desired range. By following these simple steps, you can safely and effectively adjust a propane regulator to suit your needs. Adjusting a propane regulator is a straightforward process that can be done with just a few simple tools and a little know-how.

Exploring: How Long Does 18 Holes Of Mini Golf Take
“How long does 18 holes of mini golf take? On average, a round of mini golf typically takes about 45 minutes to an hour to complete. However, several factors can influence the time it takes to finish a game. From navigating challenging obstacles to aiming for the perfect hole-in-one, the duration of your mini golf experience can vary. Let’s explore some tips and tricks to make the most of your time on the mini golf course.”

How Long Does 18 Holes of Mini Golf Take?
Welcome, young adventurers, to the exciting world of mini golf! Have you ever wondered how long it takes to play a round of mini golf with 18 holes? Mini golf, also known as putt-putt or miniature golf, is a fun and challenging game enjoyed by people of all ages. In this blog post, we will explore the time it takes to complete a full 18-hole course of mini golf. So put on your golfing cap, grab your putter, and let’s dive into the world of mini golf time management!
The Average Time to Play 18 Holes of Mini Golf
Before we get into the nitty-gritty details, let’s talk about the average time it takes to play 18 holes of mini golf. On average, it can take about 1 to 2 hours to complete a full round of mini golf with 18 holes. However, the actual time can vary depending on various factors such as the size and complexity of the course, the number of players, and the skill level of the participants.
Factors That Affect the Time to Complete 18 Holes
Course Size and Complexity
The size and complexity of the mini golf course play a significant role in determining how long it takes to finish a game. Some courses may have simple and straightforward holes, while others might feature challenging obstacles such as windmills, water hazards, and loop-de-loops. The more intricate the course design, the longer it may take to navigate through each hole.
Number of Players
The number of players in a mini golf game can also impact the time it takes to complete 18 holes. If you are playing solo, you may be able to move through the course at a quicker pace compared to playing in a group. More players mean more turns and potentially more time spent waiting for others to take their shots.
Skill Level of Participants
Your skill level and experience in playing mini golf can influence how long it takes to complete a round. Players who are more experienced and skilled at putting may be able to navigate the course more efficiently and complete holes in fewer strokes. On the other hand, beginners may take longer to adjust to the game’s nuances and obstacles.
Tips for Speeding Up Your Mini Golf Game
Now that we’ve discussed some factors that can affect the time it takes to play 18 holes of mini golf, here are some tips to help you speed up your game and have a great time on the course:
1. Keep a Steady Pace
Try to maintain a steady pace as you move through each hole. Take your time to line up your shots, but avoid spending too much time overthinking your next move. Remember, it’s all about having fun!
2. Be Mindful of Others
If you are playing in a group, be mindful of other players’ time and take turns efficiently. Avoid unnecessary delays and try to keep the game moving smoothly.
3. Practice Your Putting Skills
The more you practice your putting skills, the quicker you’ll be able to complete each hole. Spend some time honing your technique and mastering different types of shots to improve your game speed.
4. Plan Your Shots Strategically
Before taking a shot, take a moment to plan your approach. Consider the angle, slope, and any obstacles in your path. By strategizing your shots, you can save time and improve your overall performance on the course.
So, how long does 18 holes of mini golf take? The answer is, it depends! The average time to complete a round of mini golf can range from 1 to 2 hours, but various factors such as course design, number of players, and skill level can influence the actual time taken. By following the tips mentioned above and enjoying the game at your own pace, you can make the most out of your mini golf experience. Now, go out there, tee up, and have a fantastic time putting your way through those 18 holes!
Scoring 18 HOLE-IN-ONES *Mini Golf Trick Shots* | That's Amazing
Frequently Asked Questions
How many players can participate in a typical 18-hole mini golf game?
In a standard game of mini golf, each group usually consists of 2 to 4 players. The number of players can affect the overall time it takes to complete the 18 holes.
What is the average duration for completing 18 holes of mini golf?
On average, it takes a group of 4 players approximately 1 to 1.5 hours to complete a full round of 18 holes in mini golf. However, the time can vary based on the players’ skill level and the course design.
Does the pace of play in mini golf impact the time taken to finish 18 holes?
A faster pace of play in mini golf can significantly reduce the time needed to complete 18 holes. Players who take fewer strokes per hole and move efficiently between shots can finish the game quicker than those who take more time.
Are there factors that can influence the duration of a game of 18-hole mini golf?
Various factors can impact how long it takes to play 18 holes of mini golf, such as the number of players, the complexity of the course layout, the skill level of the players, and if there are any delays or wait times at certain holes.
Final Thoughts
Playing 18 holes of mini golf typically takes around 60 to 90 minutes. The duration may vary based on factors such as the speed of play and the size and complexity of the course. Some players may finish a round more quickly, while others might take longer to complete all 18 holes. When planning a mini golf outing, it’s advisable to allocate at least an hour to an hour and a half to enjoy the game fully and savor the experience of playing through all 18 holes.
Exploring The Caloric Content Of Onigiri: How Many Calories In Onigiri
Onigiri, a beloved Japanese snack, typically contains around 200-300 calories per piece, depending on the filling and size. These delightful rice balls are not only delicious but also a convenient and satisfying treat for on-the-go snacking. Whether you enjoy them with savory fillings like salmon or pickled plum, or opt for a vegan-friendly option, onigiri provides a tasty burst of flavor in every bite. Curious about how many calories in onigiri? Let’s dive into the calorie content of this popular Japanese dish and explore some healthier variations to enjoy guilt-free.

How Many Calories in Onigiri: Exploring the Nutritional Content of Everyone’s Favorite Japanese Snack
Welcome to our comprehensive guide on the calories in onigiri! If you are a fan of this popular Japanese snack and are curious about its nutritional value, you’ve come to the right place. In this article, we will delve into the world of onigiri, exploring its calorie content and the factors that influence it.
The Basics of Onigiri
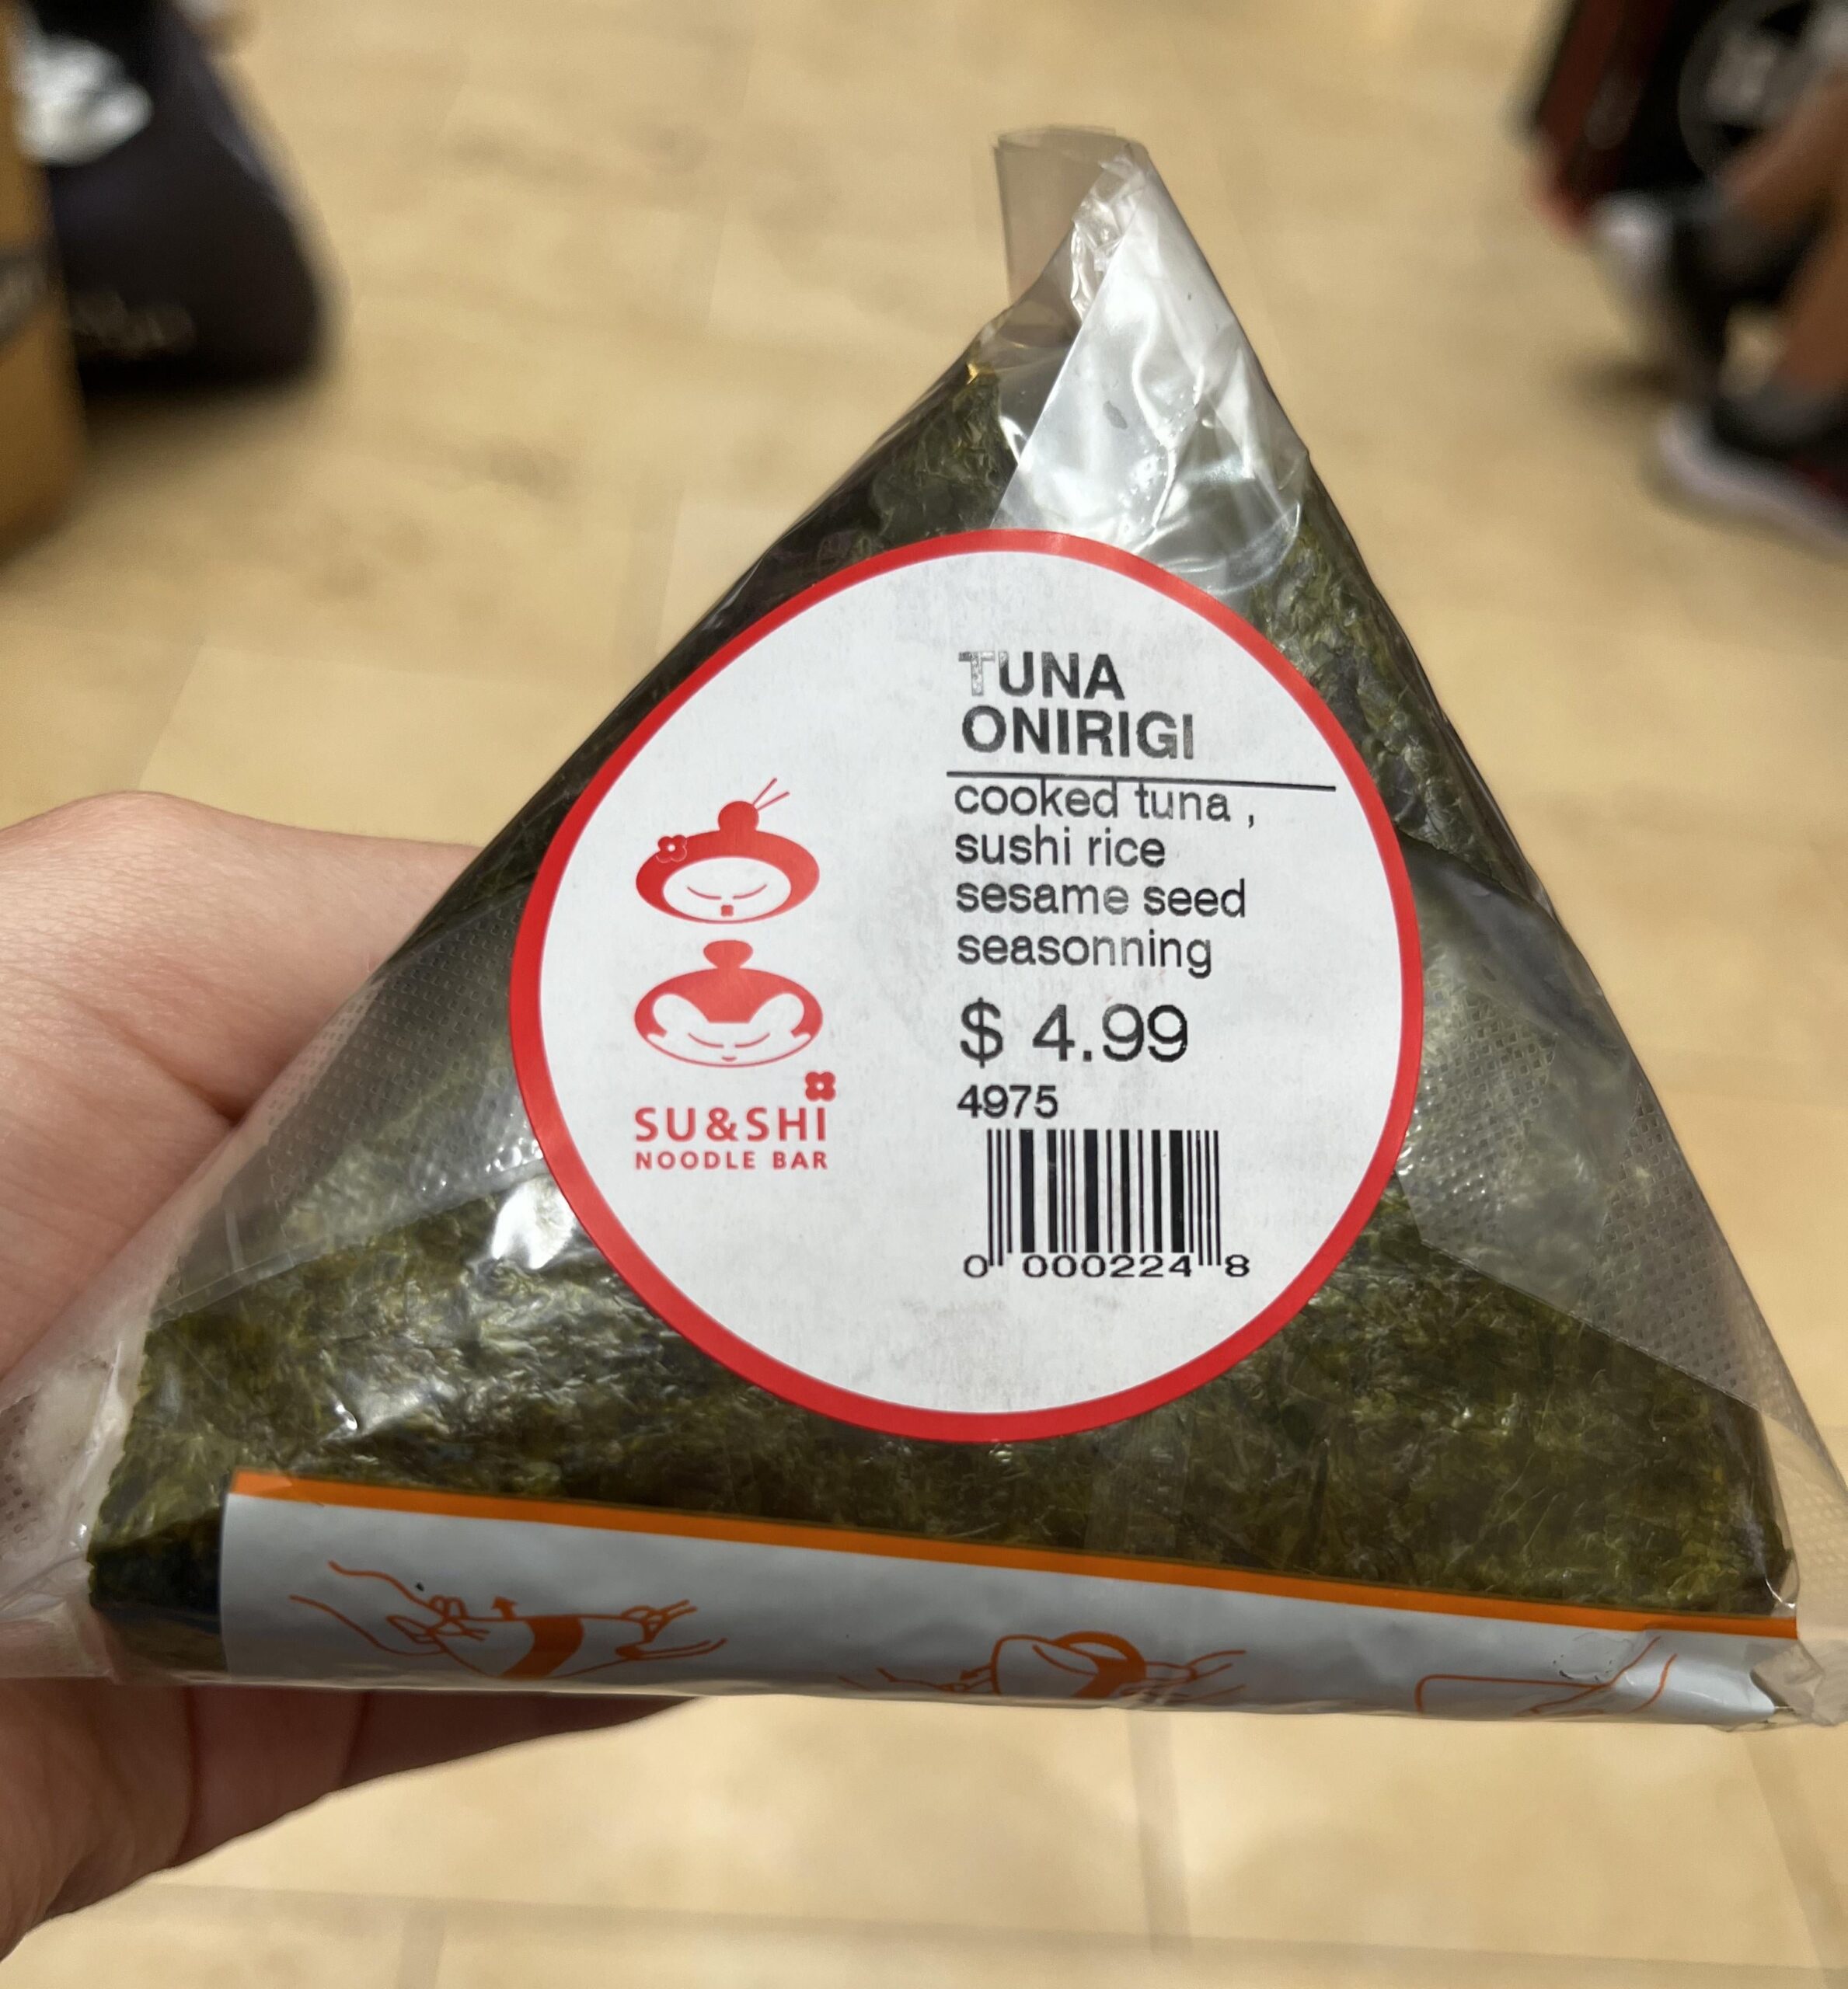
Before we dive into the calorie count, let’s first understand what onigiri is. Onigiri, also known as Japanese rice balls, is a popular snack that consists of rice formed into a triangular or oval shape and often wrapped in seaweed. It is a versatile snack that can be filled with various ingredients such as salmon, tuna, pickled plum, or seasoned vegetables.
Calories in Onigiri: A Closer Look
When it comes to the calorie content of onigiri, it’s important to consider the ingredients used in the preparation. The calorie count of an onigiri can vary depending on the type of rice, fillings, and seasonings used. On average, a typical onigiri ranges from 100 to 200 calories per piece.
Factors Influencing Calories in Onigiri
Several factors can influence the calorie content of onigiri. Let’s take a closer look at some of these factors:
Rice Type
The type of rice used in making onigiri plays a significant role in determining its calorie content. Short-grain rice, commonly used in Japanese cuisine, tends to be stickier and higher in calories compared to long-grain rice.
Filling Choices
The filling inside the onigiri can also contribute to its calorie count. Fillings like tuna or salmon are rich in protein and healthy fats, while fillings like mayonnaise or fried ingredients can add more calories.
Seasonings
Seasonings such as soy sauce, sesame seeds, and furikake (Japanese seasoning) can enhance the flavor of onigiri but also add some extra calories. It’s essential to be mindful of the amount of seasoning used to control calorie intake.
Health Benefits of Onigiri
While it’s important to be aware of the calorie content of onigiri, it’s also worth noting that this Japanese snack offers some health benefits. The combination of rice and fillings provides a good source of carbohydrates, protein, and essential nutrients.
Carbohydrates
Rice is a staple ingredient in onigiri, providing a source of complex carbohydrates that can help fuel your body with energy. Carbohydrates are essential for brain function and overall physical performance.
Protein
Depending on the filling, onigiri can also be a good source of protein. Protein is necessary for building and repairing tissues in the body, making onigiri a satisfying and nutritious snack option.
Essential Nutrients
Onigiri can be a vehicle for incorporating essential nutrients into your diet, depending on the fillings used. Ingredients like fish, vegetables, and seaweed offer vitamins, minerals, and antioxidants that are beneficial for overall health.
How to Enjoy Onigiri Mindfully
Now that you know more about the calories in onigiri and its nutritional benefits, here are some tips for enjoying this delicious snack mindfully:
Portion Control
While onigiri is a convenient snack, it’s essential to practice portion control to manage calorie intake. Consider having a balanced meal and incorporating onigiri as a part of it rather than relying solely on it as a snack.
Variety in Fillings
Experiment with different fillings to enjoy a variety of flavors and nutrients. Incorporating a mix of protein, vegetables, and seafood can make your onigiri more satisfying and nutritious.
Homemade Options
Consider making your own onigiri at home, where you can control the ingredients and portion sizes. Homemade onigiri allows you to customize the fillings and seasonings according to your preferences.
Onigiri is not only a delicious and convenient snack but also a versatile option that can be enjoyed as part of a balanced diet. By being mindful of the calorie content and ingredients used, you can savor the flavors of onigiri while reaping its nutritional benefits.
Whether you prefer a classic salmon onigiri or a creative vegetable-filled variation, onigiri offers a delightful eating experience that combines flavor, nutrition, and convenience. So, go ahead and indulge in a tasty onigiri knowing that you are making a flavorful and wholesome choice!
How Many Calories In Onigiri? – Japan Past and Present
Frequently Asked Questions
How many calories are in a typical onigiri?
A typical onigiri, which is a Japanese rice ball often filled with ingredients like salmon, tuna, or pickled plum, contains around 200-300 calories. The calorie count can vary depending on the size and fillings used in the onigiri.
Do different fillings in onigiri affect the calorie content?
Yes, the calorie content of an onigiri can be influenced by the fillings used. For instance, an onigiri filled with fatty ingredients like mayonnaise or fried chicken will likely have a higher calorie count compared to a simple onigiri with just rice and seaweed.
Are there low-calorie options for onigiri?
Absolutely! You can opt for healthier fillings like grilled fish, pickled vegetables, or plain steamed rice to keep the calorie count lower. By making mindful choices with the fillings, you can enjoy a delicious onigiri without consuming excessive calories.
Final Thoughts
In conclusion, the number of calories in onigiri varies based on the ingredients used, such as rice, fillings, and toppings. Generally, a plain onigiri contains around 200-300 calories, but this can increase based on added proteins or oils. Understanding the calorie content in onigiri is important for those monitoring their daily intake. Enjoying onigiri in moderation and incorporating it into a balanced diet is key to maintaining a healthy lifestyle. Paying attention to ‘how many calories in onigiri’ can help make informed food choices.
75 Weeks To Months Conversion Guide: How Many Months Is 75 Weeks?
75 weeks is equivalent to approximately 17 months. Breaking down this conversion can be puzzling for some, but fear not! In this article, we will delve into the simple and effective way to convert weeks to months, unraveling the mystery of how many months is 75 weeks. By the end, you will have a clear understanding of this time conversion, making it easier to manage schedules, plan events, or track milestones. Let’s dive in and unlock the knowledge you seek.

How Many Months is 75 Weeks
Welcome, young learners! Have you ever wondered how many months are in 75 weeks? Today, we are going to embark on an exciting journey to unravel the mystery behind this question. Let’s dive in and explore the fascinating world of time and calendars together!
Understanding Weeks and Months
Before we delve into the exact number of months in 75 weeks, let’s first understand what weeks and months are. A week is a unit of time that consists of seven days, starting with Sunday and ending with Saturday. On the other hand, a month is a longer period of time that is typically determined by the lunar cycle or the Gregorian calendar.
How Many Days in a Week and a Month
Now, let’s break it down further. There are 7 days in a week, as we mentioned earlier. In contrast, a month can vary in the number of days it has. For instance, some months have 30 days, while others have 31 days. February is a special month with either 28 or 29 days, depending on whether it’s a leap year or not.
Calculating Months in 75 Weeks
So, if we want to figure out how many months are in 75 weeks, we need to do a bit of math. To make things simpler, let’s start by converting the weeks into days because we know how many days there are in a week.
Converting Weeks to Days
Since there are 7 days in a week, all we have to do is multiply the number of weeks by 7 to get the total number of days. In this case, we have 75 weeks. So, the calculation would be:
75 weeks x 7 days/week = 525 days
Now that we have 525 days, let’s see how many months are contained within this duration.
Understanding Months in Relation to Days
As we mentioned earlier, months can vary in the number of days they have. On average, a month has around 30 days. To find out how many months are in 525 days, we can divide the total number of days by the average number of days in a month.
525 days ÷ 30 days/month ≈ 17.5 months
So, if we have 75 weeks, it is equivalent to approximately 17.5 months. But how do we interpret the 0.5 months? Let’s explore that further.
Dealing with Partial Months
When we encounter fractions of a month, we can think of them in terms of weeks. Since each month is roughly 4.3 weeks long on average, we can convert the 0.5 months into weeks to get a better understanding.
0.5 months x 4.3 weeks/month ≈ 2.15 weeks
This means that out of the 17.5 months, we have one full month and approximately 2 weeks left over. So, in the grand scheme of things, 75 weeks equate to roughly 17 months and 2 weeks.
Congratulations, young scholars! You’ve successfully unraveled the mystery of how many months are in 75 weeks. Through simple math and a bit of creativity, we were able to navigate the realms of time and calendars to find our answer. Remember, math is not just about numbers; it’s a powerful tool that allows us to explore and understand the world around us.
Keep questioning, keep exploring, and most importantly, keep learning. The journey of knowledge is endless, and there are always new discoveries waiting to be made. Until next time, happy calculating!
Pregnancy Weeks Months and Trimester #pregnancy #pregnancyjourney #pregnancycare
Frequently Asked Questions
How many months are in 75 weeks?
There are approximately 17 months in 75 weeks. To calculate this, you can divide the total number of weeks (75) by the average number of weeks in a month (4.35 weeks per month).
Can 75 weeks be converted directly into months?
While 75 weeks can be converted into months, the conversion is not always straightforward due to the varying lengths of months. There are approximately 4.35 weeks in a month on average, thus resulting in around 17 months in 75 weeks.
How is the conversion of 75 weeks to months calculated?
The conversion of 75 weeks to months is calculated by dividing the total number of weeks by the average number of weeks in a month. In this case, 75 weeks divided by 4.35 (average weeks per month) equals approximately 17 months.
Final Thoughts
In conclusion, 75 weeks is equivalent to about 17 months. This conversion provides clarity when transitioning between weeks and months. Remembering that there are approximately 4.3 weeks in a month can help with quick calculations. Understanding ‘how many months is 75 weeks’ is essential for planning, scheduling, and time management.
Optimal Hours For Wearing Invisalign Daily – A Complete Guide
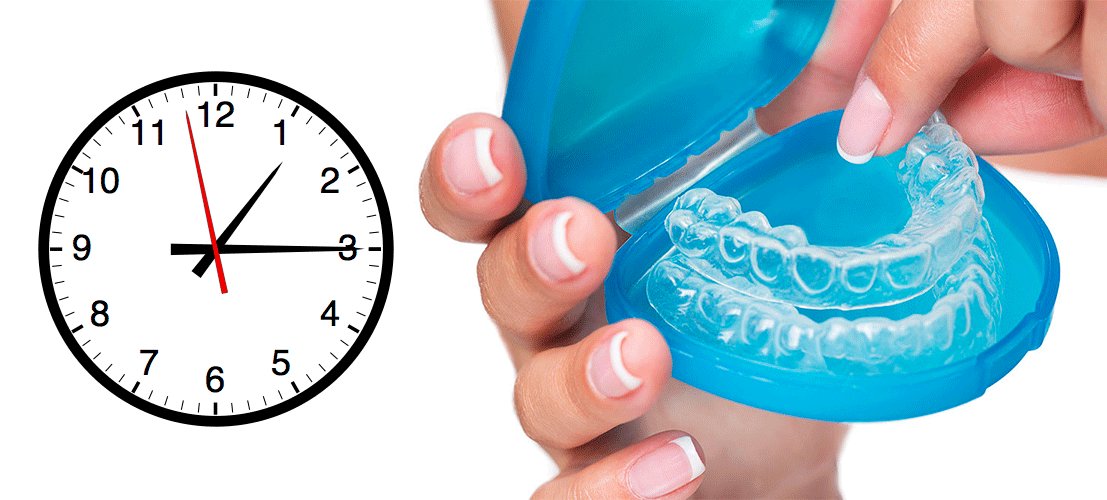
You should wear Invisalign for at least 20 to 22 hours a day to achieve optimal results. Consistency is key when it comes to straightening your teeth effectively. By following the recommended wear time diligently, you will ensure that your treatment progresses smoothly and efficiently. Remember, the more you wear your aligners, the better your outcome will be. So, make sure to keep those aligners in for the prescribed number of hours each day for a flawless smile transformation.

How Many Hours a Day to Wear Invisalign: A Comprehensive Guide
Welcome to our detailed guide on wearing Invisalign aligners! If you’re curious about how many hours a day you should wear your Invisalign trays, you’ve come to the right place. In this article, we will cover everything you need to know about the recommended hours of wearing Invisalign aligners each day.
The Basics of Invisalign
Before we dive into the specifics of how many hours a day you should wear your Invisalign aligners, let’s start with the basics. Invisalign is a popular alternative to traditional braces for straightening teeth. These clear aligners are virtually invisible and can be easily removed for eating, drinking, and oral hygiene.
Recommended Hours of Wear
It is crucial to wear your Invisalign aligners for the recommended number of hours each day to achieve the best results. Typically, you should wear your aligners for about 20 to 22 hours a day. This means that you should only remove them for eating, drinking (except for water), and oral hygiene.
Why 20-22 Hours?
The reason behind the 20-22 hours recommendation is that for Invisalign to work effectively, your teeth need consistent pressure. By wearing the aligners for the majority of the day, you are ensuring that your teeth are gradually shifted into the desired position.
Creating a Routine
To make sure you are wearing your Invisalign aligners for the recommended hours each day, it is essential to establish a routine. Try to set specific times for your meals and snacks, so you can plan when to remove your aligners. Additionally, always remember to brush your teeth before putting the aligners back in.
Mealtime Tips
When it’s time to eat, remember to take out your Invisalign aligners and store them in their case. Avoid consuming any food or drinks (except water) while wearing the aligners. Once you’re done eating, make sure to brush your teeth before reinserting the aligners.
Consistency is Key
Consistency is crucial when it comes to wearing your Invisalign aligners. While it may be tempting to remove them for longer periods, doing so can prolong your treatment time and hinder the desired results. Make a commitment to wear your aligners for the recommended hours each day to stay on track with your treatment plan.
Tracking Your Progress
Many Invisalign providers offer tools to help you track your progress and ensure you are wearing your aligners for the recommended hours each day. These may include compliance indicators on the aligners themselves or apps that remind you when to switch to the next set of aligners.
Wearing your Invisalign aligners for the recommended hours each day is essential for achieving the best results in the shortest amount of time. By following the guidelines provided by your orthodontist and maintaining consistency in your wear schedule, you’ll be well on your way to achieving a straighter and healthier smile.
Remember to consult your orthodontist if you have any concerns or questions about wearing your Invisalign aligners. With dedication and proper wear, you’ll soon be flashing a confident smile with beautifully aligned teeth!
Thank you for reading our comprehensive guide on how many hours a day to wear Invisalign aligners. We hope this information has been helpful in guiding you through your Invisalign treatment journey!
Why is it important to wear clear aligners like Invisalign 22 hours a day?
Frequently Asked Questions
How many hours a day should I wear Invisalign aligners?
It is recommended to wear your Invisalign aligners for 20 to 22 hours per day. This means you should only remove them when you eat, drink anything other than water, or brush and floss your teeth. Consistently wearing your aligners for the prescribed amount of time is crucial for the treatment to be effective and for achieving desired results.
Can I wear my Invisalign aligners for less than the recommended hours each day?
It is important to adhere to the recommended wearing schedule for Invisalign aligners to ensure the treatment progresses as planned. If you wear the aligners for fewer hours than prescribed, it can prolong the treatment duration and may not yield the desired outcome. Consistency is key in achieving successful results.
Is it okay to wear my Invisalign aligners for more than 22 hours a day?
While it may be tempting to wear your Invisalign aligners for longer periods, exceeding the recommended 22 hours a day can lead to unnecessary pressure on your teeth and gums. It is best to follow the prescribed guidelines provided by your orthodontist to ensure the treatment progresses smoothly and your oral health is not compromised.
Final Thoughts
In conclusion, wearing Invisalign aligners for 20-22 hours a day is crucial for optimal results. Consistency is key in achieving a successful outcome. Remember, the more you wear them, the more effective they will be in straightening your teeth. So, follow your orthodontist’s guidance on how many hours a day to wear Invisalign diligently. Your commitment to wearing them as recommended will directly impact the pace of your treatment progress.
Exploring Calories: How Many Calories In A Slice Of Bologna
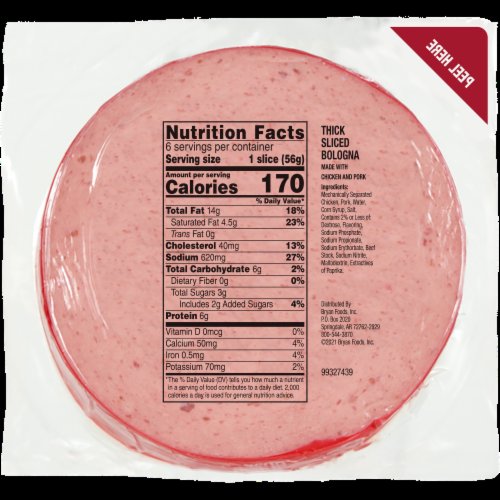
One slice of bologna typically contains around 80-90 calories. Wondering how many calories are in a slice of bologna for your next sandwich? Calories can add up quickly, so understanding the nutritional information is essential. Whether you’re calorie-conscious or just curious, knowing the calorie content of bologna can help you make more informed choices. Let’s dive into the details of how many calories are packed into that tasty slice of bologna.

How Many Calories in a Slice of Bologna: Exploring the Nutritional Value
Welcome, young food enthusiasts! Today, we are embarking on a journey to discover the mystery behind everyone’s favorite sandwich filling – bologna. Have you ever wondered how many calories are hiding in a single slice of this delicious deli meat? Let’s dive into the world of bologna and unlock the secrets of its nutritional value!
The Basics of Bologna
Before we dig into the calorie content of bologna, let’s first understand what this tasty treat is made of. Bologna is a type of sausage made from finely ground beef, pork, or a blend of both. It is seasoned with various spices and then smoked or cooked to perfection. The result? A flavorful and versatile lunch meat that has been a favorite among kids and adults alike for generations!
Calories in a Slice of Bologna
Now, the burning question – how many calories can you expect to find in a single slice of bologna? Well, the answer may surprise you. On average, a slice of bologna weighing around 1 ounce contains approximately 90 calories. This means that if you were to make a sandwich with two slices of bologna, you would be looking at about 180 calories just from the meat alone!
Factors Affecting Calorie Content
It’s important to note that the calorie content of bologna can vary slightly depending on factors such as the brand, fat content, and additional ingredients used in the sausage. Some bologna varieties may have a higher fat content, which can increase the calorie count per slice. So, it’s always a good idea to check the nutrition label if you are keeping a close eye on your calorie intake.
Nutritional Benefits of Bologna
While bologna may not be the healthiest choice when it comes to deli meats, it does offer some nutritional benefits. Bologna is a good source of protein, which is essential for building and repairing muscles in our bodies. It also contains important vitamins and minerals, such as iron and zinc, that are vital for overall health.
Pairing Bologna with Healthy Foods
If you enjoy indulging in a bologna sandwich, consider pairing it with nutrient-rich ingredients to boost its nutritional value. Adding fresh vegetables like lettuce, tomatoes, and cucumbers can provide extra vitamins and fiber to your meal. Opting for whole grain bread instead of white bread can also increase the fiber content and make your sandwich more filling.
Healthy Alternatives to Bologna
While bologna can certainly be enjoyed in moderation, there are healthier alternatives available if you are looking to cut back on calories or sodium. Turkey or chicken deli meats are leaner choices that still offer great taste and protein. You can also explore vegetarian options like tofu or tempeh for a plant-based twist on your sandwiches!
Experimenting with Flavors
Don’t be afraid to experiment with different flavors and textures when it comes to your sandwich fillings. Try adding spreads like hummus or avocado for a creamy twist, or incorporate herbs and spices for an extra kick of flavor. The possibilities are endless when it comes to creating delicious and nutritious meals!
So, the next time you reach for a slice of bologna, remember that while it may not be the healthiest option, it can still be enjoyed as part of a balanced diet. Be mindful of portion sizes and consider pairing it with complementary ingredients to enhance its nutritional value. Whether you’re a bologna enthusiast or looking to explore healthier alternatives, there’s no doubt that this classic deli meat will continue to hold a special place in our hearts and lunchboxes!
Happy eating!
How many calories are in a sandwich with Bologna sausage and wheat bread?
Frequently Asked Questions
How many calories are in a slice of bologna?
On average, a slice of bologna contains around 90-100 calories. The exact number of calories can vary depending on the brand and the specific ingredients used in the bologna.
Are there any differences in calorie count between different types of bologna?
Yes, there can be variations in calorie count among different types of bologna. For example, turkey or chicken bologna may have slightly lower calories compared to traditional beef bologna.
What factors can influence the calorie content of a slice of bologna?
The calorie content of a slice of bologna can be influenced by factors such as the fat content, additives, and preservatives used in the bologna. Higher fat content generally means more calories per slice.
Can the portion size of a slice of bologna impact the calorie count?
Yes, the size of the slice can impact the calorie count. A thicker slice of bologna will typically have more calories compared to a thinner slice, as it contains more meat and fat.
Final Thoughts
In conclusion, a slice of bologna typically contains around 80-90 calories. Understanding the calorie content of bologna can help individuals make informed decisions about their dietary intake. It is essential to consider the caloric value of each slice of bologna when planning meals and snacks. Monitoring how many calories in a slice of bologna can contribute to maintaining a balanced diet and achieving health goals effectively.
Unlocking How Many Glasses Per Champagne Bottle: The Ultimate Guide
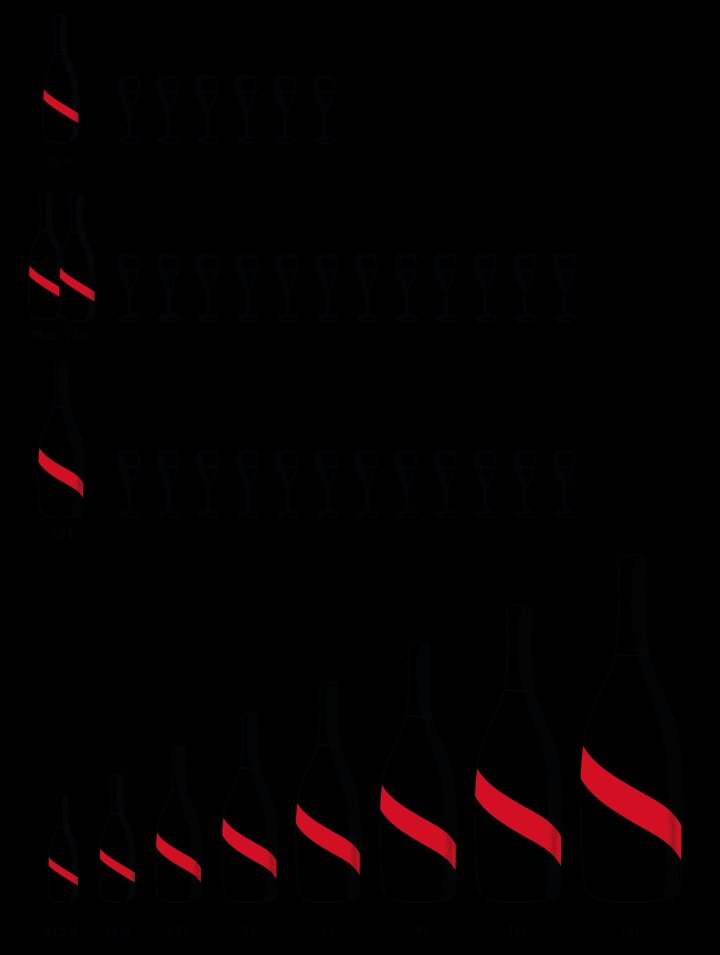
A standard champagne bottle typically serves around six glasses per bottle. However, the number of glasses per champagne bottle can vary based on the size of the flutes being used and the pour size. Factors such as the type of champagne and the occasion also play a role in determining the number of servings. Understanding how many glasses per champagne bottle is essential for planning gatherings and ensuring everyone enjoys a toast without running out. Let’s delve deeper into this bubbly topic and uncork the secrets behind champagne servings.

How Many Glasses Per Champagne Bottle
Have you ever wondered how many glasses of champagne you can pour from a single bottle? Whether you’re planning a celebration or just curious about the math behind the bubbles, understanding how many glasses you can get from a champagne bottle is essential. Let’s pop the cork and dive into the details!
The Standard Champagne Bottle Size
Before we start counting glasses, let’s talk about the size of a standard champagne bottle. Most champagne bottles are 750 milliliters, which is around 25 fluid ounces. This size is perfect for sharing with friends and family during special occasions.
Calculating the Number of Glasses
So, how many glasses can you fill from a single bottle of champagne? The answer depends on the serving size you prefer. A standard serving of champagne is around 4 to 6 ounces, which is approximately half a cup.
Using the 4-Ounce Serving Size
If you choose to pour 4-ounce servings, you can expect to get around 6 to 7 glasses per bottle. This serving size allows you to enjoy the bubbles without feeling too full, making it ideal for toasting and sipping slowly.
Opting for the 6-Ounce Serving Size
For those who prefer a slightly larger pour, going with a 6-ounce serving size will yield about 4 to 5 glasses per bottle. This size is great for those who want a fuller glass of champagne to enjoy during celebrations.
Factors Affecting the Number of Glasses
Several factors can influence how many glasses you can pour from a champagne bottle. The size of the glasses, the pouring technique, and the desired serving size all play a role in determining the final count.
Glass Size
The size of the glasses you use can impact the number of servings you can get from a bottle. Smaller champagne flutes will allow you to pour more glasses compared to larger wine glasses.
Pouring Technique
Mastering the art of pouring champagne can also affect the number of glasses you can serve. By gently tilting the glass and bottle while pouring, you can minimize waste and maximize the number of glasses per bottle.
Serving Size
Choosing a specific serving size, whether it’s 4 ounces or 6 ounces, will directly impact the number of glasses you can pour from a single bottle. Consider your guests’ preferences and the occasion when deciding on the ideal serving size.
Now that you know how many glasses you can pour from a champagne bottle, you can plan your next celebration with confidence. Whether you choose to stick with the standard 4-ounce pour or opt for a larger serving size, the key is to enjoy the moment and savor each sip of bubbly goodness. Cheers to making memories and raising a glass of champagne to life’s special moments!
Remember, the number of glasses per champagne bottle may vary based on personal preferences and pouring techniques, so feel free to experiment and find the perfect serving size for you. Here’s to celebrating in style and adding a touch of sparkle to every occasion!
How Many Glasses in a Champagne Bottle REVEALED 🥂 | The PERFECT Pour for Every Glass Type | KD4U
Frequently Asked Questions
How many glasses of champagne can you pour from a single bottle?
Typically, you can expect to pour around 6 to 7 glasses of champagne from a standard 750ml bottle. This estimation is based on serving the usual 5-ounce flute servings. However, the actual number of glasses may vary slightly depending on the size of the flute and how generously the champagne is poured into each glass.
What factors can influence the number of glasses you can pour from a champagne bottle?
Several factors can affect the number of glasses you can pour from a champagne bottle. These include the size of the champagne flute, how full each glass is poured, and any spillage or wastage during pouring. Additionally, if larger glasses are used or if the champagne is poured more generously, you may get fewer glasses per bottle.
Is it possible to get more glasses of champagne from a single bottle?
If you pour smaller servings or use champagne flutes with smaller capacities, you may be able to pour more glasses from a single bottle. However, it’s essential to balance this with ensuring that your guests still receive an adequate serving size to enjoy the champagne fully.
Final Thoughts
In conclusion, knowing how many glasses per champagne bottle is essential for planning gatherings. A standard champagne bottle typically yields around 6-7 glasses. This information helps hosts determine the number of bottles needed to cater to their guests. Therefore, understanding the serving size per bottle is crucial for a successful celebration.

When To Brush Teeth After Tooth Extraction – Timing Guide
After a tooth extraction, you can start brushing your teeth again usually the day after the procedure. It’s essential to maintain good oral hygiene even during the healing process. However, you must be gentle and careful around the extraction site to avoid any irritation or complications. Proper brushing technique and using a soft-bristled toothbrush are crucial to prevent discomfort. Remember, oral care plays a significant role in the recovery process. So, how long after a tooth extraction can I brush my teeth? Let’s dive in for more details.

How Long After a Tooth Extraction Can I Brush My Teeth
So, you’ve just had a tooth extracted, and now you’re wondering when you can start brushing your teeth again. It’s a common question, and the answer can vary depending on the type of extraction you had and your overall dental health. In this comprehensive guide, we’ll explore everything you need to know about how long after a tooth extraction you can safely brush your teeth.
Understanding the Tooth Extraction Process
Before we dive into when you can brush your teeth after an extraction, let’s first understand what happens during a tooth extraction. When a tooth is extracted, whether it’s a simple extraction or a surgical one, the extraction site is left with an open wound that needs to heal.
After the extraction, a blood clot forms in the socket to protect the bone and nerves underneath. This blood clot is crucial for the healing process and should not be disturbed to prevent complications like dry socket, infection, or delayed healing.
Immediate Aftercare
Immediately after your tooth extraction, your dentist or oral surgeon will provide you with post-operative instructions. These instructions typically include guidelines on how to care for the extraction site, manage pain, and prevent complications.
One common instruction is to avoid brushing the extraction site for the first 24 hours. This initial period is crucial for allowing the blood clot to form and stabilize in the socket. Brushing too soon can dislodge the clot and disrupt the healing process.
When Can You Brush Your Teeth?
Now, let’s get to the question you’ve been waiting for – when can you brush your teeth after a tooth extraction? The general rule of thumb is to wait at least 24 hours before brushing your teeth after a tooth extraction. However, this timeline may vary depending on the type of extraction and your dentist’s recommendations.
Simple Extraction
If you had a simple extraction where the tooth was easily removed without the need for stitches, you can typically resume gentle brushing around the extraction site after 24 hours. Be sure to brush carefully and avoid the extraction site to prevent irritation or dislodging the blood clot.
Surgical Extraction
For more complex extractions that require stitches or involve bone removal, your dentist may recommend waiting longer before brushing your teeth near the extraction site. In such cases, your dentist will provide specific instructions on when it is safe to resume brushing and how to do so without causing harm.
How to Brush After a Tooth Extraction
When you’re ready to start brushing your teeth after a tooth extraction, here are some tips to ensure you do so safely and effectively:
1. Use a Soft-Bristled Toothbrush: Opt for a soft-bristled toothbrush to avoid causing trauma to the extraction site. Firm or hard-bristled brushes can be too harsh on the sensitive area.
2. Be Gentle: Brush your teeth gently, especially around the extraction site. Avoid applying too much pressure to prevent irritation or dislodging the blood clot.
3. Avoid the Extraction Site: When brushing near the extraction site, be mindful of the area and try to avoid direct contact with the socket. Focus on cleaning the other teeth as usual.
Signs to Watch For
While it’s important to start brushing your teeth to maintain oral hygiene after a tooth extraction, it’s equally vital to watch for any signs of complications. If you experience any of the following symptoms, contact your dentist immediately:
1. Persistent Bleeding: If bleeding continues beyond the first few hours or worsens, it may indicate an issue with the blood clot.
2. Severe Pain: While some discomfort is normal after a tooth extraction, severe or worsening pain could be a sign of infection or dry socket.
3. Swelling or Redness: Excessive swelling or redness around the extraction site may indicate an inflammatory response or infection.
So, how long after a tooth extraction can you brush your teeth? Waiting at least 24 hours is a good general rule, but always follow your dentist’s specific instructions for your individual case. Remember to be gentle when brushing, avoid the extraction site initially, and watch for any signs of complications. With proper care and attention, you’ll be back to your regular oral hygiene routine in no time!
Can I brush my teeth after wisdom teeth extractions? #dentist
Frequently Asked Questions
How soon after a tooth extraction can I start brushing my teeth?
It is generally recommended to wait at least 24 hours before brushing your teeth after a tooth extraction to allow the blood clot to form and the extraction site to begin healing. Gentle brushing around the extraction site should be done carefully to avoid disturbing the healing process.
Can I use toothpaste when brushing my teeth after a tooth extraction?
Avoid using toothpaste immediately after a tooth extraction as the chemicals in toothpaste might be too harsh for the healing site. Once the initial healing period is over, you can gradually reintroduce toothpaste when brushing your teeth, making sure to be gentle around the extraction area.
How should I brush my teeth around the extraction site post tooth extraction?
When brushing your teeth around the extraction site, use a soft-bristled toothbrush and gently brush in a circular motion, being careful not to apply too much pressure on the area. Rinse your mouth with lukewarm saltwater after brushing to help keep the extraction site clean and promote healing.
Is it necessary to brush my teeth after a tooth extraction if it’s uncomfortable?
If brushing your teeth around the extraction site is causing discomfort, you can focus on gently rinsing your mouth with saltwater to keep the area clean. However, maintaining good oral hygiene is essential for proper healing, so try to brush your teeth as gently as possible to prevent infection and promote healing.
Final Thoughts
After a tooth extraction, wait 24 hours before gently brushing your teeth near the extraction site. Brush using a soft-bristled toothbrush to avoid irritating the area. Remember, good oral hygiene is crucial for proper healing and preventing infections. So, how long after a tooth extraction can I brush my teeth? Wait 24 hours, then brush gently with a soft-bristled toothbrush near the extraction site.