


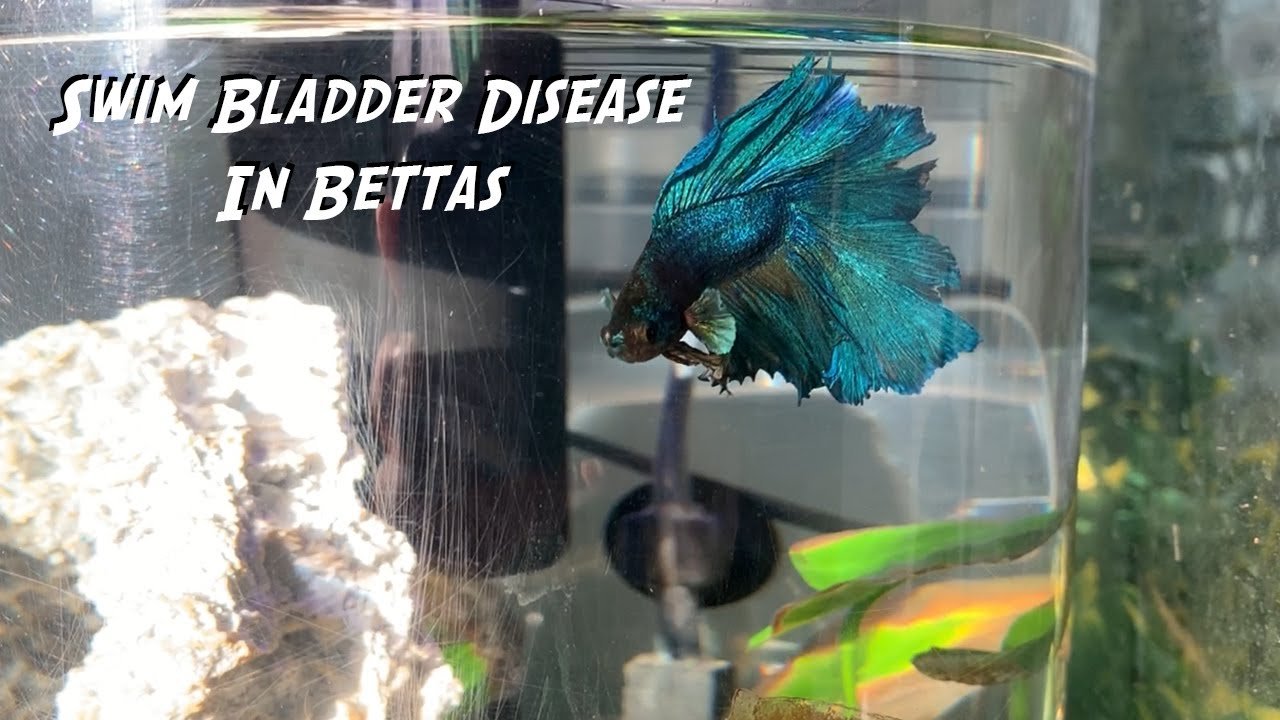
Effective Tips: Cure Swim Bladder Disease In Betta
Are you worried about how to cure swim bladder disease in betta? The good news is that with the right care and treatment, your beloved fish can make a full recovery. Understanding the signs and symptoms of this common ailment is crucial in providing prompt assistance. By following a few simple steps and making adjustments to their environment, you can help your betta fish overcome swim bladder disease and thrive once again. Let’s delve into the practical tips and strategies to ensure your betta’s health and well-being.

How to Cure Swim Bladder Disease in Betta
Welcome, Betta fish enthusiasts! If you’ve noticed your Betta fish struggling with swim bladder disease, you’re not alone. This common condition can cause your fish to have difficulty swimming, floating uncontrollably, or even swimming upside down. But fear not, because in this comprehensive guide, we will dive into everything you need to know about swim bladder disease in Betta fish and how to cure it effectively.
Understanding Swim Bladder Disease
Before we discuss how to cure swim bladder disease in Betta fish, let’s understand what this condition actually is. The swim bladder is an essential organ that helps fish control their buoyancy and move up or down in the water. When this organ becomes impaired, it can lead to swim bladder disease.
There are several factors that can contribute to swim bladder disease in Betta fish, including overfeeding, constipation, poor water quality, and genetic predisposition. By identifying the root cause, you can take the necessary steps to cure and prevent this condition in your beloved Betta.
Signs and Symptoms of Swim Bladder Disease
Recognizing the signs of swim bladder disease is crucial in providing timely treatment for your Betta fish. Some common symptoms include:
- Difficulty swimming upright
- Constant floating or sinking
- Swimming sideways or upside down
- Loss of appetite
- Bloated or swollen appearance
If you notice any of these symptoms in your Betta fish, it’s essential to act promptly to ensure their health and well-being.
Treating Swim Bladder Disease in Betta Fish
1. Fasting
One of the initial steps in treating swim bladder disease in Betta fish is fasting. By withholding food for 3-4 days, you can help alleviate constipation, which is a common cause of swim bladder issues. During this fasting period, ensure your fish has access to clean, warm water to aid in digesting any blockages.
2. Adjusting Water Conditions
Maintaining ideal water conditions is essential for the overall health of your Betta fish. Ensure the water temperature is between 75-80°F (24-27°C) and that the tank is clean and properly filtered. Performing regular water changes can help reduce stress on your fish and promote healing.
3. Providing Peas
Feeding your Betta fish blanched peas can help relieve constipation and aid in digestion. Remove the skin from the peas and offer them to your fish in small, bite-sized pieces. Peas are a natural and gentle way to regulate your Betta’s digestive system.
4. Medications
If the above steps do not show improvement in your Betta fish’s condition, consider consulting a vet specializing in fish health. They may recommend medications or treatments to address any underlying infections or issues causing swim bladder disease.
Preventing Swim Bladder Disease
While it’s essential to know how to cure swim bladder disease in Betta fish, prevention is always better than cure. To help prevent this condition, consider the following tips:
- Feed your Betta fish a balanced and varied diet
- Avoid overfeeding, as this can lead to digestive issues
- Maintain good water quality by regularly cleaning the tank and performing water changes
- Monitor your Betta fish for any signs of illness or abnormal behavior
- Provide your Betta with enough space to swim and exercise
By following these preventive measures, you can reduce the risk of swim bladder disease and ensure your Betta fish remains healthy and happy.
In conclusion, swim bladder disease is a common ailment that can affect Betta fish, but with proper care and attention, it can be effectively treated and prevented. By understanding the causes, symptoms, and treatment options for swim bladder disease, you can ensure your Betta fish lives a long and happy life.
Remember, always consult with a vet or experienced fish keeper if you are unsure about the health of your Betta fish. With the right knowledge and proactive care, you can help your Betta swim happily and healthily once more!
Thank you for reading, and we hope this guide has been helpful in learning how to cure swim bladder disease in Betta fish.
How to Heal Swim Bladder Disease in Bettas
Frequently Asked Questions
What are the common symptoms of swim bladder disease in betta fish?
Common symptoms of swim bladder disease in betta fish include erratic swimming behavior, difficulty staying upright, floating to the surface or sinking to the bottom, lack of appetite, and bloating in the abdomen area.
How can I treat swim bladder disease in my betta fish?
To treat swim bladder disease in betta fish, you can try fasting your fish for 3-4 days to relieve pressure on the swim bladder. After fasting, feed them small, high-fiber meals such as daphnia or cooked peas. Adjusting the water temperature and maintaining good water quality can also help in the recovery process.
Is there a need to isolate the betta fish with swim bladder disease from other tank mates?
It is not necessary to isolate a betta fish with swim bladder disease from other tank mates unless they are showing signs of aggression towards the affected fish. Providing a stress-free environment can aid in the recovery process, so maintaining a peaceful tank environment is essential.
Final Thoughts
In conclusion, curing swim bladder disease in betta requires adjusting their diet, maintaining good water quality, and providing proper tank conditions. Ensure bettas are not overfed and feed them high-quality, easily digestible food. Regular water changes and a well-maintained tank can help prevent swim bladder issues. Consult a veterinarian if symptoms persist despite following these steps. By addressing the root causes and providing proper care, you can effectively treat swim bladder disease in bettas and help them thrive.
How Much Is An Allergy Test Without Insurance: Cost Guide
An allergy test without insurance can range from $200 to $1,000, depending on the type of test and where it is conducted. This crucial diagnostic procedure allows individuals to identify the specific allergens triggering their symptoms, paving the way for effective treatment and relief. Without insurance coverage, the cost of an allergy test may seem daunting, but there are strategies to make it more affordable. Understanding the options available and seeking out discounted clinics can help mitigate the financial burden of obtaining an allergy test without insurance.

How Much is an Allergy Test Without Insurance: Understanding the Costs
Welcome to our guide on understanding the costs associated with allergy testing, particularly for those individuals who do not have insurance coverage. Allergies can impact our daily lives significantly, and getting tested is crucial to pinpointing the allergens that may be causing discomfort. However, the price of allergy testing can vary depending on the type of test needed and the healthcare provider you visit. In this article, we will delve into the specifics of how much an allergy test costs without insurance, explore the different types of allergy tests available, discuss possible alternatives for affordable testing, and provide tips on managing allergy-related expenses.
The Importance of Allergy Testing
Before diving into the costs associated with allergy testing, let’s first understand why getting tested is essential. Allergy testing helps identify specific allergens that trigger allergic reactions in individuals. By knowing what you are allergic to, you can take necessary precautions to avoid exposure to these allergens, leading to better symptom management and improved quality of life.
Common allergy symptoms include sneezing, itching, nasal congestion, skin rashes, and difficulty breathing. If you experience any of these symptoms regularly, it may be a sign that you have allergies and could benefit from testing to determine the exact triggers.
Types of Allergy Tests
There are several types of allergy tests available, each with its own costs and benefits. The most common allergy tests include:
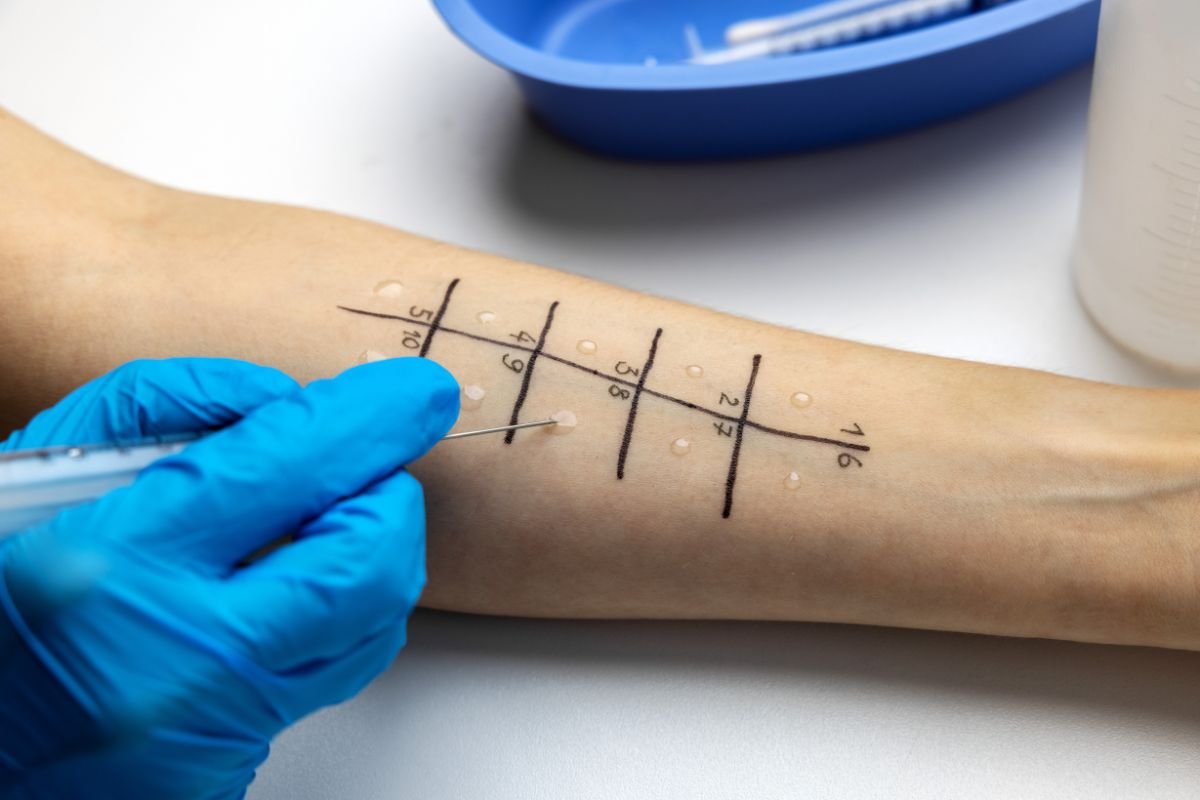
Skin Prick Test
The skin prick test is one of the most common methods used to diagnose allergies. During this test, a small amount of allergen extract is placed on the skin, and then a small prick or puncture is made through the drop. If you are allergic to the substance, you will develop a reaction at the site within 15-20 minutes.
Blood Test (RAST or IgE test)
Blood tests, such as the RAST (radioallergosorbent) test or IgE test, measure the level of specific antibodies in your blood that your immune system produces in response to allergens. These tests are especially useful for individuals who cannot undergo skin prick testing due to skin conditions or other medical reasons.
Elimination Diet
An elimination diet involves removing specific foods from your diet that are known to cause allergies and then slowly reintroducing them to identify any allergic reactions. While this method can be effective, it is essential to consult a healthcare provider or allergist before attempting an elimination diet to ensure proper guidance and monitoring.
Cost of Allergy Testing Without Insurance
One of the primary concerns for individuals without insurance is the cost associated with allergy testing. Typically, the price of allergy testing without insurance can range from $200 to $1000 or more, depending on the type of test, the number of allergens being tested for, and the location where the test is conducted.
For example, a skin prick test may cost around $60 to $300 per allergen panel, with additional charges for the appointment and consultation. Blood tests can range from $200 to $1000 or more, depending on the specific tests needed and the laboratory fees involved.
Affordable Alternatives for Allergy Testing
If you are concerned about the high costs of allergy testing without insurance, there are several affordable alternatives you can explore:
Community Health Clinics
Community health clinics often offer discounted or sliding scale fees for medical services, including allergy testing. Contact your local clinic to inquire about their pricing options and eligibility requirements.
Local Universities or Research Centers
Universities and research centers may conduct allergy testing as part of their research studies or training programs. You may be able to participate in these studies at a reduced cost or even for free, while also contributing to scientific research.
Telemedicine Services
Some telemedicine services offer virtual allergy consultations and testing kits that you can use at home. While these services may not be as comprehensive as in-person testing, they can provide a more affordable option for initial assessment and guidance.
Managing Allergy-Related Expenses
Aside from the cost of testing, managing allergy-related expenses involves several strategies to minimize the financial burden:
Insurance Coverage
If you do not have insurance, consider exploring affordable insurance options through government programs or healthcare exchanges. Having insurance coverage can significantly reduce the out-of-pocket costs for allergy testing and treatment.
Generic Medications
Opting for generic allergy medications instead of brand-name drugs can help save money without compromising on effectiveness. Many over-the-counter antihistamines and nasal sprays are available as generics at a lower cost.
Allergen Avoidance
One of the most effective ways to manage allergies is by avoiding exposure to known allergens. Taking proactive measures to minimize contact with triggers, such as dust mites, pollen, pet dander, and mold, can help reduce the need for medications and medical interventions.
In conclusion, while the cost of allergy testing without insurance can be a significant concern for many individuals, there are options available to make testing more accessible and affordable. By understanding the different types of allergy tests, exploring cost-effective alternatives, and implementing strategies to manage allergy-related expenses, you can take control of your allergies without breaking the bank. Remember to consult with a healthcare provider or allergist to determine the best course of action for diagnosing and managing your allergies effectively.
Thank you for reading our comprehensive guide on how much allergy testing costs without insurance. Stay informed, stay healthy!
How Much Do Epinephrine Autoinjectors Cost Without Insurance? | Allergy Relief Guide
Frequently Asked Questions
How much does an allergy test cost without insurance?
An allergy test without insurance can range from $100 to $300 for skin prick tests and up to $1,000 for blood tests. Costs vary depending on the type of test needed and the provider’s fees.
Are there any affordable options for allergy testing without insurance?
Some clinics and laboratories may offer discounted rates or payment plans for individuals without insurance. It’s advisable to research and inquire about such options to find the most affordable solution.
Can I negotiate the cost of an allergy test if I don’t have insurance?
Yes, it is possible to negotiate the cost of an allergy test without insurance. You can speak directly with the healthcare provider or facility to discuss payment options, potential discounts, or payment plans to make the test more affordable for you.
What factors can influence the price of an allergy test for someone without insurance?
Several factors can impact the cost of an allergy test for individuals without insurance, including the type of test required, the healthcare provider’s fees, the location of the facility, and any additional services or consultations needed as part of the testing process.
Final Thoughts
In conclusion, an allergy test without insurance can range anywhere from $200 to $1000, depending on the type of test and where it is conducted. It is important to shop around and compare prices to find the best option for your budget. Many clinics and healthcare providers offer payment plans or discounts for self-pay patients. Remember to inquire about any available financial assistance programs. Ultimately, being proactive and informed about the cost of an allergy test without insurance can help you make the best decision for your healthcare needs.
Cost Of Refelting A Pool Table: How Much Is It To Refelt A Pool Table
Refelting a pool table typically costs between $250 and $500, depending on various factors. The process involves removing the old felt, applying new cloth, and ensuring a smooth, level playing surface. While the price may vary based on size, quality of material, and additional services, hiring a professional ensures a high-quality finish. Consider the investment as not just a monetary one, but also in the enjoyment and longevity of your pool table. How much is it to refelt a pool table remains a common query among billiards enthusiasts seeking to maintain their playing surface in top condition.

How Much Does it Cost to Refelt a Pool Table?
Welcome to the ultimate guide on understanding the costs associated with refelting a pool table. If you’re a pool enthusiast or a proud owner of a pool table, you may have wondered about the expenses involved in keeping your table in top condition. In this article, we will break down the factors that influence the cost of refelting a pool table and provide you with all the information you need to make an informed decision.
Why Refelting a Pool Table is Important
Before we delve into the costs, let’s understand why refelting a pool table is crucial. The felt, also known as the cloth, on a pool table is a vital component that affects the game’s playability and aesthetics. Over time, the felt may wear out, tear, or become damaged, impacting the ball’s roll and accuracy of shots. By refelting your pool table, you can restore its smooth surface, ensuring a consistent playing experience.
Factors Influencing the Cost of Refelting
Several factors can influence the cost of refelting a pool table. Here are some key considerations:
Size of the Pool Table
The size of your pool table plays a significant role in determining the cost of refelting. Standard pool tables come in different sizes, such as 7 feet, 8 feet, and 9 feet. Larger tables require more felt material, which can increase the overall expenses.
Quality of the Felt
The quality of the felt you choose can impact the total cost. Higher-quality felts made from premium materials may cost more upfront but can offer better durability and playability in the long run. Cheaper felts may save you money initially but might wear out faster, necessitating more frequent refelting.
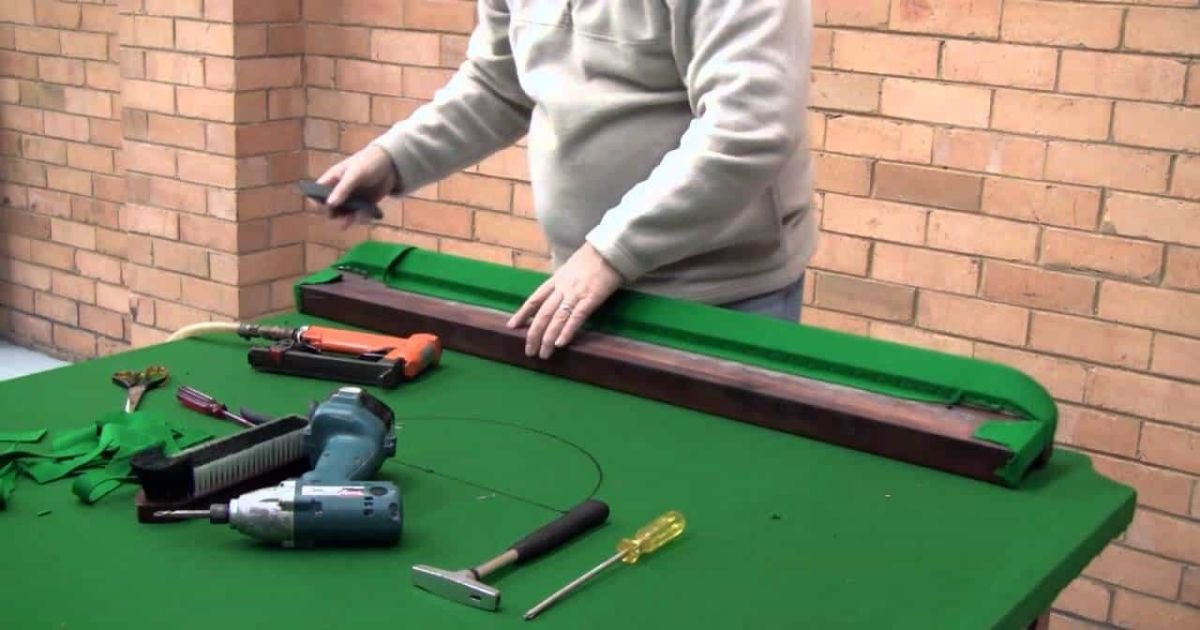
Professional Installation
Hiring a professional to refelt your pool table can add to the overall cost. While some individuals may attempt a DIY refelting project, it is advisable to seek the expertise of a professional to ensure the job is done correctly. Professional installers have the knowledge and experience to handle the delicate process of refelting with precision.
Additional Services
Depending on the condition of your pool table, you may require additional services, such as leveling the table, replacing cushions, or repairing any structural damage. These supplementary services can increase the overall cost of refelting. It’s essential to assess the table’s condition to determine if any extra work is needed.
Typical Costs of Refelting a Pool Table
Now that we’ve discussed the factors that influence the cost, let’s take a look at the typical expenses you can expect when refelting a pool table:
Material Costs
The cost of the felt itself can range from $100 to $500, depending on the quality and size needed for your pool table. Higher-end felts may cost more, but they can offer superior performance and longevity.
Labor Costs
The labor costs for refelting a pool table can vary based on location and the expertise of the installer. On average, you can expect to pay anywhere from $200 to $500 for professional installation. DIY enthusiasts may save on labor costs but should be prepared for the challenges that come with refelting a pool table.
Additional Services
If your pool table requires any additional services, such as cushion replacement or structural repairs, you should budget extra for these expenses. The cost of these services can vary depending on the extent of the work needed.
Tips for Saving Money on Refelting
If you’re looking to refelt your pool table without breaking the bank, consider the following tips:
Shop Around for Quotes
Get estimates from multiple pool table refelting professionals to compare prices and services. By shopping around, you can find the best deal that fits your budget.
Consider DIY Options
If you’re handy with tools and enjoy a good DIY project, you may opt to refelt your pool table yourself. Keep in mind that DIY refelting requires precision and patience, so make sure you’re up for the challenge before taking it on.
Maintain Your Pool Table
Regular maintenance of your pool table can help prolong the life of the felt and prevent premature wear and tear. Simple practices like brushing the felt regularly and avoiding spills can go a long way in preserving the playing surface.
Refelting a pool table is an essential maintenance task that ensures your table remains in optimal condition for years to come. By understanding the factors that influence the cost of refelting and exploring ways to save money, you can make informed decisions regarding the upkeep of your pool table. Remember, investing in the care of your pool table can enhance your playing experience and prolong the lifespan of this beloved game piece.
How To Refelt A Pool Table – Easy DIY
Frequently Asked Questions
How much does it typically cost to refelt a pool table?
Refelting a pool table can cost anywhere from $250 to $600 on average. The actual price may vary depending on factors such as the size of the pool table, the quality of the felt material, and any additional services required during the refelting process.
What factors can influence the cost of refelting a pool table?
The cost of refelting a pool table can be influenced by various factors including the size of the table, the type and quality of the felt material chosen, the location of the table, and whether any additional repairs or maintenance are needed before the refelting process can begin.
Are there any additional costs to consider when refelting a pool table?
In addition to the cost of the actual refelting service, there may be additional costs to consider such as transportation fees if the pool table needs to be moved, any repairs or adjustments needed to the table structure, and potential fees for dismantling and reassembling the table.
Can I refelt a pool table by myself to save money?
While it is possible to refelt a pool table by yourself to save money, it is a complex and delicate process that requires specific skills and tools. Attempting to refelt a pool table without the necessary expertise can lead to costly mistakes and potentially damage the table, so it is often recommended to hire a professional for the job.
Final Thoughts
Refelting a pool table typically costs between $250 to $600. Factors such as the size of the table, type of cloth, and any additional services can affect the total price. Ensure to get quotes from multiple professionals to find the best deal. When considering how much it is to refelt a pool table, it is essential to balance quality and affordability.
Determining How Many Dimes And Nickels Make A Dollar
Ten dimes and five nickels make a dollar. Have you ever puzzled over how many dimes and nickels add up to a crisp dollar bill? Understanding the value of different coins is not only practical but also a fun way to enhance your math skills. In this article, we will dive into the world of currency and explore the fascinating relationship between dimes, nickels, and the almighty dollar. Let’s unravel the mystery behind how many dimes and nickels make a dollar!

How Many Dimes and Nickels Make a Dollar
Understanding the Value of Dimes and Nickels
Have you ever wondered how many dimes and nickels you need to make a dollar? Understanding the value of these coins can be a fun and educational experience. Let’s dive in and explore the world of dimes and nickels!
What is the Value of a Dime?
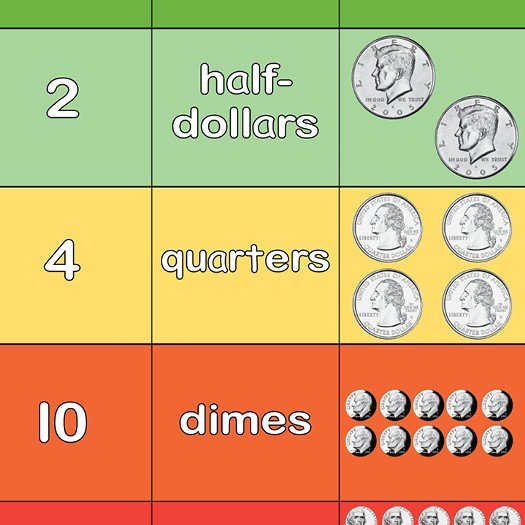
First, let’s talk about dimes. A dime is worth 10 cents. It has a smooth edge and features President Franklin D. Roosevelt on one side. Dimes are smaller in size compared to quarters and are commonly used in everyday transactions.
What is the Value of a Nickel?
Now, let’s move on to nickels. A nickel is worth 5 cents. It is slightly larger than a dime and features President Thomas Jefferson on one side. Nickels are often used in conjunction with other coins to make up a specific amount.
Calculating with Dimes and Nickels
When it comes to making a dollar using dimes and nickels, there are various combinations you can use. Let’s break down the math!
1. Using Only Dimes
If you use only dimes to make a dollar, you would need 10 dimes. Since each dime is worth 10 cents, 10 dimes x 10 cents = 100 cents, which equals to $1.
2. Using Only Nickels
What if you want to make a dollar using only nickels? In this case, you would need 20 nickels. Since each nickel is worth 5 cents, 20 nickels x 5 cents = 100 cents, which equals to $1.
3. Using a Combination of Dimes and Nickels
Now, let’s explore combining dimes and nickels to make a dollar. This is where the fun begins! Let’s look at some possible combinations:
- 8 dimes + 4 nickels = $1 (80 cents from dimes + 20 cents from nickels)
- 6 dimes + 10 nickels = $1 (60 cents from dimes + 50 cents from nickels)
- 12 dimes + 2 nickels = $1 (120 cents from dimes + 10 cents from nickels)
Experimenting with Dimes and Nickels
One way to have fun with dimes and nickels is to come up with your own combinations to make a dollar. You can use a piggy bank or a jar filled with coins to practice different combinations. It’s a great way to improve your math skills while having fun!
So, how many dimes and nickels make a dollar? The answer depends on how you choose to combine them. Whether you use only dimes, only nickels, or a mix of both, you can always make a dollar with the right combination. Remember, coins are not just currency; they can also be tools for learning and exploration!
How Many Dimes Make Up $1? #Shorts #math #money
Frequently Asked Questions
How do I determine how many dimes and nickels make a dollar?
To make a dollar using dimes and nickels, you need to understand the value of each coin. A dime is worth 10 cents, while a nickel is worth 5 cents. By using a combination of dimes and nickels, you can create different combinations that add up to a dollar.
Can you provide an example of how to make a dollar using dimes and nickels?
Sure! One way to make a dollar using dimes and nickels is by having 6 dimes and 20 nickels. This combination equals $1 since 6 dimes x 10 cents + 20 nickels x 5 cents = 60 cents + 100 cents = $1.
Is there more than one way to make a dollar with dimes and nickels?
Absolutely! There are multiple combinations of dimes and nickels that can add up to a dollar. For instance, you could have 10 dimes and 10 nickels or 8 dimes and 20 nickels – as long as the total value equals 100 cents or $1.
Final Thoughts
Calculating how many dimes and nickels make a dollar can be a useful skill for everyday transactions. By understanding that a dime is worth 10 cents and a nickel is worth 5 cents, it is easy to determine that 10 dimes or 20 nickels make a dollar. This knowledge can come in handy when counting change or budgeting expenses. Mastering this simple arithmetic can make handling money more efficient and hassle-free in daily life.

Master The Art Of How To Cut Panettone With Ease
To cut panettone without crumbling its delicate layers, follow these simple steps. Start by using a serrated knife to gently slice through the soft bread. Cut in a sawing motion to maintain the airy texture of the panettone. Remember, mastering how to cut panettone is key to enjoying this classic Italian holiday treat without any mess or fuss.

How to Cut Panettone: A Beginner’s Guide
Welcome to our step-by-step guide on how to cut panettone, a delicious Italian sweet bread traditionally enjoyed during the holiday season. This fluffy and fragrant treat can sometimes be tricky to slice perfectly due to its dome shape and soft texture. But worry not! We are here to show you the best techniques and tips to slice your panettone like a pro.
Why Cutting Panettone Correctly Matters
Before we dive into the cutting techniques, let’s understand why it’s essential to cut panettone correctly. Panettone has a delicate structure with various textures and flavors distributed throughout the loaf. Cutting it properly ensures that each slice maintains the integrity of the bread, showcasing its delicious fruits and nuts evenly.
Tools You’ll Need
Before you start cutting your panettone, make sure you have the right tools. You will need a sharp serrated knife, a cutting board, and some dental floss or a clean fishing line. The serrated knife will help you slice through the bread without crushing it, while dental floss or a fishing line will enable you to make clean cuts without squishing the panettone.
Step-by-Step Guide to Cutting Panettone
Step 1: Preparation
Place your panettone on a stable surface and gather your tools. Make sure the bread is at room temperature for easier slicing. The warmth will soften the bread slightly, making it more manageable to cut.
Step 2: Cutting the Base
Start by placing the panettone on its side and using a sharp serrated knife to cut off the domed top. This step creates a flat surface, allowing the panettone to stand upright for slicing.
Step 3: Slicing
Once the top is removed, begin slicing the panettone into even sections. Use a gentle sawing motion with your knife to avoid squashing the bread. Aim for slices that are about an inch thick to showcase the beautiful texture inside.
Step 4: Using Dental Floss or Fishing Line
If you find that your knife is compressing the panettone, try using dental floss or a fishing line instead. Slide the floss or line under the loaf where you want to cut and cross the ends over the top to create a clean, precise cut. This method works exceptionally well for softer bread like panettone.
Tips for Perfectly Sliced Panettone
Here are some additional tips to help you achieve perfectly sliced panettone:
- Let the panettone cool completely before cutting to prevent it from crumbling.
- Use a gentle touch when slicing to maintain the airy texture of the bread.
- Wipe your knife clean between cuts to ensure each slice is neat and presentable.
- If you prefer smaller portions, slice the panettone into wedges instead of traditional slices.
- Store any leftover panettone in an airtight container to keep it fresh.
Enjoy Your Perfectly Cut Panettone!
Now that you’ve mastered the art of cutting panettone, get ready to enjoy this delightful treat with friends and family. Whether you pair it with a cup of coffee for breakfast or serve it as a dessert after dinner, your perfectly sliced panettone is sure to impress. Happy slicing!
How to cut and serve Panettone
Frequently Asked Questions
How should I cut a panettone without squishing it?
To cut a panettone without squishing it, use a sharp serrated knife. Start by gently scoring the top with the knife to create a guide. Hold the panettone firmly with one hand and cut through using a sawing motion to ensure clean slices.
What is the best technique for slicing a panettone to maintain its shape?
The best technique for slicing a panettone to maintain its shape is to cut it horizontally. This method helps preserve the fluffy texture and prevents the cake from collapsing. Begin by laying the panettone on its side and cutting it into even slices.
How can I prevent the panettone from crumbling when cutting it?
To prevent the panettone from crumbling when cutting it, make sure the knife is sharp and clean. Avoid pressing down too hard on the cake as this can cause it to crumble. Instead, use a gentle sawing motion to create clean slices.
Final Thoughts
To cut panettone, use a serrated knife to prevent squishing. Start by removing the paper wrapping and cutting the panettone vertically into slices. Then, cut each slice horizontally, ensuring even portions. By following these simple steps, you can enjoy a perfectly sliced panettone every time.
Cost Of Building A House In Virginia: Everything You Need To Know
Wondering how much to build a house in Virginia? The cost of constructing your dream home in this picturesque state can vary significantly based on various factors. From location to materials and labor, each element plays a vital role in determining the overall expenses. By delving into the intricacies of home construction in Virginia, you can gain a better understanding of what to expect financially. Let’s explore the nuances of building a house in Virginia and unravel the mysteries behind the price tags.

How Much to Build a House in Virginia: A Comprehensive Guide
Welcome to our detailed guide on the cost of building a house in Virginia! If you are considering building your dream home in the beautiful state of Virginia, you’re in the right place. In this article, we will break down the expenses involved in constructing a new house in Virginia, from land costs to construction materials and everything in between. By the end of this guide, you will have a clear idea of how much it costs to build a house in Virginia and be well-equipped to start your home-building journey.
The Cost of Land in Virginia
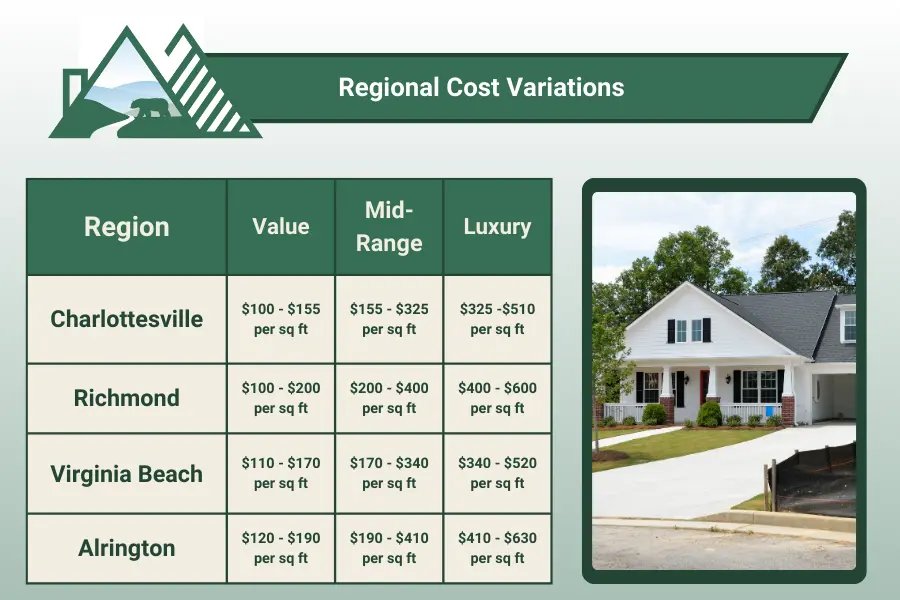
Before you can start building your dream home, you need a piece of land to build it on. The cost of land in Virginia can vary greatly depending on the location, size, and proximity to amenities. In urban areas like Richmond or Arlington, land prices tend to be higher compared to rural areas. On average, the cost of land in Virginia can range from $50,000 to $200,000 or more per acre.
Building Permits and Fees
Once you have purchased your land, you will need to obtain building permits from the local government before you can start construction. Building permits are necessary to ensure that your new home complies with local building codes and regulations. The cost of building permits in Virginia can vary depending on the size and scope of your project, but you can expect to pay anywhere from $1,000 to $5,000 or more for permits and fees.
Construction Materials and Labor Costs
One of the most significant expenses when building a house in Virginia is the cost of construction materials and labor. The price of materials such as lumber, concrete, roofing, and insulation can fluctuate based on market conditions and availability. Labor costs, including hiring contractors, architects, and other professionals, also contribute to the overall expenses.
Lumber and Framing
Lumber is a crucial material in home construction, especially for framing. The cost of lumber can vary due to factors like demand, supply, and transportation costs. On average, you can expect to spend around $15,000 to $30,000 on lumber and framing for a typical single-family home in Virginia.
Roofing and Siding
Roofing materials such as shingles or metal panels, as well as siding materials like vinyl or brick, are essential components of a house. The cost of roofing and siding can range from $5,000 to $20,000, depending on the material quality and square footage of your home.
Interior Finishes
Interior finishes such as flooring, paint, countertops, and fixtures also contribute to the overall cost of building a house in Virginia. High-end finishes will increase your expenses, while more budget-friendly options can help you stay within your budget. On average, interior finishes can cost anywhere from $20,000 to $50,000 or more.
Additional Costs to Consider
When calculating how much it costs to build a house in Virginia, don’t forget to account for additional expenses such as landscaping, driveway installation, utility connections, and home insurance. These costs can add up quickly and should be factored into your budget from the beginning.
Building a house in Virginia is a significant investment, but with proper planning and budgeting, you can achieve your dream home within your means. By understanding the various costs involved in the construction process, you can make informed decisions and ensure that your project stays on track financially. Remember, each home-building project is unique, and costs can vary based on individual preferences and circumstances. We hope this guide has provided you with valuable insights into how much it costs to build a house in Virginia. Good luck on your home-building journey!
Thank you for reading our comprehensive guide on the cost of building a house in Virginia. If you have any questions or need further assistance, feel free to reach out to us. Happy building!
COMPLETE EXPLANATION About the New Home Construction Process in Virginia
Frequently Asked Questions
What factors influence the cost of building a house in Virginia?
The cost of building a house in Virginia is influenced by various factors such as the location, size of the house, materials used, labor costs, permits, and site preparation expenses. These factors can vary significantly and impact the overall cost of construction.
Is it more cost-effective to buy a pre-existing home or build a new house in Virginia?
It depends on your preferences and budget. Building a new house in Virginia allows you to customize the home to your needs and preferences but can be more expensive and time-consuming. Buying a pre-existing home may be more cost-effective in some cases but might not fully meet your requirements.
How much does land cost factor into the total cost of building a house in Virginia?
The cost of land in Virginia can vary depending on the location, size, zoning regulations, and accessibility to utilities. Land cost is a significant factor in the total cost of building a house as it can impact the overall budget for construction.
Are there any hidden costs to consider when building a house in Virginia?
There can be hidden costs when building a house in Virginia, such as permit fees, utility connection charges, landscaping expenses, and unforeseen construction challenges. It’s essential to budget for these potential additional costs to avoid any financial surprises during the building process.
Final Thoughts
Building a house in Virginia costs an average of $100 to $200 per square foot. Factors like location, materials, and design influence the final cost significantly. Additional expenses, such as permits and labor, also contribute to the overall budget. When considering how much to build a house in Virginia, it’s essential to create a detailed budget and work closely with a reputable contractor throughout the construction process. Strive for transparency and open communication to ensure the project stays within budget.

1964 Birth Year Calculation: How Old Are You Now?
If you were born in 1964, you would be 57 years old in 2021. This straightforward question often arises when trying to calculate someone’s age. Understanding how to determine one’s age based on their birth year is a common skill many people find useful. Let’s delve into the simple calculation behind the question, “If you were born in 1964, how old are you?” Join us as we explore the straightforward yet intriguing world of age calculation.

If You Were Born in 1964, How Old Are You?
Welcome, curious minds! Have you ever wondered how age works? Today, we are diving into a fascinating exploration of time and birthdays. If you were born in 1964, how old are you now? Let’s crack the code and uncover the secrets of aging!
The Math Behind Age
Age is like a magical number that keeps changing every year. To figure out how old someone is, we need to do some math. If you were born in 1964, the first step is to find the current year. Since we’re in 2021, we subtract 1964 from 2021 to calculate your age.
2021 (Current Year) – 1964 (Year of Birth) = ?
So, what’s the answer? It’s a moment of suspense, isn’t it? Let’s solve this together!
Let’s Do the Math Together!
By subtracting 1964 from 2021, we get:
2021 – 1964 = 57
Amazing! If you were born in 1964, you are 57 years old in 2021. That means you’ve celebrated 57 birthdays and accumulated 57 years of incredible memories!
Time Travel to 1964
Now, let’s take a trip back in time to 1964. Close your eyes and imagine a world where the Beatles were taking the music scene by storm, and everyone was doing “The Twist.” It was a time of peace, love, and rock ‘n’ roll.
If you were born in 1964, your parents might have listened to “I Want to Hold Your Hand” on the radio while eagerly awaiting your arrival. The world was a different place back then, but your birth brought joy and happiness to your family.
Life in the 60s
The 1960s were a decade of change and revolution. From the Civil Rights Movement to the first man on the moon, the world was evolving in remarkable ways. As a child born in 1964, you grew up in a time of optimism and progress.
Imagine playing with your friends outside, riding your bike without a care in the world, and listening to vinyl records on a lazy Sunday afternoon. Life was simple yet full of wonder and adventure.
Celebrating 57 Years of Life
As you reflect on your 57 years of existence, think about all the experiences that have shaped you into the amazing person you are today. Birthdays are not just about getting older; they’re a celebration of life, love, and wisdom.
Embracing Your Age
Age is nothing to fear or hide. Each year brings new opportunities for growth and discovery. Whether you’re 5, 25, or 57, every age has its beauty and magic. Embrace your age with pride and gratitude for all the moments that have made you who you are.
So, if you were born in 1964, you are 57 years old in 2021. And remember, age is just a number. What truly matters is the joy, love, and laughter you bring to the world every day. Happy birthday, whoever you are!
Keep celebrating life and never stop counting your blessings. Age is a gift, and it’s up to you to unwrap it with a smile. Cheers to another year of adventures and memories!
Until next time, dear readers. Keep shining brightly!
Born in 1964 ✨ #fyp #shorts
Frequently Asked Questions
What is the age of a person born in 1964?
As of the current year, the age of a person born in 1964 would be 57 years old. This calculation is based on deducting the birth year from the current year.
How can I determine my age if I was born in 1964?
To find out your age if you were born in 1964, you simply subtract 1964 from the current year. This will give you the exact age you are in years.
Is it possible to know the age of someone born in 1964 without asking them directly?
Yes, you can determine the age of an individual born in 1964 by subtracting their birth year from the current year. This straightforward calculation will give you their exact age.
Final Thoughts
If you were born in 1964, you are 57 years old in 2021. Age is determined by subtracting the birth year from the current year. This simple calculation applies to anyone wondering, “If you were born in 1964 how old are you?” So, if you were born in 1964, you are indeed 57 years old.
Ultimate Guide On How To Use Ozone Generator In Home
To use an ozone generator in your home effectively, start by understanding its purpose. Ozone generators are powerful tools that can efficiently eliminate odors, purify the air, and sanitize surfaces. Place the generator in the targeted area, set the timer, and ensure proper ventilation. It’s essential to follow safety guidelines and use the ozone generator in moderation to avoid any potential risks. Embrace the benefits of using an ozone generator in your home for a fresh and clean living environment.

How to Use Ozone Generator in Home
Welcome to our comprehensive guide on using an ozone generator in your home! Ozone generators are powerful tools that can help improve the air quality in your living spaces by eliminating odors, mold, bacteria, and other contaminants. In this article, we will walk you through the process of effectively and safely using an ozone generator in your home.
What is an Ozone Generator?
Before we delve into how to use an ozone generator, let’s first understand what it is. An ozone generator is a device that produces ozone gas, which is a highly reactive form of oxygen. Ozone is a powerful oxidizing agent that can break down and neutralize various pollutants in the air and on surfaces, making it an effective tool for deodorizing and disinfecting indoor spaces.
Safety First
While ozone generators can be incredibly beneficial, they also need to be used with caution. Ozone is a potent gas that can be harmful if not used properly. Before using an ozone generator in your home, make sure to read the manufacturer’s instructions carefully and follow all safety guidelines.
Key Safety Tips:
- Always ventilate the area before and after ozone treatment.
- Keep the ozone generator away from living areas while in operation.
- Avoid prolonged exposure to ozone gas.
Choosing the Right Ozone Generator
When selecting an ozone generator for home use, consider factors such as room size, ozone output, and features like timers and adjustable settings. It’s essential to choose a generator that is appropriate for the square footage of the area you intend to treat.
Factors to Consider:
- Room Size: Ensure the ozone generator’s capacity matches the size of the room.
- Ozone Output: Higher output generators are suitable for larger spaces.
- Features: Look for generators with adjustable settings for better control.
Using an Ozone Generator in Your Home
Now that you have your ozone generator, let’s walk through the steps to effectively use it in your home.
Step 1: Prepare the Area
Before operating the ozone generator, ensure the space is clear of people, pets, and plants. Remove any items that may be sensitive to ozone exposure, such as artwork, electronic devices, and certain fabrics.
Step 2: Set Up the Ozone Generator
Follow the manufacturer’s instructions to set up the ozone generator in the center of the room. Ensure the generator is placed on a stable surface and not near any heat sources or water.
Step 3: Adjust Settings
If your ozone generator has adjustable settings, select the appropriate output level and timer settings based on the size of the room and the severity of odors or contaminants.
Step 4: Activate the Generator
Turn on the ozone generator and leave the area. Most generators have a timer function, so you can set the treatment duration and let the generator do its job. Remember to close the door to the room being treated.
Step 5: Ventilate the Area
Once the treatment cycle is complete, allow the space to ventilate for a sufficient period before re-entering. Open windows and doors to facilitate the dissipation of ozone gas.
Benefits of Using an Ozone Generator in Your Home
Using an ozone generator can offer numerous benefits for your home environment. Some advantages include:
- Eliminating Odors: Ozone neutralizes odors from pets, smoke, cooking, and more.
- Killing Bacteria and Mold: Ozone can help sanitize surfaces and reduce microbial contaminants.
- Improving Indoor Air Quality: Ozone can freshen and purify the air, creating a cleaner living space.
In conclusion, using an ozone generator in your home can be a convenient and effective way to improve indoor air quality and eliminate unwanted odors. By following safety guidelines, selecting the right generator, and employing proper usage techniques, you can enjoy the benefits of a fresher and cleaner living environment. Remember to prioritize safety and caution when using ozone generators to ensure a healthy and comfortable home for you and your family.
We hope this guide has been helpful in understanding how to use an ozone generator in your home. Stay tuned for more tips and insights on creating a healthier and happier living space!
Ozone Generator – Why they work and how to use one
Frequently Asked Questions
How can I safely use an ozone generator in my home?
Before using an ozone generator in your home, ensure the area is well-ventilated. Follow the manufacturer’s instructions carefully, as overexposure to ozone can be harmful. Keep the room empty of people, pets, and plants when the generator is running, and make sure to air out the room after use.
What are the benefits of using an ozone generator at home?
An ozone generator can help eliminate odors, mold, and bacteria in your home. It is an effective way to freshen up a space and improve indoor air quality. Additionally, ozone can reach areas that are hard to clean with traditional methods, providing a deep cleaning effect.
How long should I run an ozone generator in my home?
The recommended duration for running an ozone generator in a room depends on its size and the generator’s power. Typically, it is advised to run the generator for 1-3 hours for general air purification purposes. However, always refer to the specific guidelines provided by the manufacturer for the most effective use.
Final Thoughts
In conclusion, using an ozone generator in your home can effectively eliminate odors and sanitize the air. Remember to follow safety guidelines and instructions provided by the manufacturer. Place the ozone generator in a central location and run it for the recommended time to achieve the best results. With proper usage, the ozone generator can help maintain a fresh and clean indoor environment. So, make sure to utilize it correctly to enjoy the benefits of using an ozone generator in your home.

The Ultimate Guide: How Many Takbeer In Eid Prayer
In Eid prayer, there are a total of seven takbeers. These takbeers hold significant importance during the prayer and mark various stages of the prayer itself. Understanding the precise number and timing of these takbeers is crucial for performing the prayer correctly. Let’s delve deeper into the significance and sequence of the takbeers in Eid prayer to ensure a meaningful and fulfilling worship experience. Join us as we explore the beauty and essence of each takbeer in this special prayer ritual.

How Many Takbeer in Eid Prayer: Unraveling the Spiritual Tradition
Welcome, young learners, as we embark on a journey to understand the beautiful tradition of Eid prayer and the significance of Takbeer in this special Islamic celebration. Eid prayer holds a special place in the hearts of Muslims around the world, and knowing the details of how many Takbeer are performed during this prayer can deepen our understanding of this joyous occasion.
The Significance of Takbeer in Islamic Prayer
Before we delve into the specifics of how many Takbeer are performed during Eid prayer, let’s first understand the importance of Takbeer in Islamic prayer. Takbeer refers to the phrase “Allahu Akbar,” which means “God is the Greatest.” This phrase is a declaration of the greatness and majesty of Allah and is recited by Muslims in various prayers and rituals to express their reverence and submission to the Almighty.
During Eid prayer, Takbeer holds a special significance as it signifies the magnificence of Allah and the joy of the Eid celebration. The rhythmic recitation of Takbeer during the prayer creates a sense of unity and harmony among the worshippers, reminding them of the oneness of Allah and the blessings of the festive occasion.
Understanding the Takbeer in Eid Prayer
Now, let’s explore how many Takbeer are performed during Eid prayer. Eid prayer consists of two units (Rak’ahs), and the number of Takbeer recited in each unit varies between different schools of thought within Islam. In this article, we will focus on the common practices followed by many Muslims around the world.
Takbeer in the First Rak’ah
As the Imam (the prayer leader) begins the Eid prayer, the worshippers follow his lead in reciting the Takbeer. In the first Rak’ah of Eid prayer, it is common to perform a total of seven Takbeer, including the opening Takbeer to start the prayer. These Takbeer are recited at specific points in the prayer, each marking a transition from one part of the prayer to another.
After the opening Takbeer, the Imam recites additional Takbeer before reciting the Quranic verses and then proceeds with the Ruku (bowing) and Sujood (prostration) as part of the prayer structure. The worshippers follow the Imam’s lead in performing these acts of devotion, including the recitation of Takbeer at designated moments.
Takbeer in the Second Rak’ah
In the second Rak’ah of the Eid prayer, the number of Takbeer may vary depending on the school of thought and the specific Islamic tradition being followed. However, it is common to recite five additional Takbeer in the second Rak’ah after the opening Takbeer, bringing the total number of Takbeer in the Eid prayer to twelve in some practices.
As the worshippers continue their prayer with humility and devotion, the recitation of Takbeer in the second Rak’ah adds to the spiritual atmosphere of the Eid celebration, reinforcing the themes of gratitude, unity, and renewal that are central to this special occasion.
Conclusion: Embracing the Spirit of Eid Through Prayer
As we conclude our exploration of how many Takbeer are performed in Eid prayer, let us reflect on the importance of this spiritual practice in enhancing our connection to Allah and our fellow worshippers. Eid prayer is not just a routine ritual but a profound expression of faith, gratitude, and community that brings Muslims together in celebration and reflection.
By understanding the significance of Takbeer in Eid prayer and following the traditions with sincerity and devotion, we can deepen our spiritual experience and draw closer to the essence of this sacred occasion. May the blessings of Eid inspire us to cultivate compassion, unity, and love in our hearts and communities, now and always.
Remember, young learners, that the spirit of Eid prayer goes beyond the number of Takbeer recited; it is about opening our hearts to the mercy and guidance of Allah, fostering unity and kindness, and spreading joy and blessings to all those around us. Eid Mubarak!
How to pray Eid Prayer, how many takbeers for Eid Prayer & how to pray it while traveling Assim Al
Frequently Asked Questions
How many Takbeer are said in Eid prayer?
In Eid prayer, there are seven Takbeer in the first Rak’ah, including the opening Takbeer to start the prayer. After the opening Takbeer, six more Takbeer are pronounced before reciting Surah Al-Fatihah.
What is the significance of saying Takbeer in Eid prayer?
The Takbeer in Eid prayer is a way of magnifying and glorifying Allah, showing gratitude for the blessings of Eid, and expressing joy and happiness on this special occasion. It also serves as a reminder of the greatness of Allah and the importance of worship.
Do the number of Takbeer differ in Eid prayer compared to regular prayers?
Yes, the number of Takbeer in Eid prayer differ from regular prayers. In Eid prayer, additional Takbeer are said as part of the special prayer format for the occasion, while regular prayers have a set number of Takbeer depending on the type of prayer being performed.
Final Thoughts
In conclusion, the number of takbeers in Eid prayer is seven in the first rak’ah and five in the second rak’ah. This is a unique aspect of the Eid prayer that distinguishes it from regular daily prayers. Understanding the specific manner in which the takbeers are performed is crucial for observing the prayer correctly. Remembering the required takbeers during the Eid prayer ensures that it is performed in accordance with the traditions of the Prophet Muhammad (peace be upon him).

How Far Is New Smyrna Beach From Daytona Beach: Distance Guide
New Smyrna Beach and Daytona Beach are two popular coastal destinations in Florida. How far is New Smyrna Beach from Daytona Beach? The distance between the two is approximately 17 miles, making them convenient options for a day trip or weekend getaway. Whether you’re craving a relaxing beach day or seeking adventure, both locations offer a variety of activities for visitors to enjoy. Let’s delve into the details of this short but scenic journey along the picturesque Atlantic coastline.

How Far is New Smyrna Beach from Daytona Beach?
Welcome to our guide on the distance between two of Florida’s most popular beach destinations – New Smyrna Beach and Daytona Beach. Whether you’re a local looking for a quick day trip or a visitor trying to plan your vacation itinerary, understanding the distance between these two coastal towns can help you make the most of your time in the Sunshine State. Let’s dive into the details!
Overview of New Smyrna Beach
New Smyrna Beach is a charming seaside community located on the east coast of Florida. Known for its pristine sandy beaches, excellent surfing spots, and laid-back atmosphere, New Smyrna Beach attracts visitors from near and far. The town offers a mix of art galleries, boutique shops, and delicious dining options, making it a must-visit destination for beach lovers and water enthusiasts.
Overview of Daytona Beach
Daytona Beach, located just north of New Smyrna Beach, is famous for its hard-packed sandy shores and iconic boardwalk. This vibrant city is synonymous with motorsports, hosting events like the Daytona 500 and Biketoberfest. Visitors to Daytona Beach can enjoy a range of activities, including shopping, dining, and exploring the historic Daytona Beach Main Street Pier.
Distance Between New Smyrna Beach and Daytona Beach
So, how far apart are these two popular beach destinations? The distance between New Smyrna Beach and Daytona Beach is approximately 17 miles. This short drive along the Atlantic coast offers stunning ocean views and the opportunity to explore multiple beaches in a single day.
Driving Directions
If you’re planning to drive from New Smyrna Beach to Daytona Beach, the most common route is to take Interstate 95 North. This straightforward drive typically takes around 30 minutes, depending on traffic conditions. Along the way, you’ll pass through scenic coastal landscapes and may even spot some wildlife along the roadside.
Alternative Transportation Options
For those who prefer not to drive, there are other transportation options available to travel between New Smyrna Beach and Daytona Beach. Local shuttle services, ridesharing apps, and organized tours can provide convenient and stress-free ways to make the journey, allowing you to sit back and enjoy the scenery.
Things to Do Along the Way
While the drive between New Smyrna Beach and Daytona Beach is relatively short, there are plenty of attractions and activities to check out along the way. Consider making a pit stop at one of the following points of interest:
1. Ponce de Leon Inlet Lighthouse & Museum
Located midway between the two beach towns, the Ponce de Leon Inlet Lighthouse offers panoramic views of the coast and a glimpse into Florida’s maritime history. Climb to the top of the lighthouse for a breathtaking vista of the surrounding area.
2. Marine Science Center
For those interested in marine life, the Marine Science Center in Ponce Inlet is a fascinating stop. Explore interactive exhibits, learn about local marine animals, and even participate in turtle rehabilitation efforts at this educational facility.
3. Daytona International Speedway
If you’re a motorsports enthusiast, a visit to the Daytona International Speedway is a must. Take a guided tour of the track, visit the Motorsports Hall of Fame of America, and immerse yourself in the thrilling world of racing history.
In conclusion, the distance between New Smyrna Beach and Daytona Beach is a mere 17 miles, making it easy to explore both destinations in a single day. Whether you choose to drive yourself or opt for alternative transportation options, the journey between these two coastal towns is filled with scenic vistas and exciting attractions. So pack your sunscreen, grab your shades, and get ready to experience the best of Florida’s East Coast!
We hope this guide has been helpful in answering the question of how far New Smyrna Beach is from Daytona Beach. Feel free to reach out if you have any more questions or need further assistance in planning your beach adventure!
How Far Is Daytona Beach From New Smyrna Beach, Florida? – Beach Tour Guide
Frequently Asked Questions
How can I travel from New Smyrna Beach to Daytona Beach?
You can travel from New Smyrna Beach to Daytona Beach by car, taking the scenic route along A1A or the faster route via I-95 North. The distance between the two cities is approximately 17 miles, and the drive typically takes around 30-40 minutes, depending on traffic and road conditions.
Are there any public transportation options available between New Smyrna Beach and Daytona Beach?
There is no direct public transportation route between New Smyrna Beach and Daytona Beach. However, you can consider using ride-sharing services, taxis, or private shuttles for transportation between the two cities.
What are some attractions or landmarks to see along the way from New Smyrna Beach to Daytona Beach?
On your journey from New Smyrna Beach to Daytona Beach, you can enjoy scenic views of the Atlantic coastline, pass by the Ponce de Leon Inlet Lighthouse & Museum, and explore the charming seaside town of Ponce Inlet. Additionally, you may encounter various beach access points and parks along the route.
Final Thoughts
New Smyrna Beach is just a short drive away from Daytona Beach, located approximately 20 miles south. This makes it a convenient option for those looking to explore more of the coastal area. Whether you’re interested in enjoying the beach, exploring local attractions, or trying out water sports, the proximity between Daytona Beach and New Smyrna Beach allows for easy access to both destinations. So, if you’re wondering how far New Smyrna Beach is from Daytona Beach, rest assured that it’s a quick and straightforward trip that is definitely worth making.