


The Ultimate Guide: How To Count Bars In Rap
Counting bars in rap can be a challenge for beginners. A bar in rap typically consists of four beats, representing a fundamental unit in structuring lyrics and music. To count bars effectively, listen closely to the beat and identify when it repeats every four beats. Understanding how to count bars in rap is crucial for artists, producers, and enthusiasts to create cohesive and rhythmic verses. Let’s dive into this essential skill and master the art of counting bars in rap!

How to Count Bars in Rap: A Comprehensive Guide for Beginners
Welcome to our detailed guide on how to count bars in rap music. If you’ve ever found yourself nodding your head to a rap song and wondering how rappers keep their flow so smooth, you’ve come to the right place. Bars are the building blocks of rap lyrics, and understanding how to count them can help you appreciate the artistry behind your favorite rap songs. In this article, we’ll break down what bars are, why they matter, and most importantly, how you can count them like a pro. So, grab your notebook and let’s dive in!
What Are Bars in Rap Music?
Before we get into the nitty-gritty of counting bars, let’s first understand what bars actually are. In music, a bar (also known as a measure) is a unit of time that organizes the beats of a song. In rap music, a bar typically consists of a specific number of beats, with each beat representing a specific moment in the music where you could tap your foot or clap your hands. Bars create a rhythmic structure that rappers use to craft their lyrics and flow.
Think of bars as the musical framework that rappers use to deliver their rhymes. Just like a painter uses a canvas to create a masterpiece, a rapper uses bars to create lyrical magic. Understanding bars is essential if you want to appreciate the intricacies of rap music and gain a deeper insight into how rappers construct their verses.
Why Counting Bars Matters
Counting bars in rap music is like deciphering a secret code that unlocks the rhythm and flow of a song. By learning how to count bars, you can develop a keen ear for music and better appreciate the skill and artistry that goes into crafting rap lyrics. Whether you’re an aspiring rapper looking to improve your own skills or simply a fan who wants to delve deeper into the world of hip-hop, mastering the art of counting bars is a valuable skill to have.
When you can count bars in a rap song, you’ll be able to anticipate changes in the music, understand the structure of the verses, and even predict where the beat will drop next. It’s like having a superpower that lets you connect more deeply with the music and pick up on nuances that others might miss. So, if you’re ready to level up your rap game, let’s learn how to count bars!
How to Count Bars in Rap
Now that you know why counting bars is important, let’s get into the practical steps of how to actually count bars in rap music. Don’t worry if you’re not musically inclined – anyone can learn how to count bars with a bit of practice and patience. Here’s a step-by-step guide to help you master the art of counting bars:
Step 1: Listen for the Beat
The first step in counting bars is to listen for the beat of the song. The beat is the underlying pulse that drives the music forward, and it’s what you’ll use as a reference point to count bars. Pay attention to the rhythm of the instrumental – you’ll notice that certain sounds repeat at regular intervals. Try tapping your foot or nodding your head to the beat to help you stay in time.
Step 2: Identify the Pattern
Once you’ve tuned into the beat, listen for a recurring pattern in the music. In rap songs, beats are often structured in groups of four, with each group representing a bar. This means that you’ll typically hear a pattern repeat every four beats. By identifying this pattern, you’ll be able to start counting bars more accurately.
Step 3: Count Out Loud
As the instrumental plays, start counting out loud to the beat. Say “one, two, three, four” at each interval to mark the end of a bar. When you reach the fourth beat, you’ve completed one bar. Keep counting in groups of four until you’ve gone through the entire song. Don’t worry if you lose track at first – counting out loud can help you stay on course.
Step 4: Practice, Practice, Practice
Like any skill, counting bars takes practice. The more you listen to rap music and actively count bars, the easier it will become. Challenge yourself by counting bars in different songs and genres to strengthen your rhythmic skills. With time and dedication, you’ll be able to count bars like a seasoned pro.
Common Mistakes to Avoid
As you embark on your journey to master the art of counting bars in rap music, it’s important to be aware of common mistakes that beginners often make. Here are some pitfalls to watch out for:
Mistake 1: Focusing Only on the Lyrics
While the lyrics are a crucial part of rap music, counting bars requires you to pay attention to the underlying beat and rhythm of the song. Don’t get too caught up in deciphering the words – instead, focus on the musical structure of the track.
Mistake 2: Losing Track of the Beat
It’s easy to get carried away by the flow of a rap song and lose track of the beat. Remember that the beat is your guide for counting bars, so stay tuned in to the rhythm to avoid getting off course.
Mistake 3: Overthinking It
Counting bars should be a fun and engaging exercise, not a stressful task. Don’t overthink it – let the music guide you and enjoy the process of unraveling the rhythmic patterns within each song.
Congratulations on making it through our guide on how to count bars in rap music! We hope you’ve gained valuable insights into the importance of bars in rap, how to count them effectively, and common mistakes to avoid along the way. Remember, mastering the art of counting bars is a skill that takes time to develop, so don’t be discouraged if you don’t get it right away.
Keep practicing, keep listening to rap music with a critical ear, and most importantly, have fun with it! The world of rap is rich with creativity and rhythm, and by learning how to count bars, you’re unlocking a new layer of appreciation for the genre. So, put your newfound knowledge to the test, crank up your favorite rap song, and start counting bars like a pro!
Happy rapping!
How To Count and Write 16 Bars in Rap
Frequently Asked Questions
How can I accurately count bars in rap music?
To accurately count bars in rap music, focus on identifying the recurring pattern of beats in the instrumental. Bars typically consist of 4 beats each, so listen closely to the rhythm and note when the pattern repeats. Pay attention to the music’s structure and where the verses or chorus start and end, as this can help you determine the length of each bar.
What tools can help me count bars in rap songs effectively?
Utilize tools like a metronome or beat counter to assist you in counting bars in rap songs. These tools provide a steady beat that can help you stay on track and accurately count the number of bars. Additionally, consider using software that visually displays the waveform of the song, making it easier to identify the start and end of each bar.
Are there any tips for beginners to improve their ability to count bars in rap music?
For beginners looking to improve their ability to count bars in rap music, practice is key. Start by listening to rap songs with a clear, consistent beat and try to count along with the music. Focus on distinguishing the different sections of the song and identifying when a new bar begins. Over time, your ear will become more attuned to the structure and rhythm of rap music, making it easier to count bars accurately.
Final Thoughts
To count bars in rap, simply listen for the repeated pattern of the beat. Each group of 4 beats generally equals one bar. Pay attention to where the rhymes start and end to help you stay on track. Remember, practice makes perfect when it comes to mastering how to count bars in rap.
Master The Art Of How To Cut Panettone With Ease
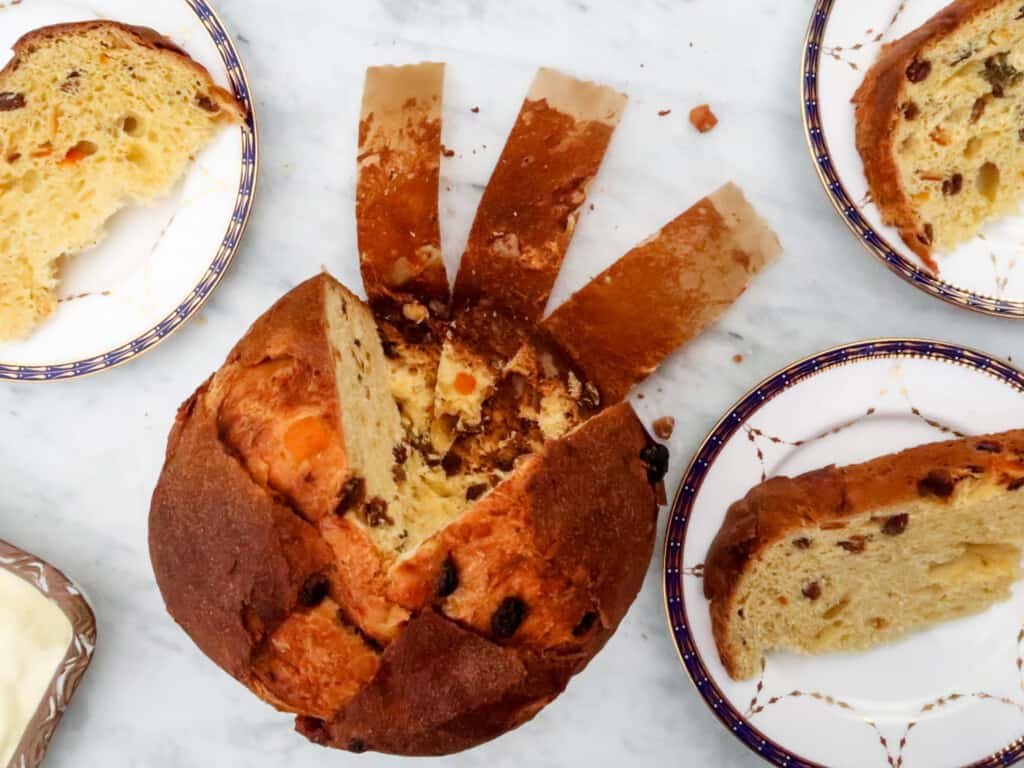
To cut panettone without crumbling its delicate layers, follow these simple steps. Start by using a serrated knife to gently slice through the soft bread. Cut in a sawing motion to maintain the airy texture of the panettone. Remember, mastering how to cut panettone is key to enjoying this classic Italian holiday treat without any mess or fuss.

How to Cut Panettone: A Beginner’s Guide
Welcome to our step-by-step guide on how to cut panettone, a delicious Italian sweet bread traditionally enjoyed during the holiday season. This fluffy and fragrant treat can sometimes be tricky to slice perfectly due to its dome shape and soft texture. But worry not! We are here to show you the best techniques and tips to slice your panettone like a pro.
Why Cutting Panettone Correctly Matters
Before we dive into the cutting techniques, let’s understand why it’s essential to cut panettone correctly. Panettone has a delicate structure with various textures and flavors distributed throughout the loaf. Cutting it properly ensures that each slice maintains the integrity of the bread, showcasing its delicious fruits and nuts evenly.
Tools You’ll Need
Before you start cutting your panettone, make sure you have the right tools. You will need a sharp serrated knife, a cutting board, and some dental floss or a clean fishing line. The serrated knife will help you slice through the bread without crushing it, while dental floss or a fishing line will enable you to make clean cuts without squishing the panettone.
Step-by-Step Guide to Cutting Panettone
Step 1: Preparation
Place your panettone on a stable surface and gather your tools. Make sure the bread is at room temperature for easier slicing. The warmth will soften the bread slightly, making it more manageable to cut.
Step 2: Cutting the Base
Start by placing the panettone on its side and using a sharp serrated knife to cut off the domed top. This step creates a flat surface, allowing the panettone to stand upright for slicing.
Step 3: Slicing
Once the top is removed, begin slicing the panettone into even sections. Use a gentle sawing motion with your knife to avoid squashing the bread. Aim for slices that are about an inch thick to showcase the beautiful texture inside.
Step 4: Using Dental Floss or Fishing Line
If you find that your knife is compressing the panettone, try using dental floss or a fishing line instead. Slide the floss or line under the loaf where you want to cut and cross the ends over the top to create a clean, precise cut. This method works exceptionally well for softer bread like panettone.
Tips for Perfectly Sliced Panettone
Here are some additional tips to help you achieve perfectly sliced panettone:
- Let the panettone cool completely before cutting to prevent it from crumbling.
- Use a gentle touch when slicing to maintain the airy texture of the bread.
- Wipe your knife clean between cuts to ensure each slice is neat and presentable.
- If you prefer smaller portions, slice the panettone into wedges instead of traditional slices.
- Store any leftover panettone in an airtight container to keep it fresh.
Enjoy Your Perfectly Cut Panettone!
Now that you’ve mastered the art of cutting panettone, get ready to enjoy this delightful treat with friends and family. Whether you pair it with a cup of coffee for breakfast or serve it as a dessert after dinner, your perfectly sliced panettone is sure to impress. Happy slicing!
How to cut and serve Panettone
Frequently Asked Questions
How should I cut a panettone without squishing it?
To cut a panettone without squishing it, use a sharp serrated knife. Start by gently scoring the top with the knife to create a guide. Hold the panettone firmly with one hand and cut through using a sawing motion to ensure clean slices.
What is the best technique for slicing a panettone to maintain its shape?
The best technique for slicing a panettone to maintain its shape is to cut it horizontally. This method helps preserve the fluffy texture and prevents the cake from collapsing. Begin by laying the panettone on its side and cutting it into even slices.
How can I prevent the panettone from crumbling when cutting it?
To prevent the panettone from crumbling when cutting it, make sure the knife is sharp and clean. Avoid pressing down too hard on the cake as this can cause it to crumble. Instead, use a gentle sawing motion to create clean slices.
Final Thoughts
To cut panettone, use a serrated knife to prevent squishing. Start by removing the paper wrapping and cutting the panettone vertically into slices. Then, cut each slice horizontally, ensuring even portions. By following these simple steps, you can enjoy a perfectly sliced panettone every time.